Operation – Ryobi ELL0002 User Manual
Page 10
10
11
OPERATION
NOTE: The laser head should be kept in travel mode when
carrying the unit or whenever the unit will not be used for
an extended period.
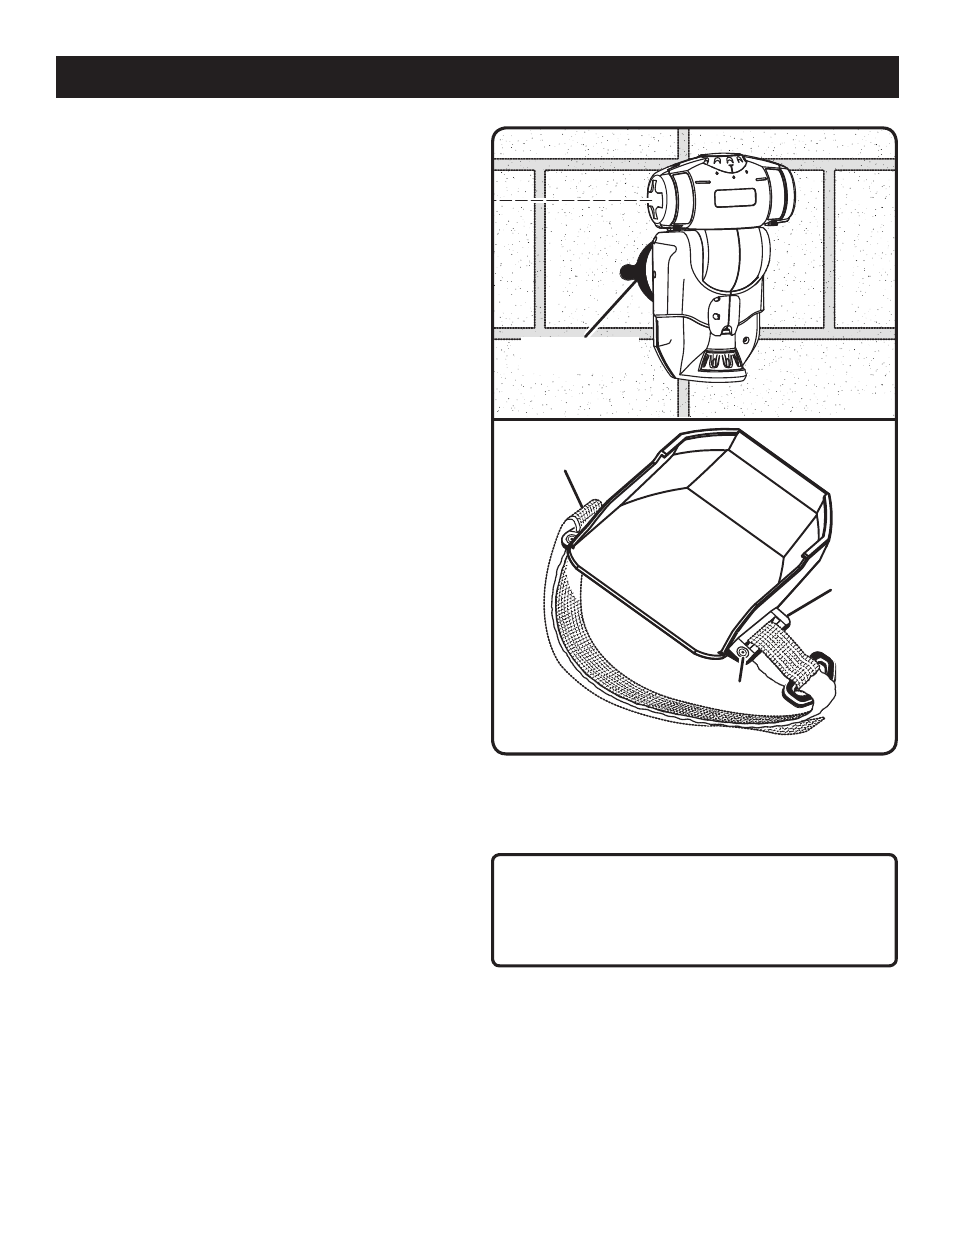
ROUGH-SURFACE ADAPTOR
See Figure 6.
By using the rough-surface adaptor, you can use the AIRgrip
feature to position the unit on many non-smooth surfaces,
including brick and painted cinder block.
NOTE: The AIRgrip feature cannot be used with stucco or
unpainted cinder block.
n
Position the rough-surface adaptor on the surface where
you want to secure the vacuum base.
NOTE: Dotted lines on the adaptor should be visible.
n
Place the unit against the adaptor on the dotted lines, and
press against the surface slightly to engage the seal.
n
Continue to hold the unit against the surface while press-
ing the on/off button.
n
Release the unit when you hear a change in motor
sound.
USING THE MULTI-FUNCTION BASE
See Figure 7.
Hook-and-loop strap and push pin mounting methods are
available only when the multi-function base is installed.
To install the base:
n
While holding the laser level with the power button facing
you, align the raised ridge on the base with the groove
on the level.
n
Slide the laser level and base completely together.
HOOK-AND-LOOP STRAP: The hook-and-loop strap can
be used to attach the laser level to irregularly shaped objects
such as pipes, 2x4s, 2x6s, or metal grates.
n
Attach the strap to one side of the multi-function base
by threading it through the loop and fastening.
n
Position the laser level on the surface where you want it
mounted.
n
Wrap the strap around the object being mounted (pipe,
board, etc.).
n
Place the loose end of the strap through the remaining
loop on the multi-function base and secure.
PUSH PINS: Push pins allow the laser level to be mounted
to stucco and permeable surfaces.
Fig. 7
ROUGH-SURFACE
ADAPTOR
HOOK-AND-LOOP
STRAP
LOOP
ANGLED HOLE
Fig. 6
n
Place the laser level on the surface where you want it
mounted.
�n Align push pins with angled holes in the base and push
in to secure.
CAUTION:
Use caution when using the multi-function base. Do not
orient the unit in a way that will allow the vacuum base
to slide or fall out of the multi-function base.