Fig. 12b – Petsafe Petporte Smart Flap® Microchip Cat Flap User Manual
Page 12
12
Fig. 9
Fig. 10a
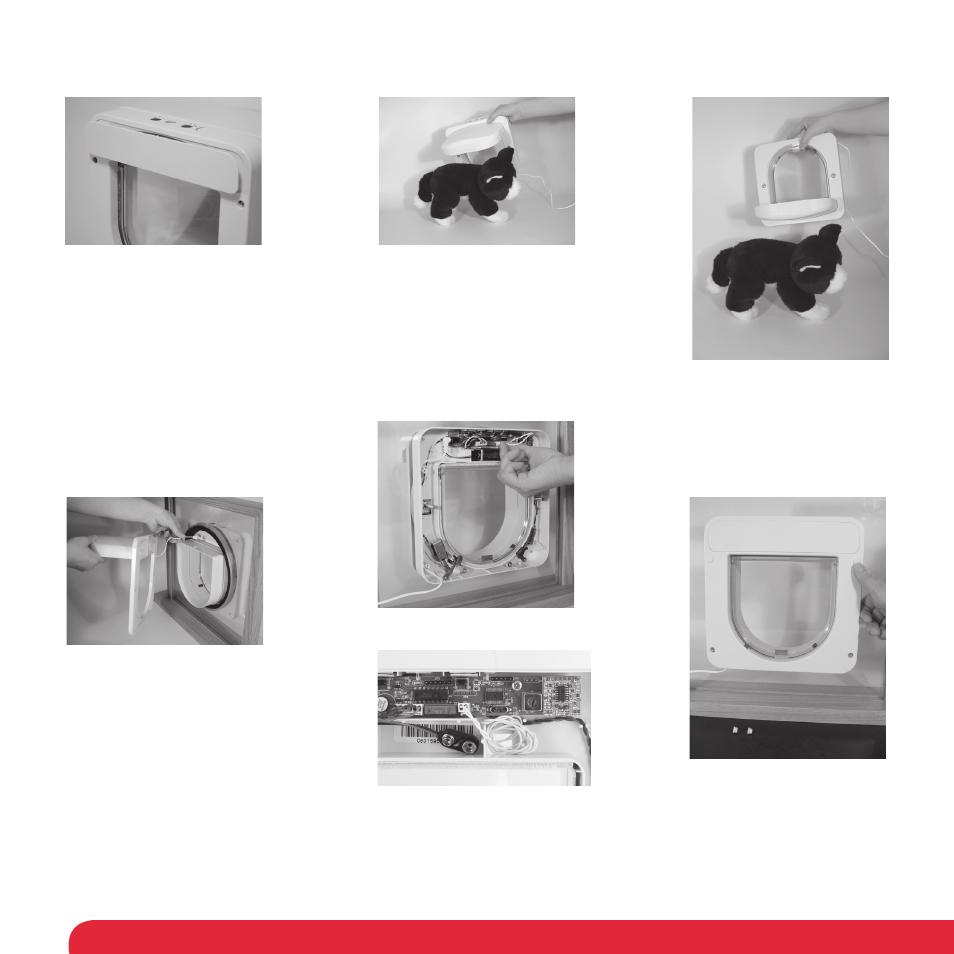
Fig. 10b
Fig. 11
Fig. 12a
Fig. 13
Click the small cover plate back
over the interior section.
Power up the Petporte smart
fl ap
®
, program in your cat as
shown on page 7, and pass the
Petporte smart fl ap
®
over your cat
at a distance that your cat would
normally approach it to check
that will work for your cat.
Alternatively you can hold
the Petporte smart fl ap
®
in
an inverted orientation for the
purpose of programming your
cat’s microchip.
When fi tting the Petporte
smart fl ap
®
into an opening
offer the interior section with
Extension Tunnel if needed up
to the opening. Next pass the
porch cable from the porch
and exterior section through
the rectangular opening in the
interior section.
Attach the porch cable to the
electronics board and hold the
exterior and interior sections
together using the two M6 screws.
Tighten the screws to hold the
Petporte smart fl ap
®
in the desired
position within the opening.
Once positioned, attach the large
cover plate and secure with the four
self-tapping fi xing screws. Click in
place the small cover plate. Place
all of the blanking plugs, four small
ones for the self-tapping fi xing screws
and two large blanking plugs for the
M6 screws. Finally, power up your
Petporte smart fl ap
®
.
Fig. 12b