View centerline floor level, Centered between studs – PDR Mounts iwbB250 User Manual
Page 5
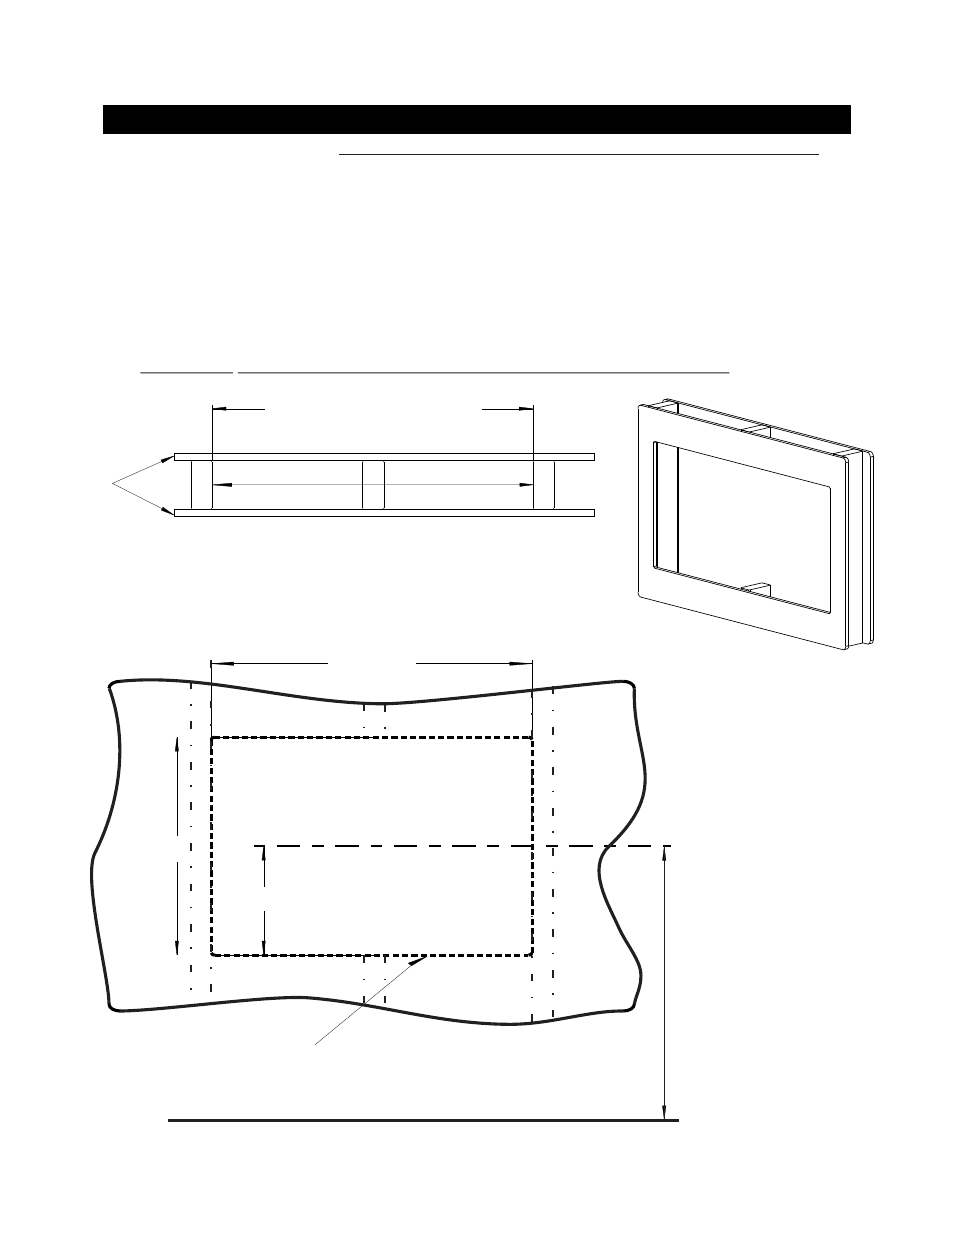
INSTALLATION INSTRUCTIONS FOR DRYWALL CUT-OUT
5
1: Find a suitable place for the display.
Make certain that there is no plumbing, wiring or any other obstacle in the wall.
2: Locate the center of the wooden studs (using a stud finder) and mark the location of the three studs.
3: The studs should have an inside dimension (between the three studs) of 30 1/4” to 30 3/4”.
4: Shimming is not necessary unless the studs exceed the 30 3/4” (shims not supplied for larger than standard stud spacing).
5: Mark the desired viewing center line (a distance from the floor up to the center of the display) .
6: Measure down from the center line 7 3/4 “.
7: Using a pencil and level draw a horizontal line from the 7 3/4 “ mark.
8: From the horizontal line just drawn, place the box on that line and centered between three studs.
10: Trace the outside of the box and cut-out with a drywall saw.
11: Cut and remove the center stud to fit the IWB-250.
12: Route all necessary audio, video and electrical cables thru drywall cut-out.
CAUTION! A qualified electrician should make all power connections
9: The opening should be flush to the inside of the left most stud.
7 3/4”
15 1/2”
30 1/4”
30 3/4” max
30 1/4” min
Stud location
View looking down from top of wall
Wood studs
Drywall
VIEW CENTERLINE
FLOOR LEVEL
Adjust height to suite view center line
View of wall with cut-out in drywall
Drywall cut-out
Centered between studs