Nexen I300 965502 User Manual
Page 7
7
FORM NO. L-21226-B-1008
Bearing Replacement
1. To replace bearing (Item 2) remove retaining ring
(Item 10) and press the hub (Item 10) out of the
bearing. Then press the bearing (Item 2) from the
spring plate (Item 18). Be sure to clean the excess
Loctite‚ from both bores before reassembling, use
fresh safety solvent to clean.
2. Apply a continuous bead of Loctite‚ 680 (Green)
around the outer circumference of the new bearing
(Item 2), press the new bearing into the spring
housing (Item 18), press on the outer race of the
bearing for this process.
3. While supporting the inner race of the bearing press
the hub (Item 1) into the bearing and replace the
retaining ring( Item 10)
O-Ring Replacement
1. Remove the piston (Item 5), then remove O-rings
(Item 3,4) from piston grooves.
Note: A small amount of compressed air may be
required to remove piston.
2. Visually inspect the piston and housing O-ring
contact area for debris, clean as required.
3. Coat the O-ring contact surfaces of the Housing
(Item 6) and the O-rings (Item 3,4) with a thin film
of O-ring lubrication. Install O-rings into O-ring
grooves in piston.
4. Install piston into housing.
Reassembly
1. Before reassembly, clean housing (Item 6) and hub
(Item 5) with a safety solvent. Make sure to clean
any Loctite residue from the friction interface areas.
2. Considering the following guidelines, reassembly
brake by following Disassembly steps 1 thru 7 in
reverse order.
a. Apply a continuous bead of Loctite‚ 680
(Green) around the outer circumference of
spring housing (Item 18).
b. Be sure to align groove in spring housing (Item
18) to set screw hole in housing (Item 6).
c. Tighten setscrew (Item 14) to 80 Nm.
Note: Brake will not have full torque immediately
after replacing friction facings, it is required the
facing goes through a “Break in” procedure. Run
the brake under full load at 1 RPM for 6 minutes to
“Break in” this brake.
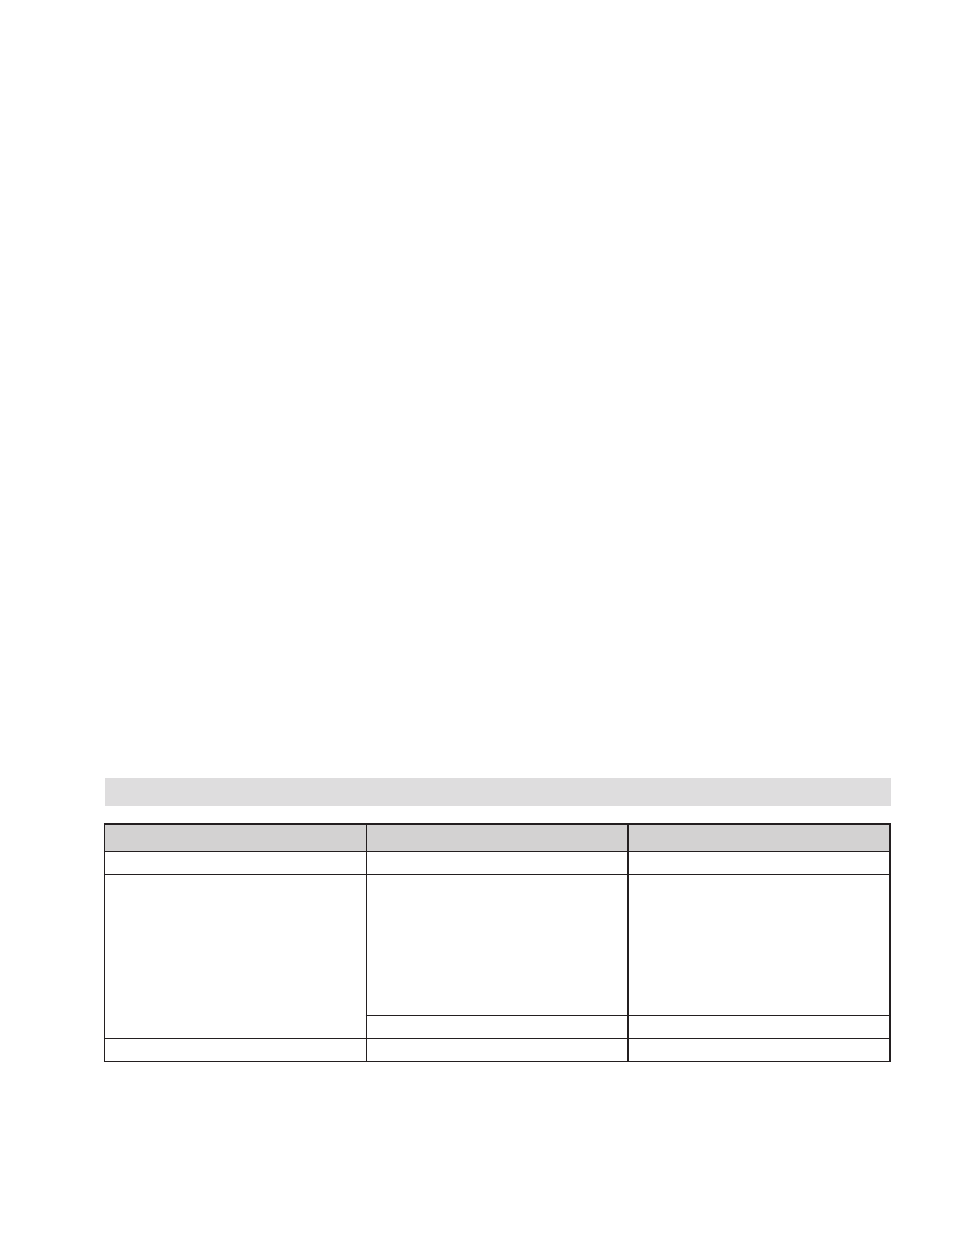
TROUBLESHOOTING
pROBLEm
pROBABLE CAUSE
SOLUTION
Failure to engage (brake)
Weak or broken springs
Replace broken springs
Failure to disengage
Control valve malfunction - air not getting
to the brake.
Check for low air pressure or replace the
control valve.
NOTE: The unit has been designed to
release before (at or below) 4.1 bar [60
psi]. Required disengagement pressure
higher than 4.1 bar [60 psi] may indicate
improper assembly.
Air is leaking around the O-ring seals
Replace the O-rings
Loss of torque
Friction Facing is worn or dirty
Replace the Friction Facing