Nexen I300 965502 User Manual
Page 6
FORM NO. L-21226-B-1008
6
Disassembly
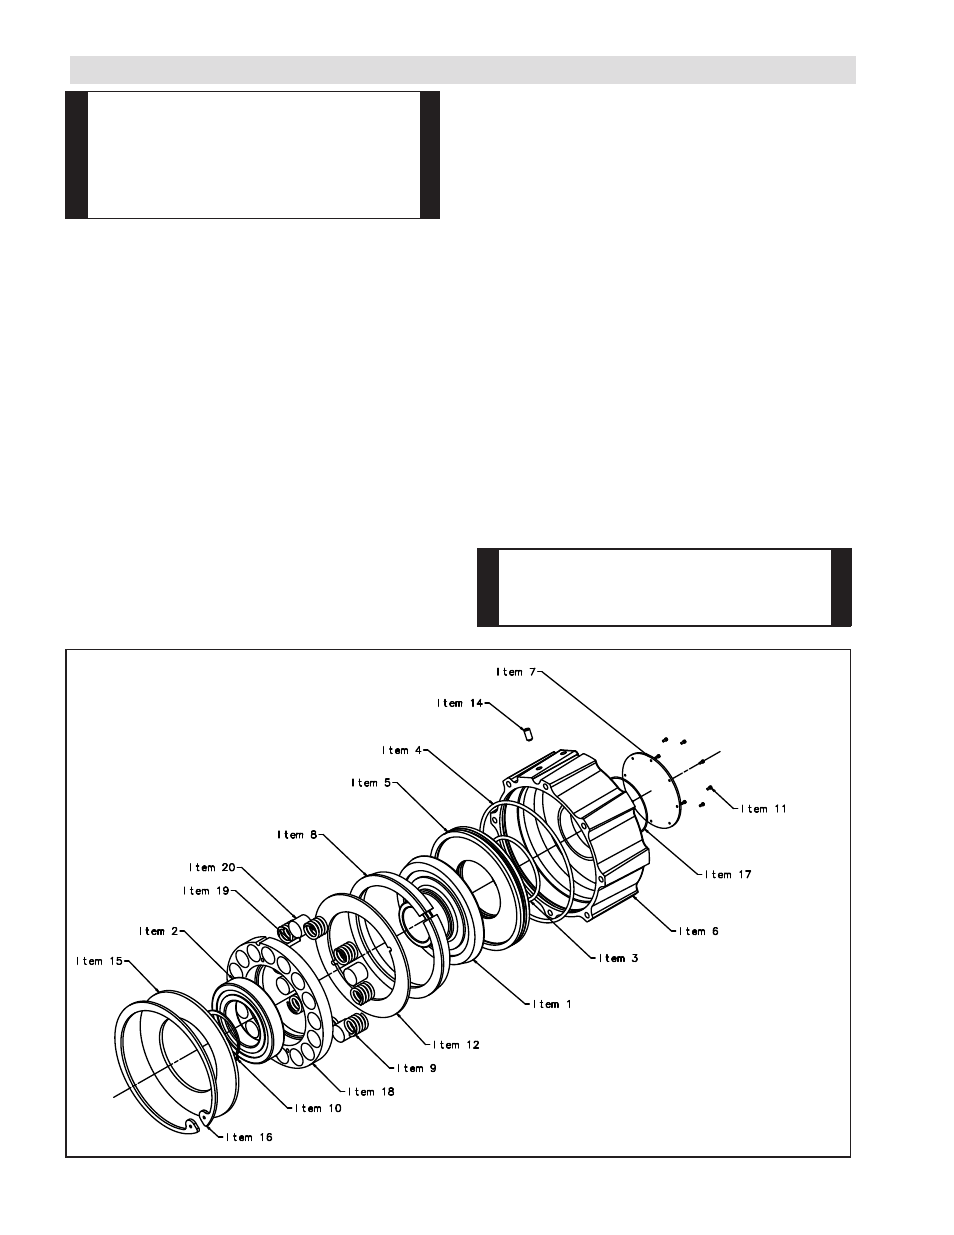
Refer to figure 3 for the following steps.
1. Using an arbor press, load the spring backing plate
(item 15) to remove preload from retaining ring (Item
16), approximately 13344N (3000 lbs) is required
to fully remove load from ring.
2. Remove retaining ring (Item 16) from housing (Item
6), slowly release the pressure from the press until
all spring load has been released.
3. Remove spring backing plate (Item 15), springs
(Item 9) and load transfer plugs (Item 20) from the
brake.
4. Loosen set screw (Item 14) to allow the spring
housing (Item 18) to be pressed out.
5. The following items can than be removed as a sub
assembly:
a. Item 10- Retaining Ring
b. Item 2- Bearing
c. Item 18- Spring Housing
d. Item 19- Dowel Pin
e. Item 12- Spring Plate
f. Item 8- Facing
g. Item 1- Hub
6. To remove the sub assembly, press on the hub (Item
1) through the hole in the housing (Item 6) used to
mount the brake.
Note: The spring housing (Item 18) is installed
using Loctite; it may take a large amount of force to
free it.
7. At this point the friction facing (Item 8) can be
removed by carefully stretching it over the hub (Item
1) the hub does not need to be removed to change
the facing.
Note: If the friction facing is the only part to be
replaced skip ahead to Reassembly.
pARTS REpLACEmENT
Warning
Working with spring or tension loaded
fasteners and devices can cause injury.
Figure 3
Warning
A press is required to disassemble this brake.
The brake contains a large amount of stored
energy; extreme caution should be taken when
disassembling, wear safety glasses
and take appropriate safety precautions.