Workrite Series VALUE Assembly Instructions for Tables with Left Front Crank User Manual
Page 7
Workrite Ergonomics | 800.959.9675 www.workriteergo.com
7
Sonoma Series™ VALUE Workcenters - Assembly Instructions for Tables with Left Front Crank
7
a
b
c
a
b
c
T
M
O
H
G
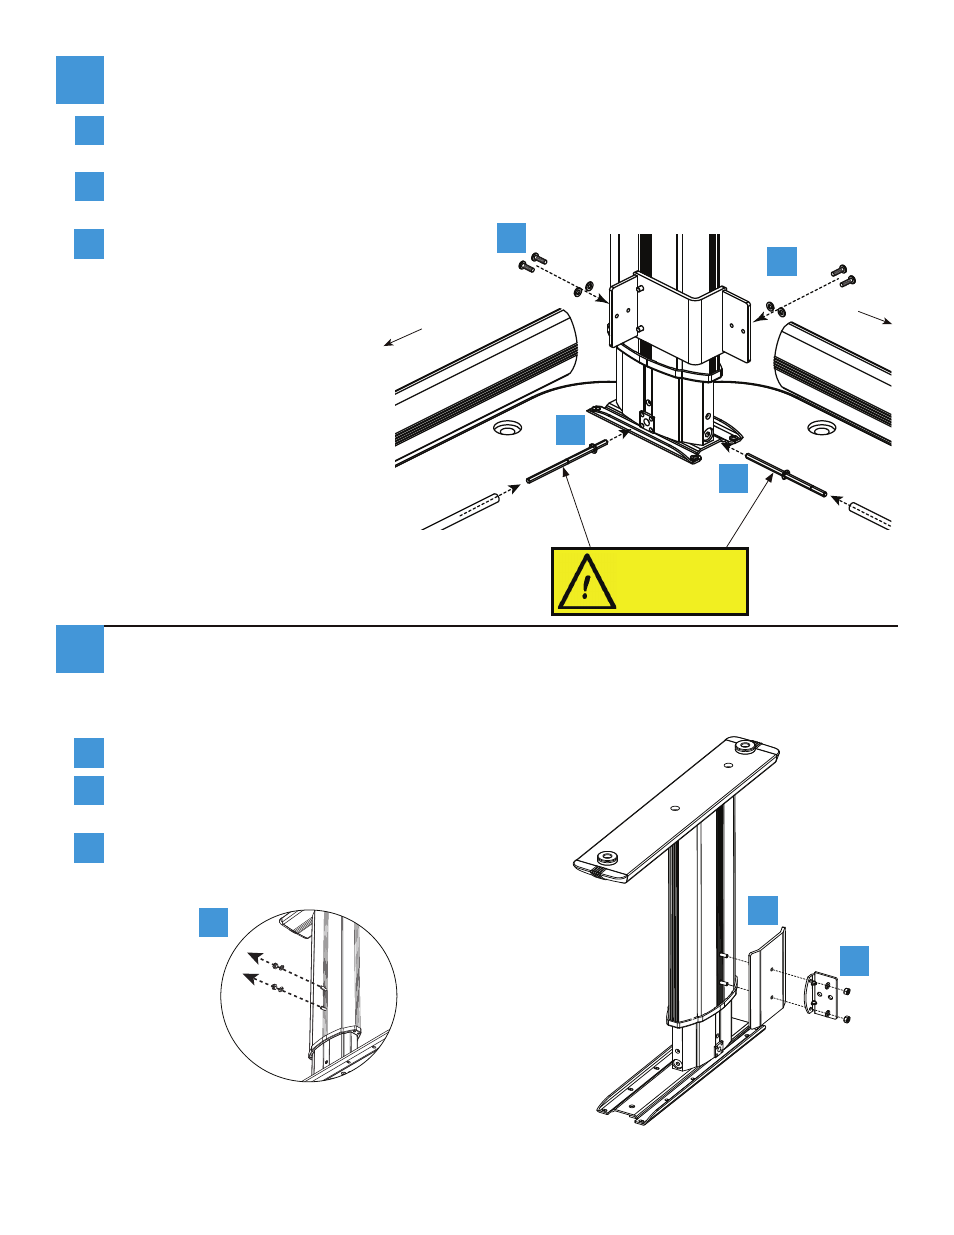
Be sure to use the
correct hex shaft
inserted in the proper
orientation or the
table will not function.
For 3-Leg Tables: Attach Crank Tubes and Crossbars to Leg 2
Use Front Entry Hex Shaft to connect Crank Tube to gear mechanism in
side of leg pointing to Leg 3 (left leg).
Use Side Entry Hex Shaft to connect Crank Tube to gear mechanism in
other side of leg 2. See diagram for correct placement and orientation.
Slide Crossbars over Leg Brackets
on Leg 2 and secure using two Lock
Washers and Button head Machine
Screws for each Crossbar.
For 3-Leg Tables, proceed to step 9.
c
Leg 3
Leg 1
S
8
For 2-Leg Tables: Attach Stiffener and Crossbar Brackets to Legs
(repeat for both legs)
Turn legs upside down.
Remove nuts and lock washers from leg studs.
Slide Stiffener Bracket onto studs with concave side facing
the leg.
Slide Crossbar Brackets onto studs and reinstall nuts (but
not lock washers). Note how the flange orients to the leg.
a
b
c
a
b
c
P
W
B or C