Bc a d – Workrite Sierra HXL Crank Assembly Instructions for 2-Leg Top Crank models User Manual
Page 8
Confirm All Screws are Tightened and Flip Table Over
Tighten all screws in frame assembly and tighten all screws connecting frame to worksurface. Flip
table over.
Base-Only Models & Other Tabletops (continued): Attach Base
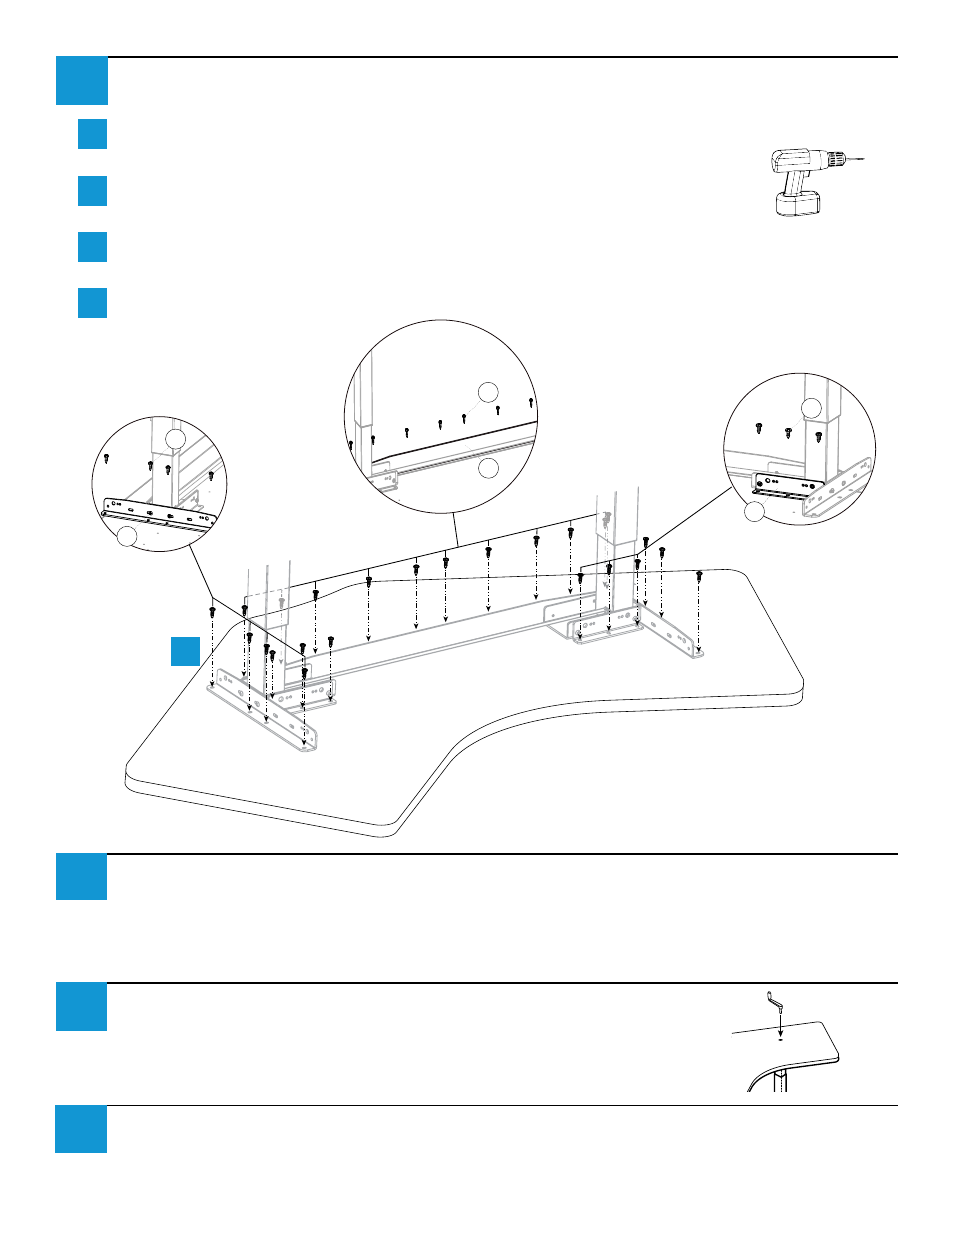
Drill
1
⁄
8
" × ¾" deep pilot holes through all of the bracket holes. TAKE EXTRA CARE TO NOT DRILL
THROUGH TOP!
Install #12 × ¾" Phillips Head Wood Screws (M) into the Short Brackets (B) ,
Medium Brackets (C), and Long Bracket (P). DO NOT FULLY TIGHTEN SCREWS!
Tighten all of the M6 × 8 mm Button Head Screws (J) that were installed in steps 3 & 4 on the base
to the brackets.
Now tighten all of the #12 × ¾" Pan Pan Head Screws (M) into the top.
Install Crank Handle
Insert Crank Handle into hole in worksurface over the right leg so that
it engages the gearbox. Turn Handle to raise or lower table.
12
Adjust Leveling Guides
If necessary, adjust leveling guides on table feet to level the worksurface.
13
11
b
c
a
d
10
Left Leg
Right Leg
3 screws per
Short Bracket
4 screws per
Medium Bracket
6-10 screws
per Long Bracket
B
C
P
M
M
M
b