Ab b – Workrite Sierra HXL Crank Assembly Instructions for 2-Leg Top Crank models User Manual
Page 6
6 of 8
Workrite Ergonomics | 800.959.9675 www.workriteergo.com
Workrite Sierra HXL™ 2-Leg Top Crank Workcenters - Assembly Instructions
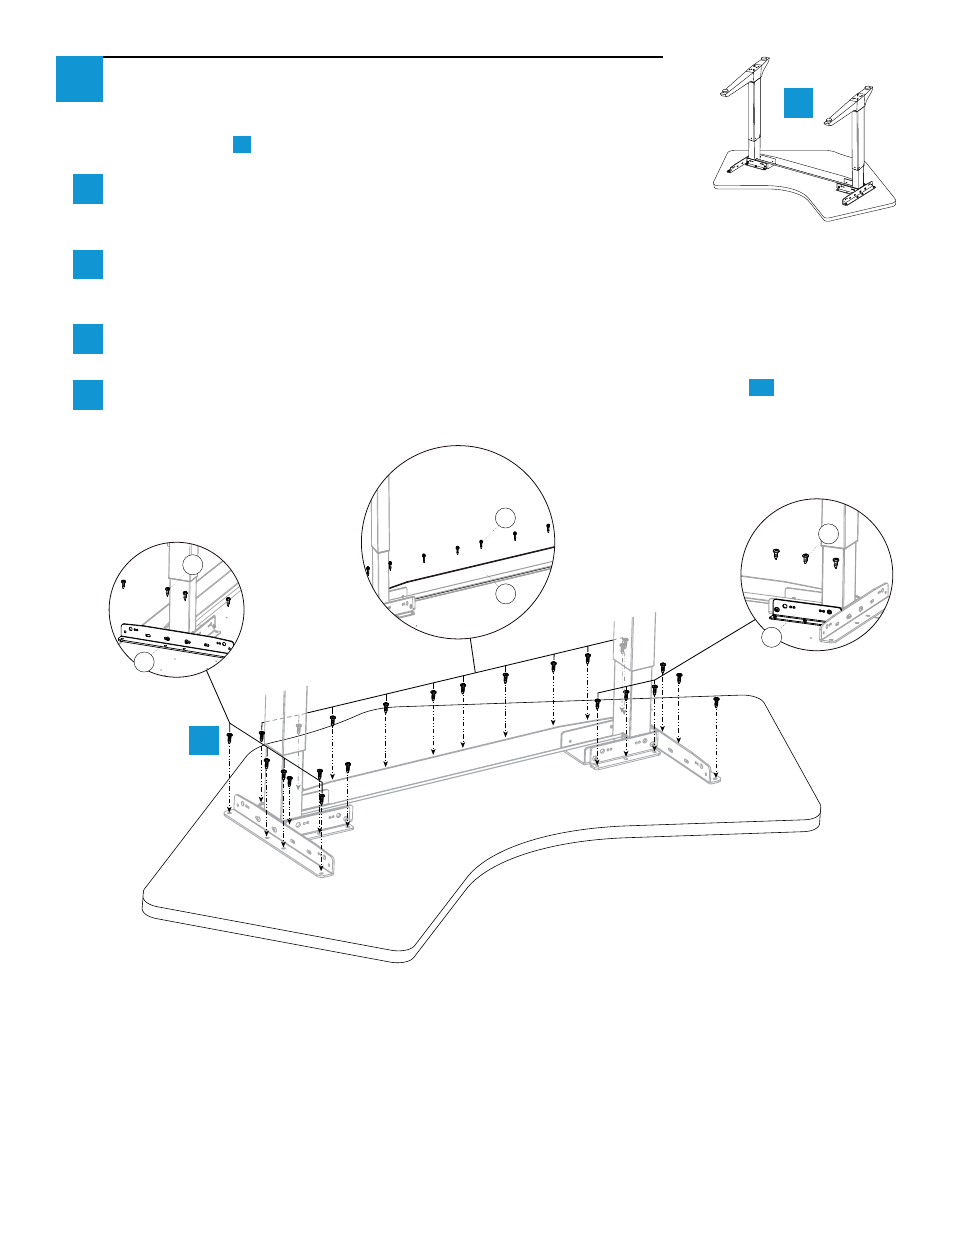
Attach Base to Workrite Tabletops
If you have a Base Only Model being attached to a non-Workrite table
top, go to step
9
.
Placement of the legs is very important. Lay out the leg assembly in
the proper location. Note that the Right Leg will be on your left and
vice versa when the assembly is upside down.
Align Base to the pre-drilled holes in top. Install #12 × ¾" Pan Head Wood Screws (M) into the
Short Brackets (B), Medium Brackets (C) , and Long Bracket (P). DO NOT FULLY TIGHTEN
SCREWS!
Tighten all of the M6 × 8 mm Button Head Screws (J) that were installed in steps 3 & 4 on the base
to the brackets.
Now tighten all of the #12 × ¾" Pan Head Screws (M) into the top. Go to Step
11
.
8
Left Leg
Right Leg
3 screws per
Short Bracket
4 screws per
Medium Bracket
a
b
b
c
a
d
6-10 screws
per Long Bracket
B
C
P
M
M
M
Right Leg
Left Leg