Workrite Sierra HXL Crank Assembly Instructions for 2-Leg Top Crank models User Manual
Page 5
Workrite Ergonomics | 800.959.9675 www.workriteergo.com
5 of 8
Workrite Sierra HXL™ 2-Leg Top Crank Workcenters - Assembly Instructions
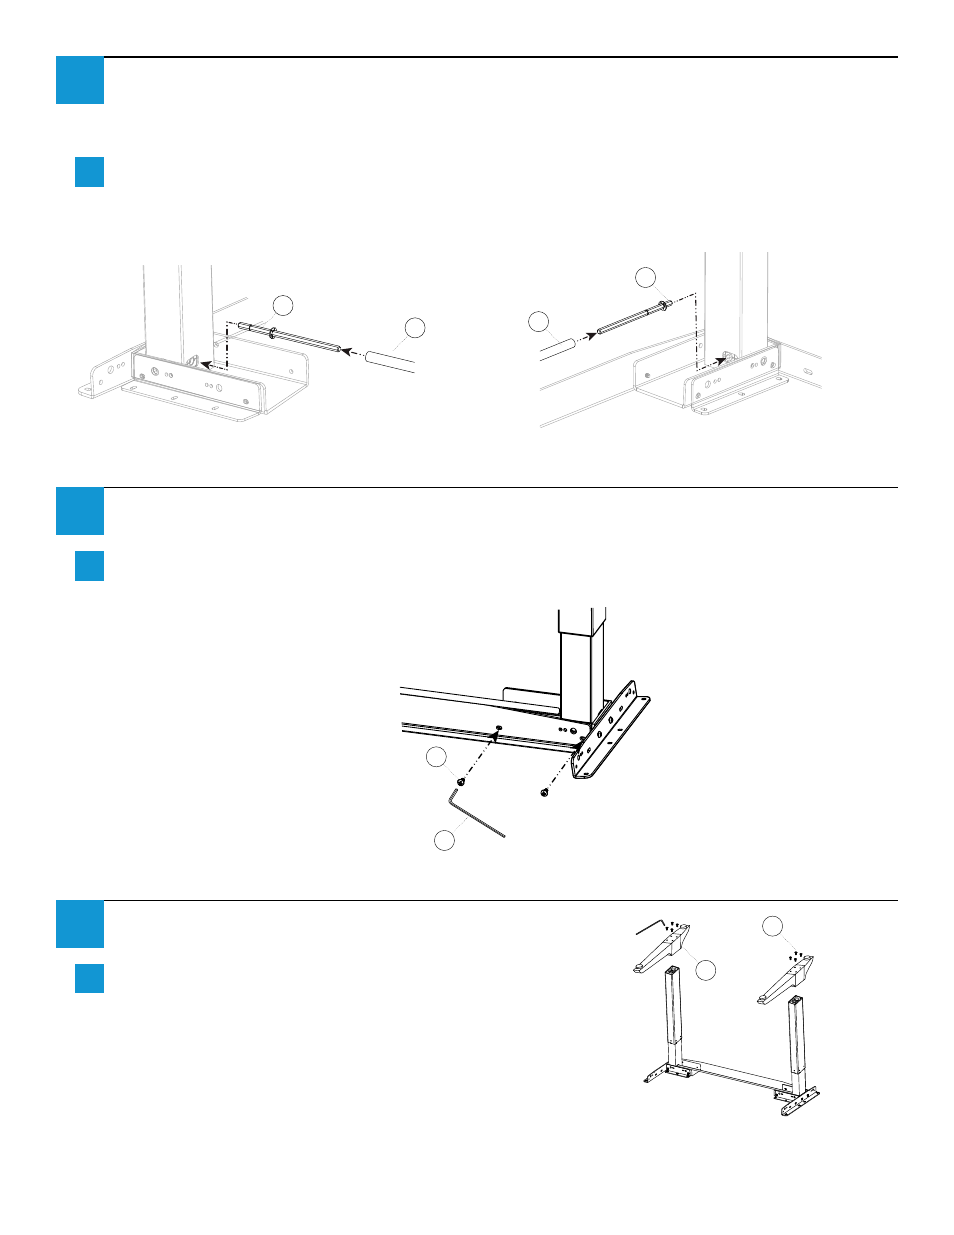
Attach Feet to Leg Assembly
Attach Foot (R) to left leg with M6 ×16 mm Flat Head
Machine Screws
screws (L) and tighten securely. Repeat
for right foot.
Secure Long Bracket
Attach Long Bracket to back of right Leg Cap using M6 × 8 mm Button Head Screws (J). Do not
tighten screws completely - allow them to slide left and right in Bracket.
Attach Legs to Hex Shafts and Crank Tube
Turn Leg Assembly upside down.
Right Leg: Insert short end of Deep Hex Shaft (G) into leg. Slide Crank Tube (Q) over Deep Hex
Shaft.
Left Leg: Insert short end of Shallow Hex Shaft (F) into leg. Slide Crank Tube (Q) over Shallow Hex
Shaft.
5
a
Right Leg
6
a
7
a
R
L
Right Leg
Left Leg
G
Q
Q
F
H
J