Workrite Sierra HXL Crank Assembly Instructions for 2-Leg Top Crank models User Manual
Page 3
Workrite Ergonomics | 800.959.9675 www.workriteergo.com
3 of 8
Workrite Sierra HXL™ 2-Leg Top Crank Workcenters - Assembly Instructions
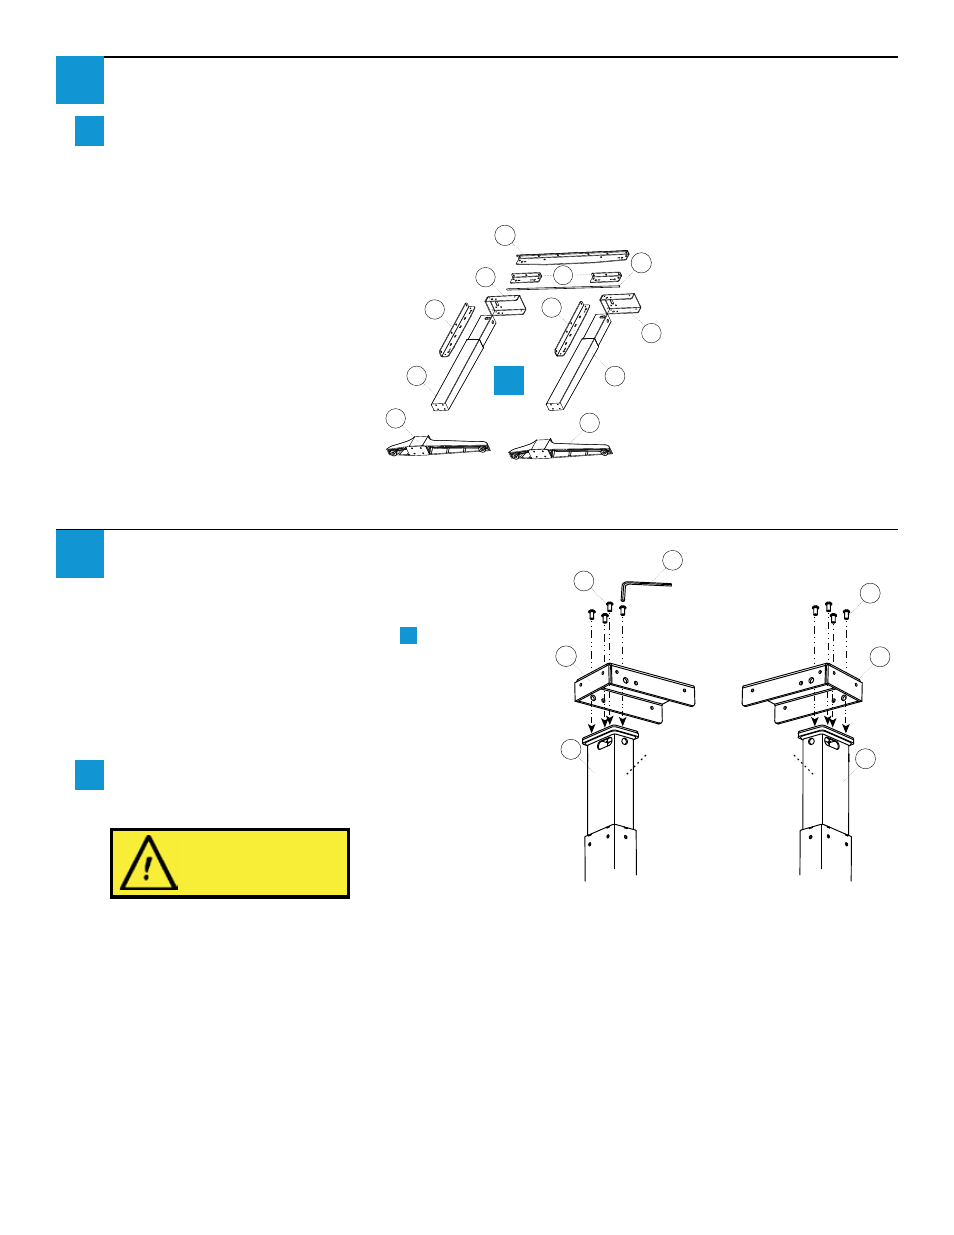
Attach Top Leg Bracket to Legs
If you have purchased the HX Spacer Accessory
Kit, refer to instructions provided with that
product. Otherwise, proceed to step
a
.
Note: Right and Left Legs are interchangeable.
These instructions assume you’ll use the leg from
the main carton as the Right Leg, and the leg
from the Second Leg carton as the Left Leg.
Attach one Top Leg Bracket (D or O) to the top
of each Leg (A or N) using M6 × 12 mm Button
Head Screws (I).
...continued
Placement of the legs is very important. Take the time now to lay out the Legs (A & N), Leg
Brackets (B, C, and P), Crank Tube (Q), and Top Leg Brackets (D & O) on the floor in the proper
location.
Note that the right leg will be on your left and vice versa when the assembly is seen from the back.
b
1
2
To avoid stripping the threads,
always insert and make the
first few turns of the screw BY
HAND with an Allen wrench
(H), ensuring it is in straight.
a
O
I
H
N
I
D
A
b
Right Leg
Right Leg
Left Leg
Left Leg
D
A
O
C
C
N
R
R
B
P
Q
Front
Front