6installation instructions – Pridiom Solar Series Installation Manual User Manual
Page 7
6
INSTALLATION INSTRUCTIONS
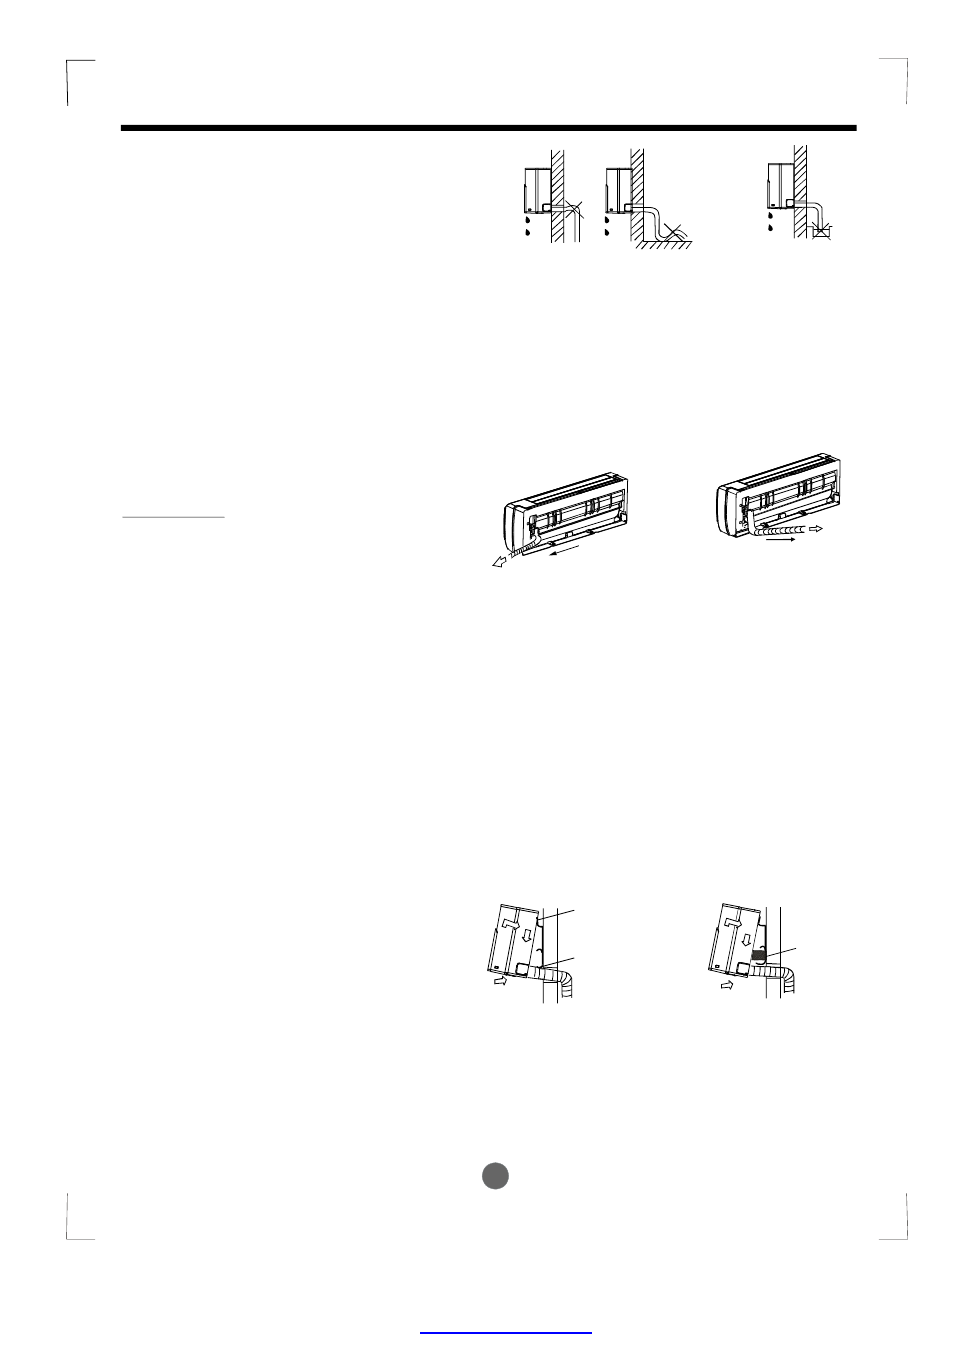
IMPORTANT: For the bottom space limitation
of the indoor unit, the unit can only use Right-
hand piping or Right rear piping as shown in
Fig.8.
1. Remove the cover for right-hand piping first.
2. For the right rear piping, install the piping as
shown in Fig.8.
3. Fix the end of the connective pipe. (Refer
to Tightening Connection in
REFRIGERANT PIPING CONNECTION)
Connective pipe installation
1. Pass the piping through the hole in the
wall.
2. Put the upper claw at the back of the
indoor unit on the upper hook of the
installation plate, move the indoor unit
from side to side to see that it is securely
hooked (see Fig.9 & Fig.10).
3. Piping can easily be made by lifting the
indoor unit with a cushioning material
between the indoor unit and the wall.
Get it out after finish piping.
4. Push the lower part of the indoor unit up
on the wall, then move the indoor unit
from side to side, up and down to check
if it is hooked securely.
4. Indoor unit installation
2. When connecting extension drain hose,
insulate the connecting part of extension
drain hose with a shield pipe, do not let
the drain hose slack.
Right-hand piping
Right rear piping
Fig.8
Fig.10
Upper Hook
Lower Hook
Cushioning
material
Fig.9
3. Connective Pipe and Drainage
Installation
1. Run the drain hose sloping downward.
Do not install the drain hose as
illustrated in Fig.7.
Drainage
Fig .7
Do not block water flow by a rise.
Do not put the end of
drain hose into water.
PDF created with pdfFactory Pro trial versi