Operation – Kidco G2401 User Manual
Page 8
Operation
U S E R G U I D E
8
12
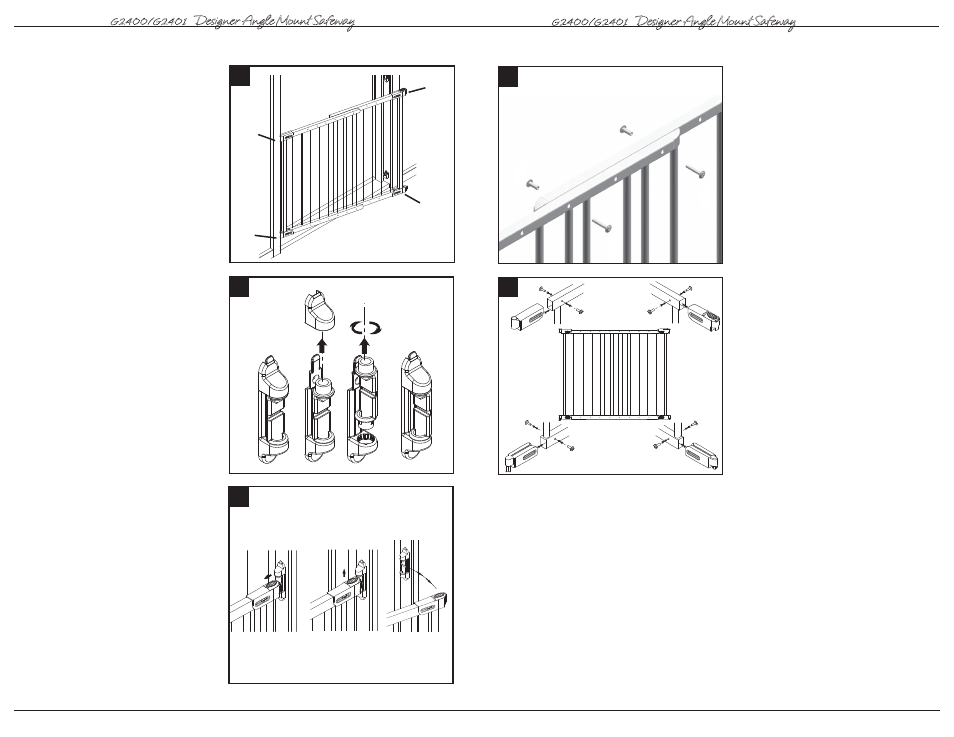
Center gate in the opening. Loosen
screws on parts (G), (H), (I) and (J) and
adjust so they rest securely into hinge and
locking side brackets. The distance
between gate and wall/doorframe must be
between 1”-3”.
Be certain to tighten all gate screws.
13
If gate is installed on an angle, part (Q)
will need to be rotated so that the gate
handle rests securely inside upper locking
bracket. Once the gate handle rests
securely inside locking bracket, slide
locking cap (S) onto upper locking
bracket (R).
IMPORTANT: ENSURE LOCKING CAP
CANNOT BE PUSHED UP AND IS
LOCKED IN PLACE.
14
To open gate, pull top locking latch
backwards with your thumb and lift gate
up and out of hinge.
When closing gate, be sure that both upper
and lower locking side parts are resting
securely in brackets and the upper latch
is locked.
13
S
Q
14
G2400/G2401
Designer Angle Mount Safeway
®
J
H
G
I
12
G U Í A D E L U S U A R I O
21
4
Coloque los tornillos (C) y los manguitos
roscados (D) en las series superior
e inferior de los orificios de ajuste
traslapados que se encuentren más
cerca de los lados de la bisagra y del
mecanismo de cierre de la reja. Todavía
no los apriete completamente.
5
NOTA: Este herraje viene preensam-
blado. Se deben seguir las siguientes
instrucciones en caso de que se necesite
reemplazarlo.
Coloque el asa y las piezas abisagradas (G),
(H), (I) y (J) en la reja. Introduzca los
tornillos (E) y los manguitos roscados (F)
en todas las cuatro piezas de acuerdo
con la ilustración. Todavía no los apriete
completamente.
G2400/G2401
Designer Angle Mount Safeway
®
4
D
C
D
C
I
F
E
J
F
E
E
F
H
F
E
G
5