Hollywood Racks HR420A Road Runner Aluminum 4 bike User Manual
Page 3
3
4. Tighten the lever clockwise to engage the patented “No Wobble” system, which will eliminate the
movement of the insert tube in the receiver. The lever should be turned “up” or to the side after
tightening to prevent it from being damaged in the case you have to descend a steep driveway
or have some other close encounter with “Solid Ground.” The rack should now be attached to
your vehicle, and locked into place.
INSTALLING BIKES ON THE RACK:
1. Remove the lynch pin (7a)
, and rotate the support arms into the horizontal or “in-use” position.
Re-insert the lynch pin and attach safety clasp.
2. For ease of installation, we suggest you put the bigger bikes on the inside (closest to vehicle),
smaller frames or kids bikes on the outside. The first bike loaded should have the handlebars facing
towards the driver’s side of the vehicle. Place the top tube (or closest appropriate frame tube) onto
the bike cradles, install the straps over the bike tube and attach to the anchor tabs on both sides of
the cradle. Use a strap notch-hole that provides a snug fit, but take care not to pull the strap over-
tight. This can put undue stress on the bike’s paint, and may over-stretch the strap, making it more
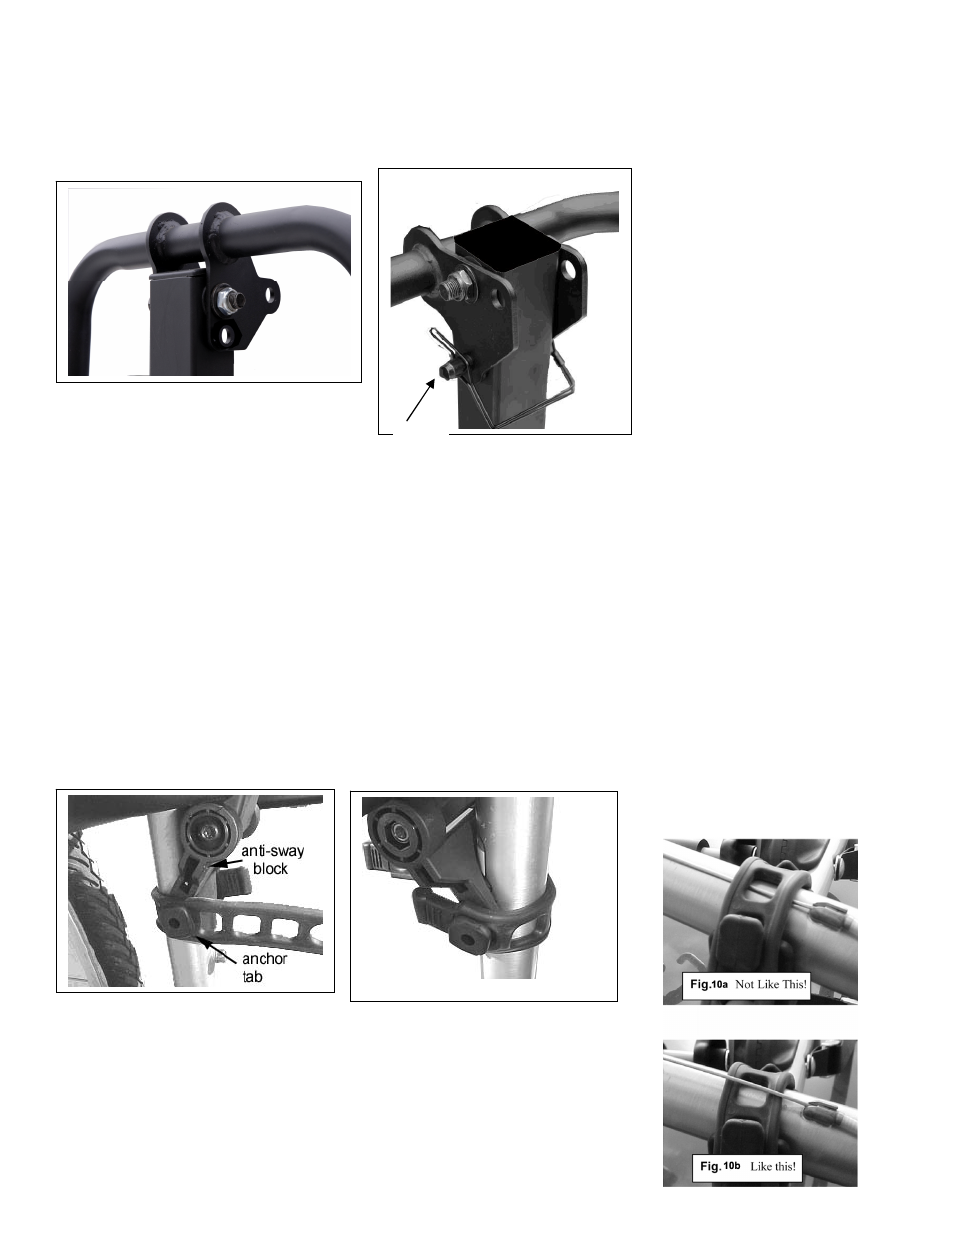
susceptible to breakage. Be sure to use the Anti-Sway blocks (below the support arms) to strap the
bikes seat tube (or other frame tube as appropriate) to prevent the bikes from swaying on the Road
Runner rack. See fig. 8 and 9 below - Be careful not to over-stress the straps!
Fig. 6 folded position
Fig. 7 in use position
3.
Installing the “safety” tie down strap:
After all the bikes have been installed, take the remaining woven
and wrap
it around the rack’s upright tube and through all of the
bike’s frames. Tighten this strap securely
Fig. 8
Fig. 9
7a
Route rubber straps
under cables