Gastroback 46008 Design Vakuum Sealer Plus User Manual
Page 15
37
how to Vacuum seal a container
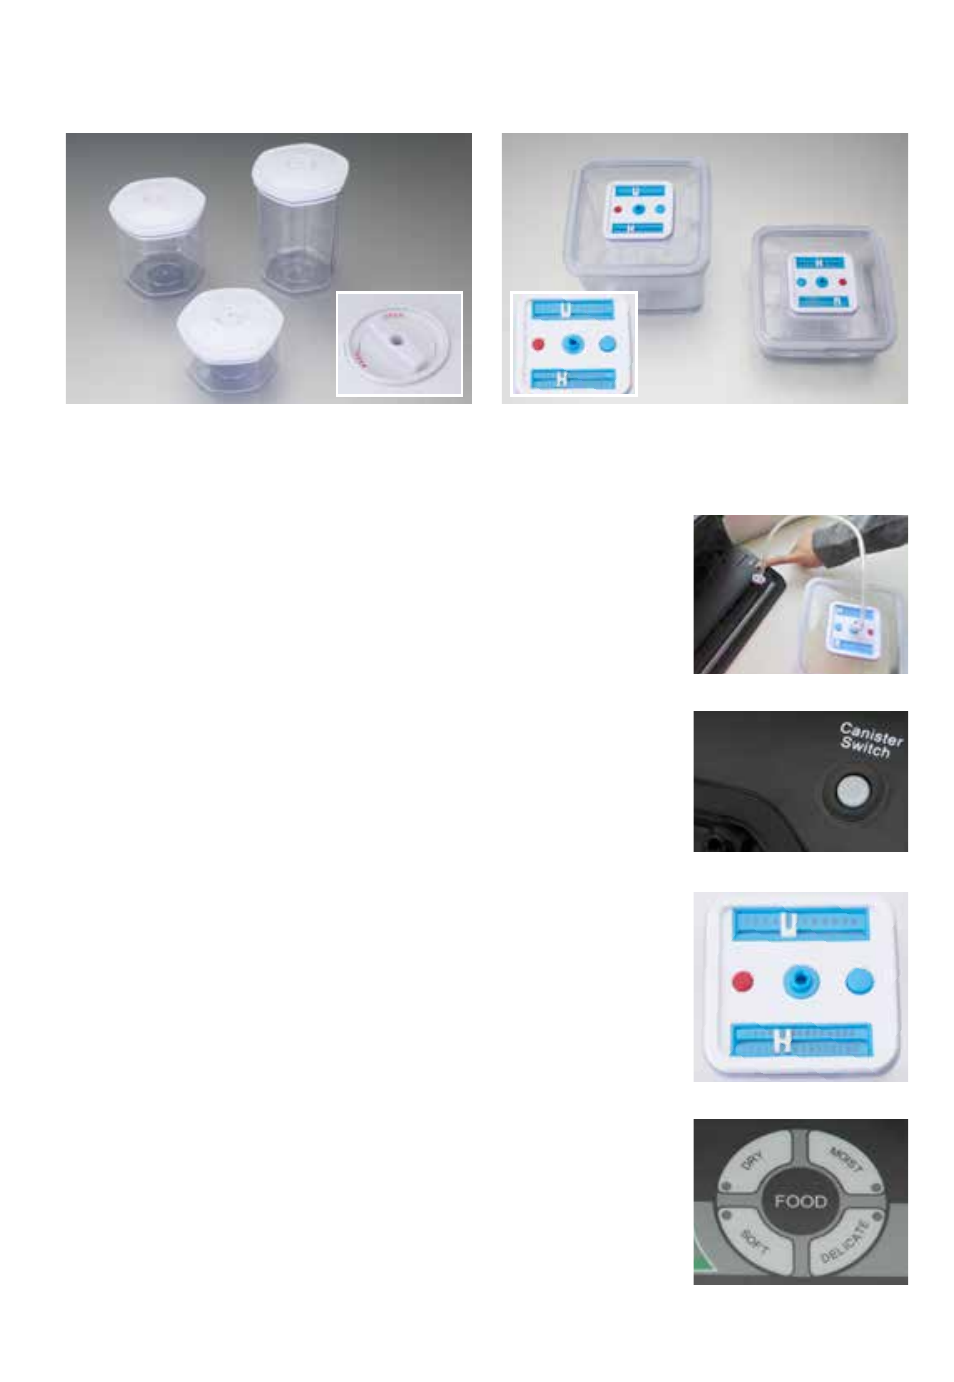
Suitable vacuum containers are available from Gastroback art.-no.: 46110 and art.-no.: 46111.
Art.-No. 46110: Container set 3-piece (6-angled)
3 special vakuuming containers: Content 700 ml, 1,400 ml
and 2,000ml, vakuum hose.
Art.-No. 46111: Container set 2-piece (4-angled)
2 special vakuuming containers: Content: 1.000 ml and 2,800 ml,
vakuum hose.
warninG:
Only use special containers suited for vacuum
packing. Always check the container carefully for any damage
(cracks or scratches) before vacuum sealing. Damaged or unsu-
itable container (glass or plastic) cannot resist the pressure and
could implode, causing severe injuries. Do not consume any food
that has been in a damaged container. Splinters in the food could
cause severe injuries.
1.
Get the appliance ready for use. Close the lid tightly. The lid
must audibly engage at each sides of the appliance.
2.
Clean the container lid and the container to ensure that the parts
are clean and dry.
3.
Fill the container with its contents.
note: Do not overfill the container. When vacuum sealing food
in a container leave 3 cm of free space underneath the lid of the
container.
4.
Take the provided vacuum hose and connect the narrow adap-
ter plug to the vacuum port at the right side of the appliance (see
picture l). The adapter plug must be attached securely and
should not be able to slip off. Place the other end of the vacuum
hose onto the middle hole on the lid of the 4-angled container
(art.-no.: 46111, picture n).Choose the type of food you are
going to vacuum (picture o). You can choose between: »DRY«,
»MOIST«, »SOFT«, »DELICATE«. If you make no selection, the
setting of »DRY« is automatically selected - the indicator light illu-
minates green. Press the »CANISTER SWITCH« button on the right
side of the appliance. The vacuum pump starts to operate audibly.
The red button on the container lid pulls downward. To ensure that
no air leaks, press with one hand during the operation on the lid
of the container.
Picture L
Picture M
Picture O
Picture N