Assembling for mincing – Gastroback 41406 Design Mincer Electronic Pro User Manual
Page 8
Assembling the appliance
WARNING: The work space has to be easily accessible, solid, even, dry and
of sufficient size. The mincer should only be set up on a firm level work surface.
Never situate the appliance close to the edge of the working area. Ensure that the
power supply cable does not hang down from the work surface as it could be easily
pulled, particularly by small children, thereby causing serious accidents. Do not put
any cloth or napkins underneath the appliance to avoid endangering by fire and electric
shocks. Never place the appliance on paper towels or uneven working areas. The air
has to able to circulate.
IMPORTANT: Always ensure that the plug is not connected to the power outlet
before assembling or disassembling the appliance.
Place the mincer on a flat, dry surface such as a bench top.
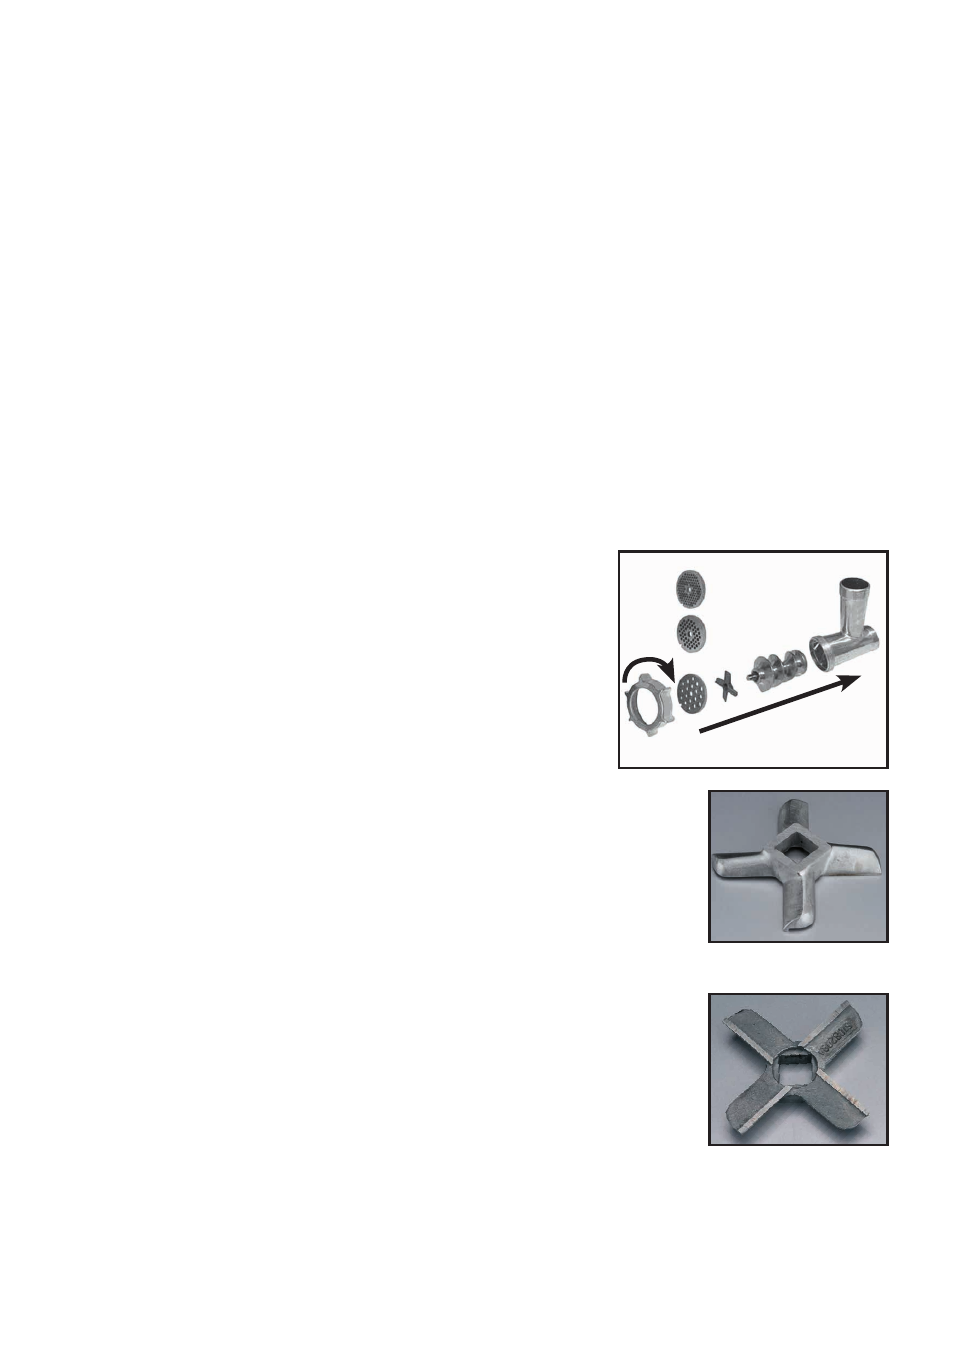
Assembling for mincing
1. Picture A: Take the worm housing into the right
hand and insert with your left hand the worm inside
the worm housing. The side of the worm with the plas-
tic end has to face the worm housing when putting
it inside the worm housing. If the worm is correctly
assembled when the plastic end of the worm pokes a
few millimetres out of the worm housing.
2. Take the crossed-blade knife and attach it to the
worm. The rounded side of the knife (picture B) must face the
worm when attaching it to the axis of the worm. Ensure the
square opening of the crossed-blade knife fits over the four
cornered shaft of the worm.
WARNING: The blades of the crossed-blade knife are very
sharp. Pay attention when you handle the crossed-blade knife.
ATTENTION: Never use the crossed-blade knife and the grind-
ing disc together with the attachments. How to work with the
attachments is explained further back in the instructions.
Mount the grinding disc on the knife. The arresting pin must
lock precisely into the corresponding recesses.
IMPORTANT: If the tools overlap the edges of the worm hous-
ing the worm is not placed all the way inside of the worm housing. Turn the worm
a little bit to make it fit inside but do not use force. If mounted correctly the grinding
30
A
rounded side
B
cutting side
C