Operating - mincing meat – Gastroback 41406 Design Mincer Electronic Pro User Manual
Page 12
34
Operating - Mincing meat
The mincer operates absolutely dependently and clean. If any problems should
occur while operating act upon instructions ´Trouble shooting`.
WARNING: For the case that liquid runs over the mincer while operating turn the
mincer off immediately and pull the plug. Clean and dry the appliance according
to the instructions ´Care and cleaning`.
TIP: If you use special mince-recipes you can mix the ingredients (for example
steamed onions or spices) with the meat before mincing. This way the ingredients
get mixed really well. Use the medium grinding disc when making tartar and mince
the ingredients twice.
IMPORTANT: The mincer cannot mince hard or stingily ingredients (for example:
bones, nuts, ginger). If you use hard ingredients like onions or carrots, you have to
steam them before adding them to the meat. Place a dry towel beside the mincer to
dry off overrunning liquids.
1. Cut the meat into stripes (10 cm long and 2cm wide) that will fit in the feed chute
and remove hard parts like bones, shells or stems.
2. Assemble the appliance as described and place a plate or dish in front of the
worm housing.
WARNING: Always make sure that the mincer is turned off before plugging in the
power supply.
3. Plug the power supply cable into a mains socket and switch
on the mincer. You can hear a signal. The appliance is ready.
WARNING: Never hold your face or other body parts over
the feed chute when the motor is running because little pieces of
food could be thrown out of the feed chute. Never push the
food into the feed chute with your fingers or put foreign sub-
stances (hair, towels, cutlery) into the feed chute. Always use the
pusher for this purpose!
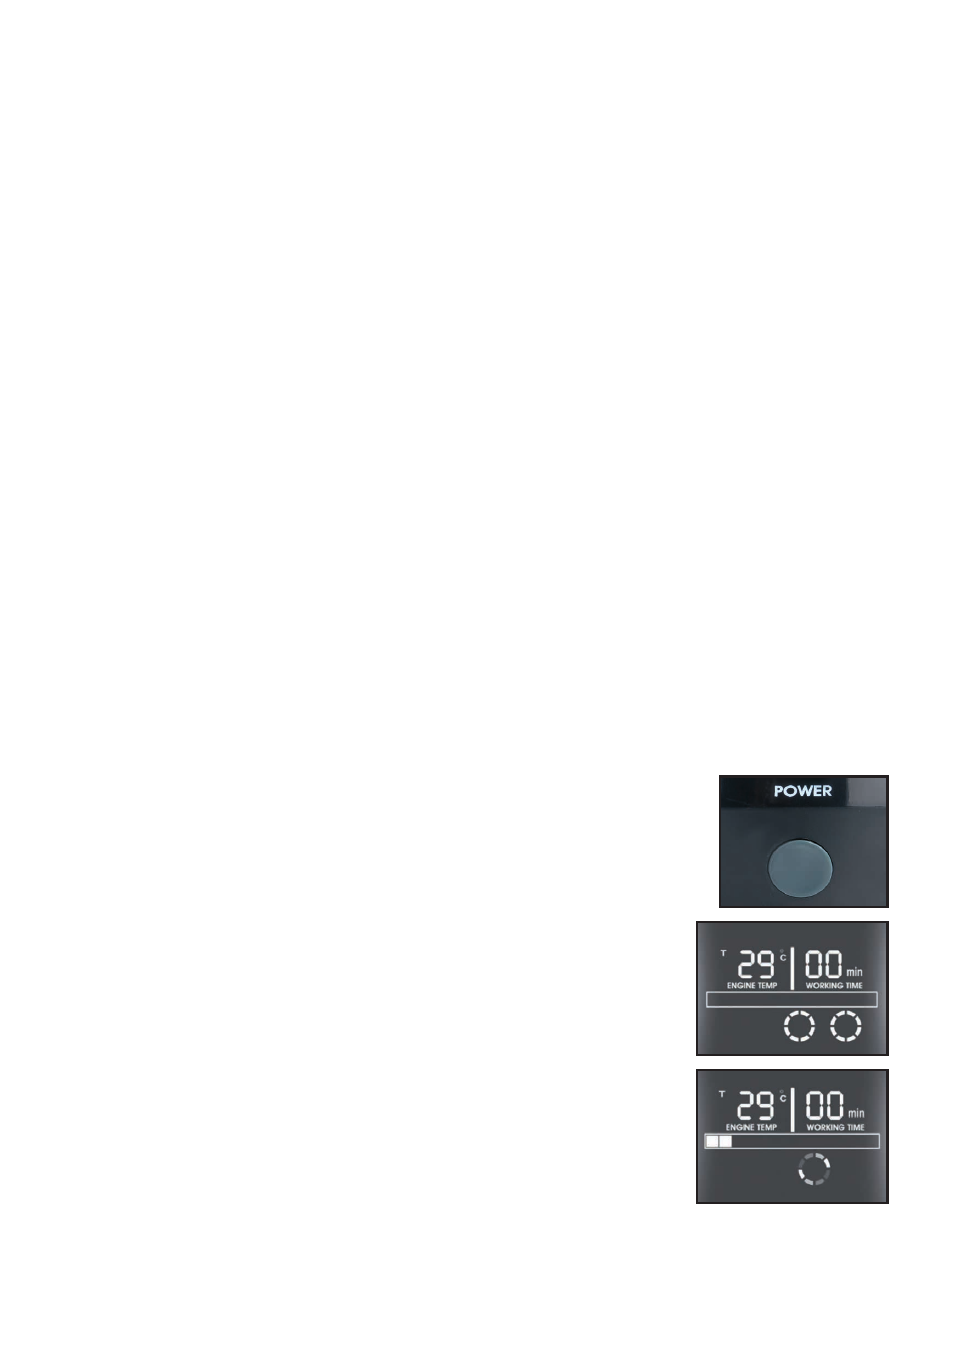
4. Press the power button on the back of the appliance
(picture A). The display illuminates and you can see the motor
temperature, working time and two circles (picture B).
5. When the appliance operates in the “ON”-mode, the LCD
display shows one circle rotating countercklockwise
(picture C).
6. When switches into the “REVERSE”-mode, the appliance will wait a few seconds,
A
B
C