Gastroback 41019 - Cook & Mix User Manual
Page 14
42
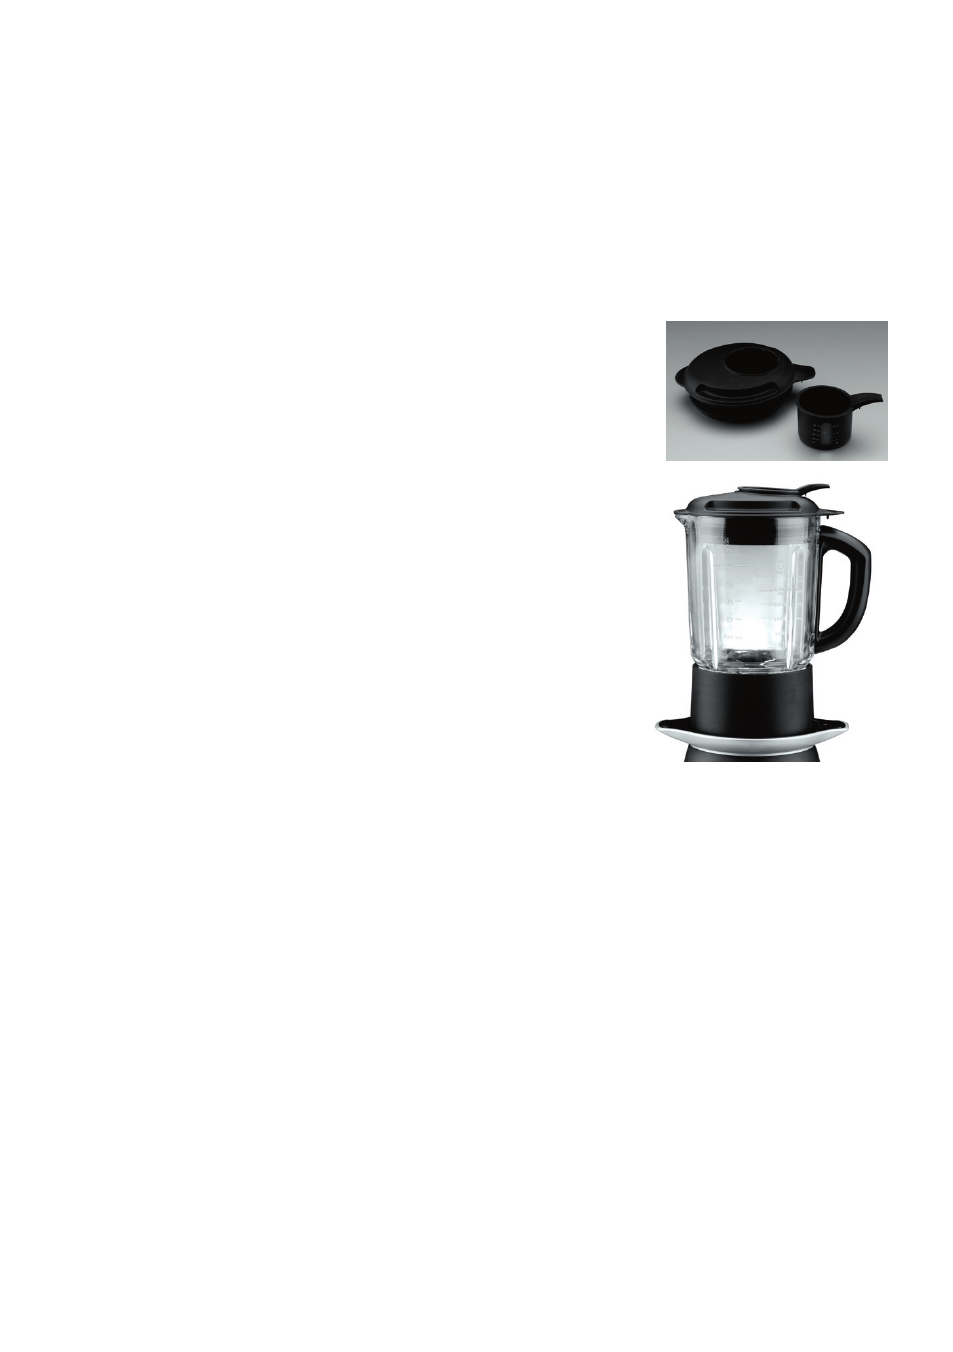
measuring cup, first position the measuring cup over the lid, aligning the protrusions with
the corresponding grooves in the lid, and then gently press down the measuring cup into
the lid. Do not use violence!
WARNING: Always ensure that lid and measuring cup are properly in
place before switching on the appliance.
3. Close the lid and insert the measuring cup in the lid.
Note: The lid is equipped with a rubber seal, preventing that food will overflow or splash
during operation. Hold the riffled handle of the lid over the handle of the glass jar and
gently press the lid down on the glass jar until the lid lies tightly
on the brim of the glass jar. The protrusion on the lid must cover
the spout of the glass jar.
Place the measuring cup (with the handle of the measuring cup
over the handle of the lid) in the opening of the lid.
4. Position the glass jar on the motor base aligning the arrow
on the jar collar level with the arrow on the motor base.
Push the glass jar gently down until it settles firmly. Ensure
that the glass jar will not tilt or wobble.
WARNING: Always ensure that the glass jar is mounted firmly
in the correct orientation on the motor base, and the lid is clo-
sed firmly, before connecting the appliance to the power sup-
ply. Do not twist the glass jar on the motor base. Do not hold
your hands or any foreign objects in the glass jar, while the
appliance is connected to the power supply. The heating plate
is mounted at the underside of the jar collar. Do not touch
the underside of the jar collar, when the heater
function has been in operation shortly before.
Note: If the glass jar will not stand stable on the motor base, lift it from the motor base,
ensure that the heating plate has cooled down, and then manually turn the hexagonal nut
at the underside of the jar collar a little. Thereafter try again.
5. Connect the appliance to a suitable wall power outlet. (See: „Important Safeguards
for Electrical Appliances“)
The power button will flash. The appliance is now ready for use. The only way to turn off
the flashing of the power button is to disconnect the appliance from the power supply. .
Note: The power button will flash only when the glass jar is placed on the motor base
properly. The safety interlock in the motor base switches off the appliance completely, if
the glass jar has no contact to the motor base. Thus, even when removing the glass jar
after preparing your food, the appliance will switch off automatically. However, always
unplug the appliance before removing the glass jar. Never leave the motor base unatten-
ded, while connected to the power supply.
6. Press the power button once to switch on the appliance. The power indicator is lit steadily.
7. Select the required function.
CAUTION: Do not operate the blender function for longer than 3 minutes to avoid over-
heating. This is the maximum running time for the motor.