Gastroback 41020 Cook & Mix Plus User Manual
Page 9
35
assembling the glass jar
1. Clean all parts of the glass jar. Handle the blades with care to avoid injuries.
2. Put the square side of the blade base into the cup base first, then press the blade base
into the jar base.
3. Fix the seal ring into the blade base. nOTe: Damp the seal ring first and then assemble
the glass jar. The glass jar will be more tight to the jar base after doing this.
4. Assemble the glass jar into the jar base.
5. Turn the glass jar clockwise about 70 degrees, lock the glass jar to the jar base tightly.
6. Put the glass jar set onto the motor housing, close the lid.
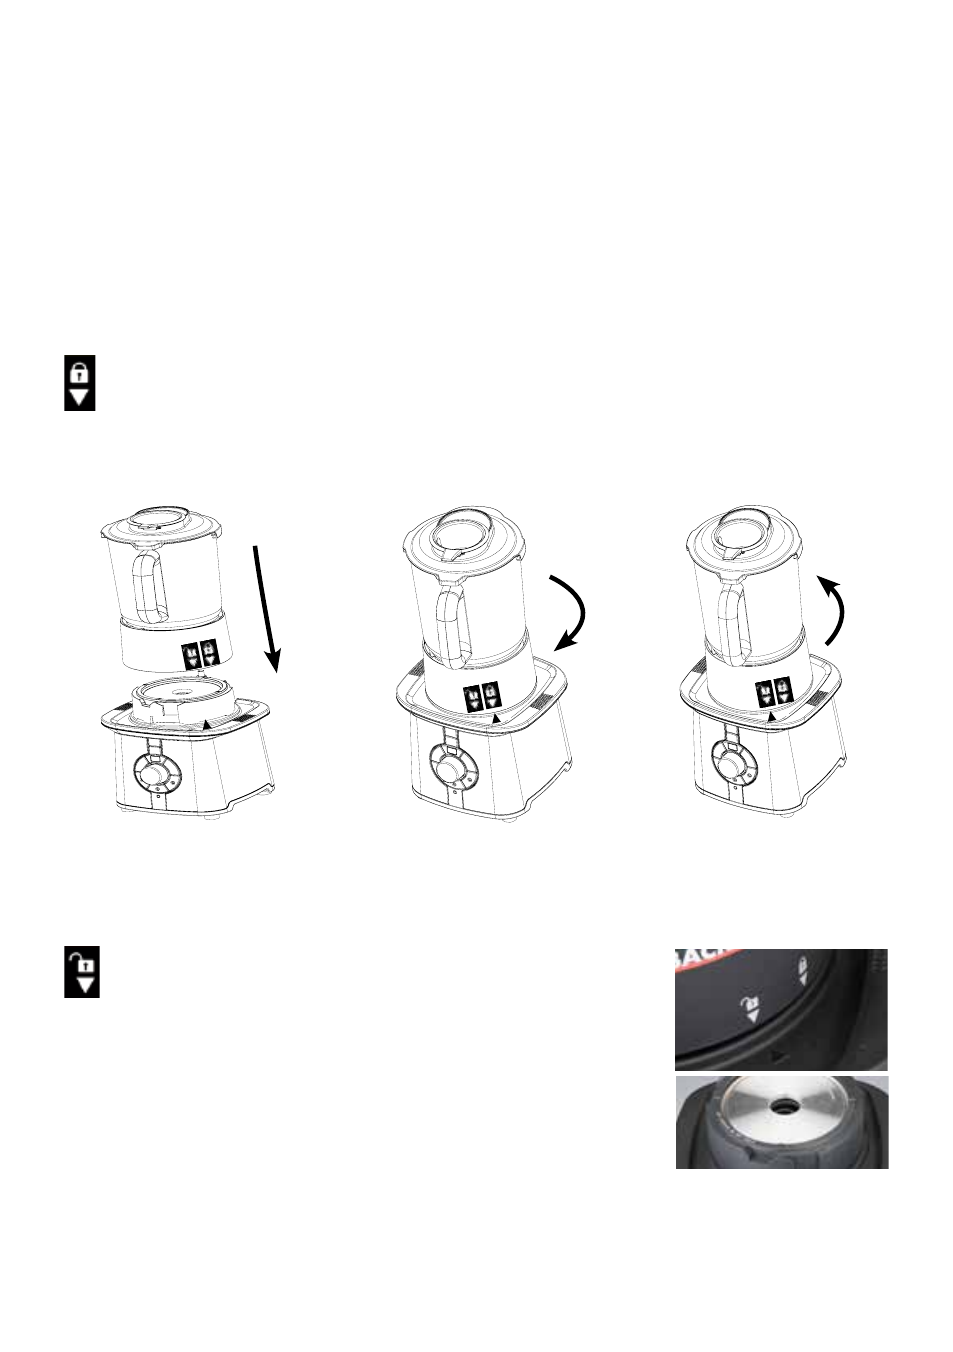
assembling the glass jar to the motor housing
• Position jar unit on the motor housing (fig. 1) and rotate it clockwise until the lock
arrow on the jar collar is level with the arrow on the housing unit (fig. 2).
• nOTe: Take care when placing the jar unit on the housing base as incorrect positions
may damage the interlock switches (fig. 2).
removing the glass jar to the motor housing
• Switch the appliance off and unplug from the outlet. Grip
the jar, rotate it counter-clockwise, and then away from the
housing base, until the arrow on the cup base reaches the
arrow on the base.
• nOTe: Take care while removing the jar from the base, since
overwinding can cause the interlock switch between the jar and
the jar base to disconnect. This might lead to leaking during ope-
ration.
• CaUTIOn: The heating element is hot when the appliance is
in heat mode, do not touch the underside of the jar base and the surface of the heating
elements.
Abb. 1 Abb. 2 Abb.3
fig.1
fig.2
fig.3