Step 2 – Copernicus PDR11 User Manual
Page 5
PDR11 - Version A - 2 November 2012 - Copernicus Educational Products Inc.
2
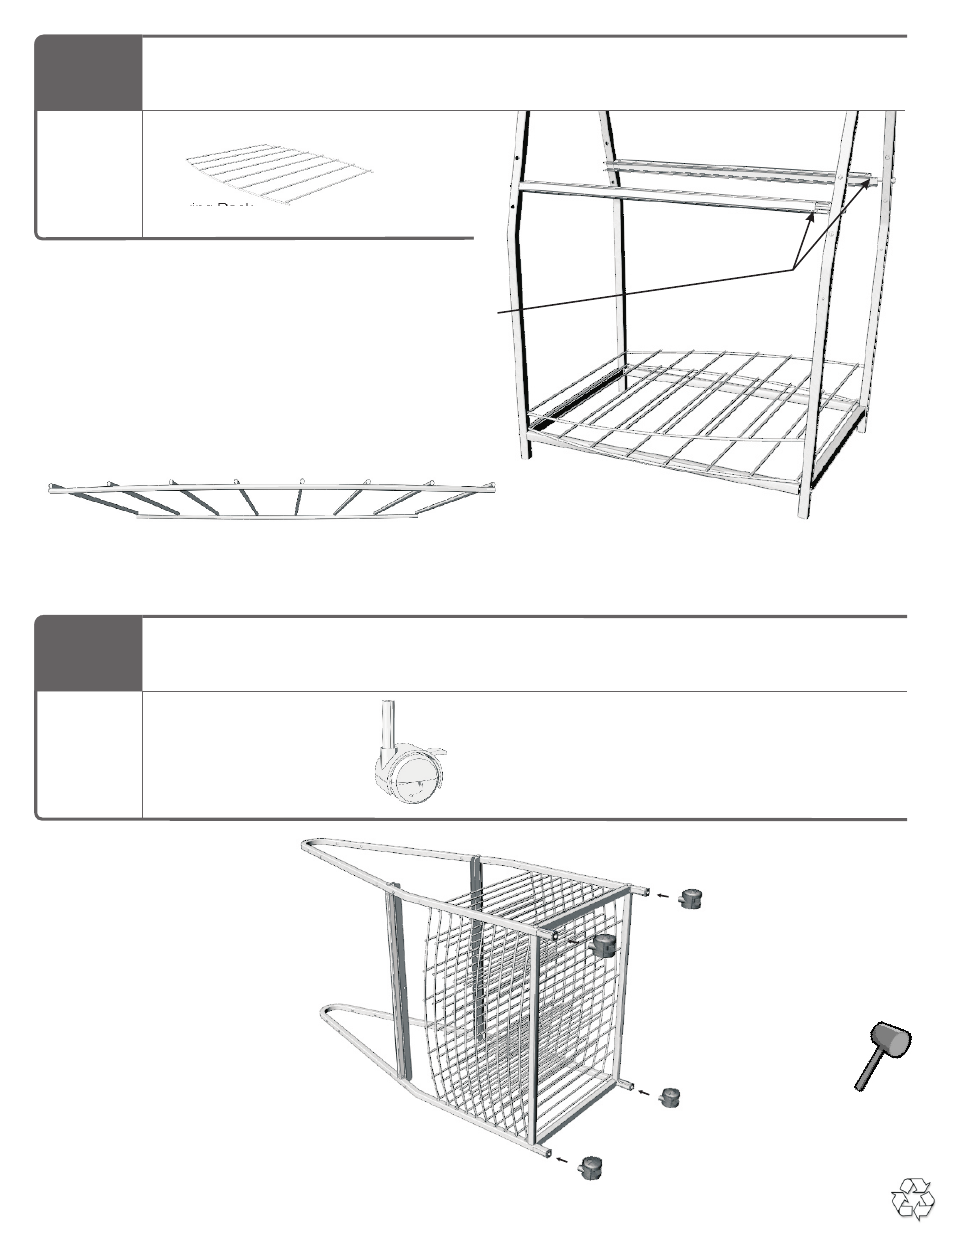
Caster
x 4
3
Insert Drying Racks
Install Casters
You may need to
tighten slightly as you
go up with the racks.
Tighten all bolts (8)
after all Drying Racks
are assembled
!
Drying Rack
x 10
You will need:
(Not to Scale)
You will need:
(Not to Scale)
Press Casters firmly into the
Frame. Casters will click into
place. If necessary, place a
wrench between the wheels &
tap in with a rubber mallet
!
We recommend installing the racks with this side
facing upwards - easier to slide paper off the rack
Up
See also other documents in the category Copernicus Products for children:
- AC401 (1 page)
- AUD1 (9 pages)
- AUD5 (13 pages)
- BC300 (1 page)
- BTHC1 (9 pages)
- BTHC2 (11 pages)
- CD400 (1 page)
- DCS1 (12 pages)
- DCS2A (14 pages)
- E3IN1 (19 pages)
- ELS1 (3 pages)
- GR220 (2 pages)
- IPT102 (14 pages)
- IR400 (51 pages)
- IS2 (16 pages)
- IS602 (40 pages)
- LLS300 (19 pages)
- LW430 (5 pages)
- PDR20 (1 page)
- RC005 (7 pages)
- RC108 (4 pages)
- RC105 (11 pages)
- RC106 (9 pages)
- RC107 (11 pages)
- SOSE1 (15 pages)
- SRC1 (10 pages)
- STEM100 (18 pages)
- SWT (8 pages)
- TAG2 (19 pages)
- TD5000 (12 pages)
- TEC500 (13 pages)
- TEC500C (12 pages)
- TEC510 (17 pages)
- TEC520 (18 pages)
- TEC57 (8 pages)
- TEC700 (12 pages)
- TEC707 (14 pages)
- VBC5600 (2 pages)
- VE550 (2 pages)
- XS005 (4 pages)