Using dewey with ipad mini, Using dewey with 10” ipad – Copernicus AUD6-DCS User Manual
Page 13
Tip
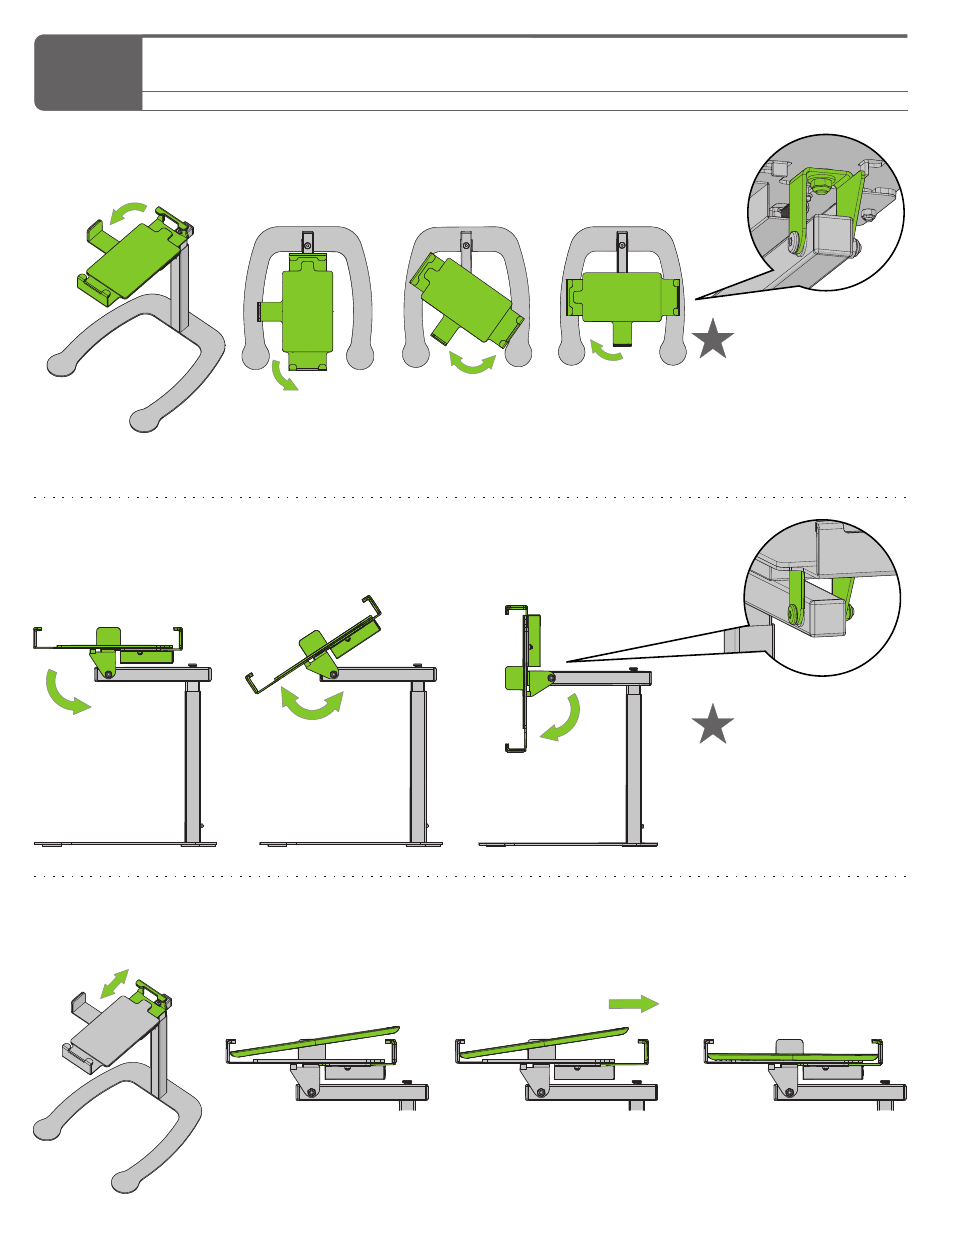
Please note images are representational only to show how the Dewey head works. Your Dewey is
mounted to the media pod, not a stand alone unit.
The green piece slides in and out to secure iPad®
Holding onto top Mechanism - tilt between Document Camera Position and Stand Position
Changing from Document Camera to Stand Position
Inserting iPad®
NOTE: Sometimes when you rotate the iPad® your projected image does not rotate, in that case you need to tilt down
the top mechanism to allow the iPad® to adjust
To Change Projected Image
Landscape Position
Portrait Position
Holding onto top mechanism - turn iPad® 90 degrees
If folding tension ever
needs to be tighter,
tighten this bolt with
10mm wrench and the
provided allen key.
If swivel tension ever
needs to be tighter,
tighten this bolt with
10mm wrench.
14
1. Use the iPad mini™ spacer, and set the bottom lip to its minimum position.
Using Dewey with iPad mini™
2. Then slide green piece out to secure iPad Mini™.
Slide the spacer into
the provided slot
Loosen the knob to
slide the bottom lip
into position and then
tighten
1.
2.
3.
1. There is no need for the iPad mini™ spacer, set up the bottom lip to its maximum position.
Using Dewey with 10” iPad®
2. Then slide green piece out to secure iPad®.
1.
2.
3.
Store the spacer under
Dewey’s top mechanism.
Note: To reposition the spacer,
push up, then slide out.
Loosen the knob to
slide the bottom lip
out and then tighten
AUD5-DCS_AUD6-DCS - Version A - 17 December 2014 - Copernicus Educational Products Inc.