Installation instructions – Code 3 Wingman with TriCore/Torus for 2011 Ford PI User Manual
Page 3
3
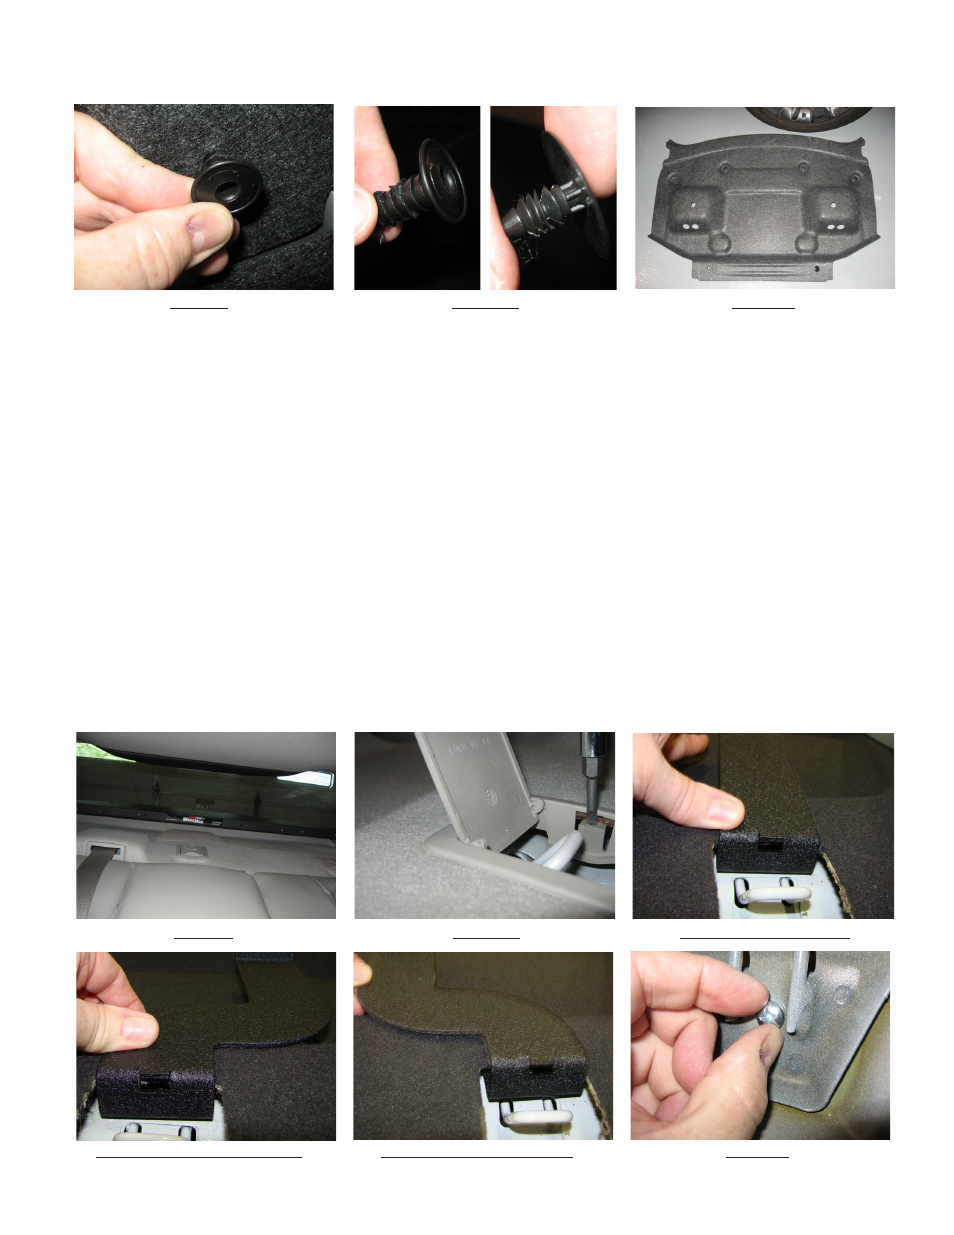
FIGURE 1 FIGURE
2
FIGURE
3
Step 2 Position the WingMan in the rear package tray area (see Figure 4) to determine the desired routing of the cable into the trunk or where
ever the final location of the cable is to be. Note: The best and safest cable routing is to drill a clearance hole for the cable directly through
the sheet metal and the interior fabric of the package tray area from inside the trunk of the vehicle directly in line with the cable exit of
the WingMan. This keeps the cable out of a passengers reach Note: Move the WingMan out of the way temporarily and make sure any
OEM wiring is out of the way so you don't damage the WingMan or the wiring when drilling the cable clearance hole! Route the cable
through the hole, pull the slack out of the cable, and reposition the WingMan before going to the next step.
Step 3 Remove the (2) outer plastic child restraint covers by prying the cover retention tab inward as shown in Figure 5 so that the cover can be
removed. Set the (2) outer plastic child restraint covers aside. Note: The cover in the center shown in Figure 4 does not need to be removed.
Step 4 Position each of the Pemserted WingMan Mounting Brackets with the Angled Pemserted flange down against the sheet metal of the
vehicle in the rear area of the child restraint pockets and line up the Pemsert threaded hole in the WingMan Mounting Bracket with the existing
holes in the Ford NGPI Taurus's Sheetmetal (see Figure 6). Note: on the SHORT version of the Ford NGPI Taurus WingMan, the mounting
brackets are "S" shaped and are Driver and Passenger Side specific as can be seen in "Figure 6 Passenger Side Short" and "Figure 6
Driver Side Short below". All of the remaining installation steps are the same for both the Long and Short versions.
Step 5 Slip a supplied 1/4" internal tooth lock washer then a 1/4" flat washer onto a supplied 1/4"-20 X 5/8" Phillips Pan Head Machine Screw,
then from inside the trunk of the vehicle, thread the screw through the existing hole in the vehicle's child restraint area and into the WingMan's
Pemserted Mounting Bracket (see Figure 7). Repeat this step for both sides of the car. Note: It is helpful to have an assistant hold the
WingMan's Mounting Bracket to prevent movement while you are threading the screws in.
Installation Instructions
Step 1 Lying inside the trunk of the vehicle, locate and remove the (6) Christmas Tree Fasteners (see Figures 1 & 2) which hold the fiber upper
trunk liner in place (Note there are 2 differant types of fasteners see Figure 2). Remove the fiber trunk liner and set it aside (see Figure 3).
FIGURE 4 FIGURE
5
FIGURE
6 LONG VERSION
FIGURE 6 PASSNGR SIDE SHORT FIGURE 6 DRIVER SIDE SHORT
FIGURE
7