Code 3 OsciLaser Flushmount User Manual
Page 4
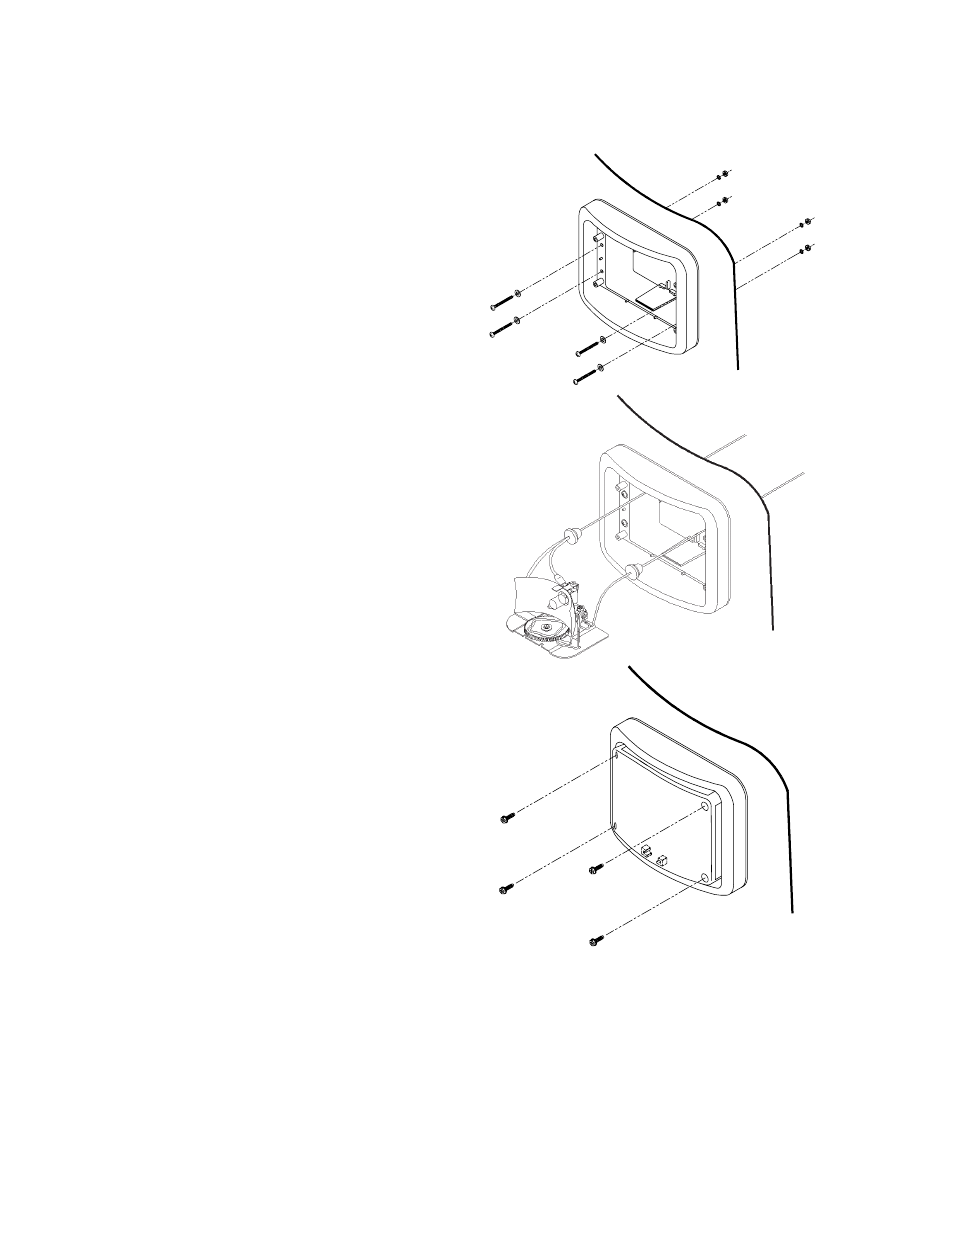
6) Slide the OsciLaser
TM
assembly into the
housing while simultaneously running the
power and ground wires out of their respec-
tive holes. Be sure to pull the power wire
through the hole until the attached rubber
grommets snap into the housing. In
addition, the base plate should be captured
in the slots at the back of the housing.
7) Connect the gray power wire to the appro-
priate lead from the lighting control switch.
8) Attach the black ground (earth) wire to the
vehicle chassis or an available negative
wire lead.
9) Attach the lens to the housing using the
four #8 x 5/8" stainless steel, sheet metal
screws provided (Figure 6). IMPORTANT:
Similar to step 6, there are slots on the
inside of the lens which must capture the
OsciLaser base plate.
FIGURE 6
FIGURE 5
FIGURE 4
4
- 2004 LED Series Beacon (8 pages)
- 2004-2014 Tahoe Citadel (3 pages)
- 2015 Tahoe Citadel (8 pages)
- 2100 (16 pages)
- 21IF (12 pages)
- 21TR & 21TR Plus (18 pages)
- Solex MultiColor (12 pages)
- 235H Remote Strobe Power Supply (12 pages)
- 275 Series Beacon (8 pages)
- 300 Series Beacon (8 pages)
- 40, 41, 42 Series Perimeter Lights (8 pages)
- 410 Mini Bar (7 pages)
- 420 Mini Bar Series (16 pages)
- 550 Series Beacon (8 pages)
- 6 Pack LED Hide-A-Blast (8 pages)
- 80 Series Perimeter Lights (10 pages)
- 800 Series Software (8 pages)
- 87, 88, 89 Series Perimeter Lights (12 pages)
- 90 Series Strobe Beacon (8 pages)
- 950 Series Software (12 pages)
- Arch Beacon (12 pages)
- Astro L800, Star LL400, Nova L200 (8 pages)
- Caprice Side Marker LED light (4 pages)
- Chase (5 pages)
- Citadel Ford PI and Explorer (3 pages)
- Code 360 (24 pages)
- CommandStik (8 pages)
- CPS220 Remote Strobe Power Supply (8 pages)
- CPS690 Remote Strobe Power Supply (12 pages)
- D.O.T. Systems for 2010 Tahoe (4 pages)
- D.O.T. Systems for 2011 Dodge Charger (4 pages)
- D.O.T. Systems for 2011 Ford PI Utility and Explorer (4 pages)
- DashLaser (12 pages)
- DeckBlaster (10 pages)
- Defender (12 pages)
- Dual Head Wildcat (2 pages)
- E-10 Beacon Series (4 pages)
- Intrepid Headliner Mounting Bracket (2 pages)
- Essex (6 pages)
- Excalibur (24 pages)
- FM 9000 (12 pages)
- Ford PI B-Pillar Bracket (4 pages)
- Ford PI Citadel (8 pages)
- Frontier LED Mini Bar (8 pages)
- Halogen Duo Bulb Work Light (1 page)