Front end side lighting options, Front fork led light head – Code 3 Harley-Davidson User Manual
Page 3
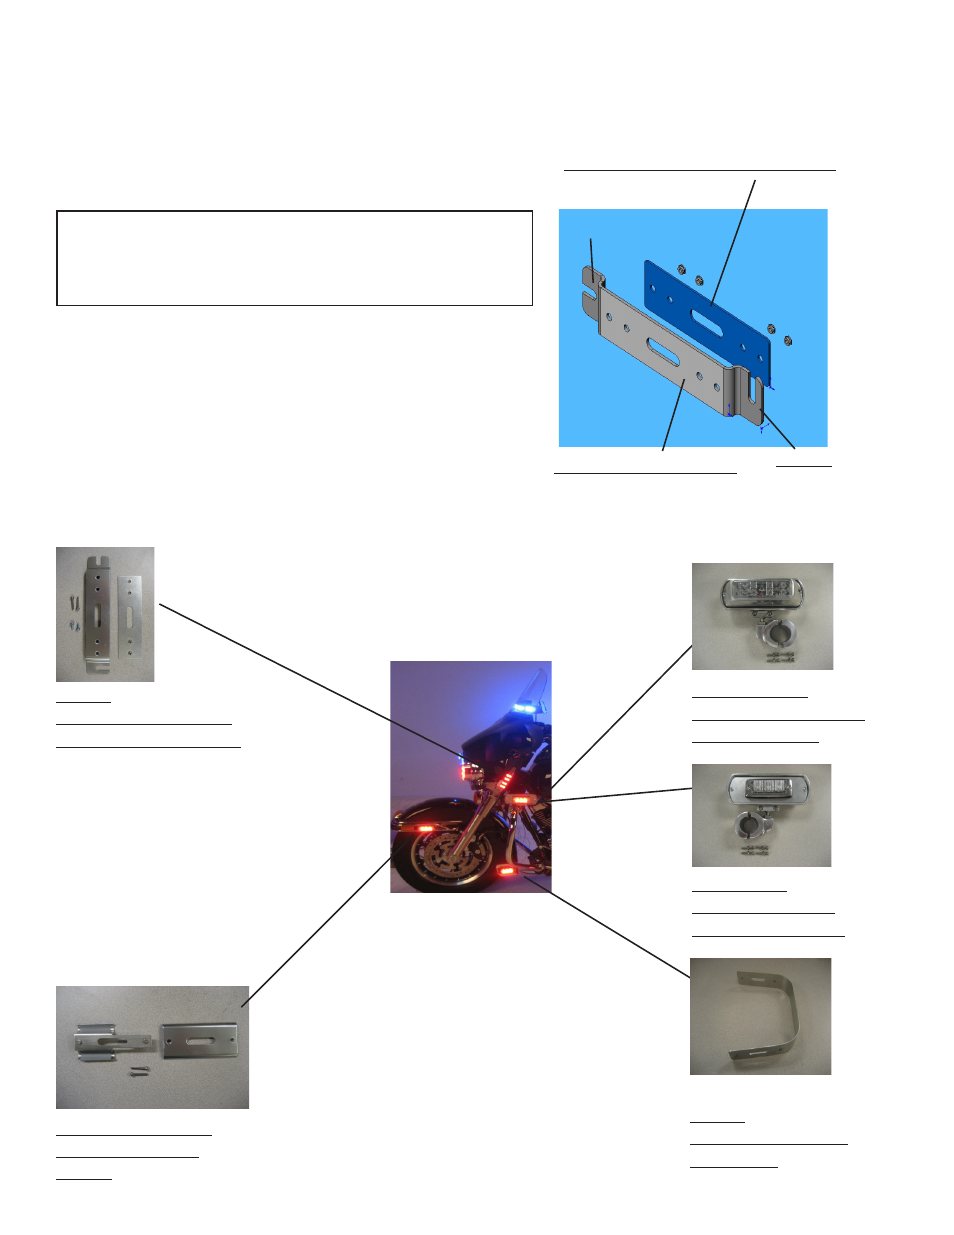
front end side lighting options
Front fork led light head
1. loosen top fork torx head bolt
2. loosen bottom fork torx head bolt
Note:
Front Fork light assembly under Torx bolts will flex outward
when loosened. It will be necessary to push light assembly in-
ward during installation of front fork brackets.
3. Place pemserted backing plate under chrome bracket
with pemserts facing up into holes of chrome bracket
4. Place light head selection onto chrome bracket and attach us-
ing provided screws. (longer screws for Xt3, shorter for leD-X
light head options. both are provided)
5. slide vertical forked end of bracket under top torx bolt
6. slide horizontal forked end of bracket under bottom torx bolt
7. Route wiring as desired behind front fork assembly, leaving
sufficient loop for fork movement.
t56307 backing plate with pemserts
t57066 chrome bracket
top
bottom
hD513
fRont foRk lIght
(Xt3 leD or leD-eX)
hD511 ( Xt3 leD)
fRont fenDeR
lIght
lXeX125 with
leD-mhc2 motoR
guaRD lIght
hXt-mhc2
motoR guaRD
lIght (Xt3 leD)
hD512
muD flaP lIght
(Xt3 leD)
NOtE:
motor guard lights can be mounted
either vertically or horizontally on
motor guards.
NOtE:
Mud flap bracket requires screw
holes and wiring holes to be drilled
into aluminum mud flap on front
fender. Mud flap is sandwiched be-
tween the bracket and the light head
once installed. bracket is under mud
flap.
NOtE:
1. front fender bracket installed
with finger of backing plate facing
forward on bike, over top of black
rubber foam inset.
2. top of back plate must be under
front fender edge to properly seat
backing plate between rails.