AVer FC1320-P&PW user manual User Manual
Page 47
41
ENGLISH
WPS
WPS (Wi-Fi Protected Setup) is an interface standard that allows users to easily establish wireless
network, and be free from complicated security setting. Please follow the steps for starting WPS.
The menu and usage of every router may be different from the sample pictures.
1. First of all, set up SSID and pre-shared key on your wireless router. WPS only supports
WPA/WPA2 security, so please do not select WEP security.
2. Plug in power adapter on IP camera.
3. Use Ethernet cable to connect the IP camera with PC or network. Enter wireless setting page,
and see if the SSID of your wireless router is listed in "Status of Wireless Networks". If yes,
continue toward next step. No other wireless setting is needed.
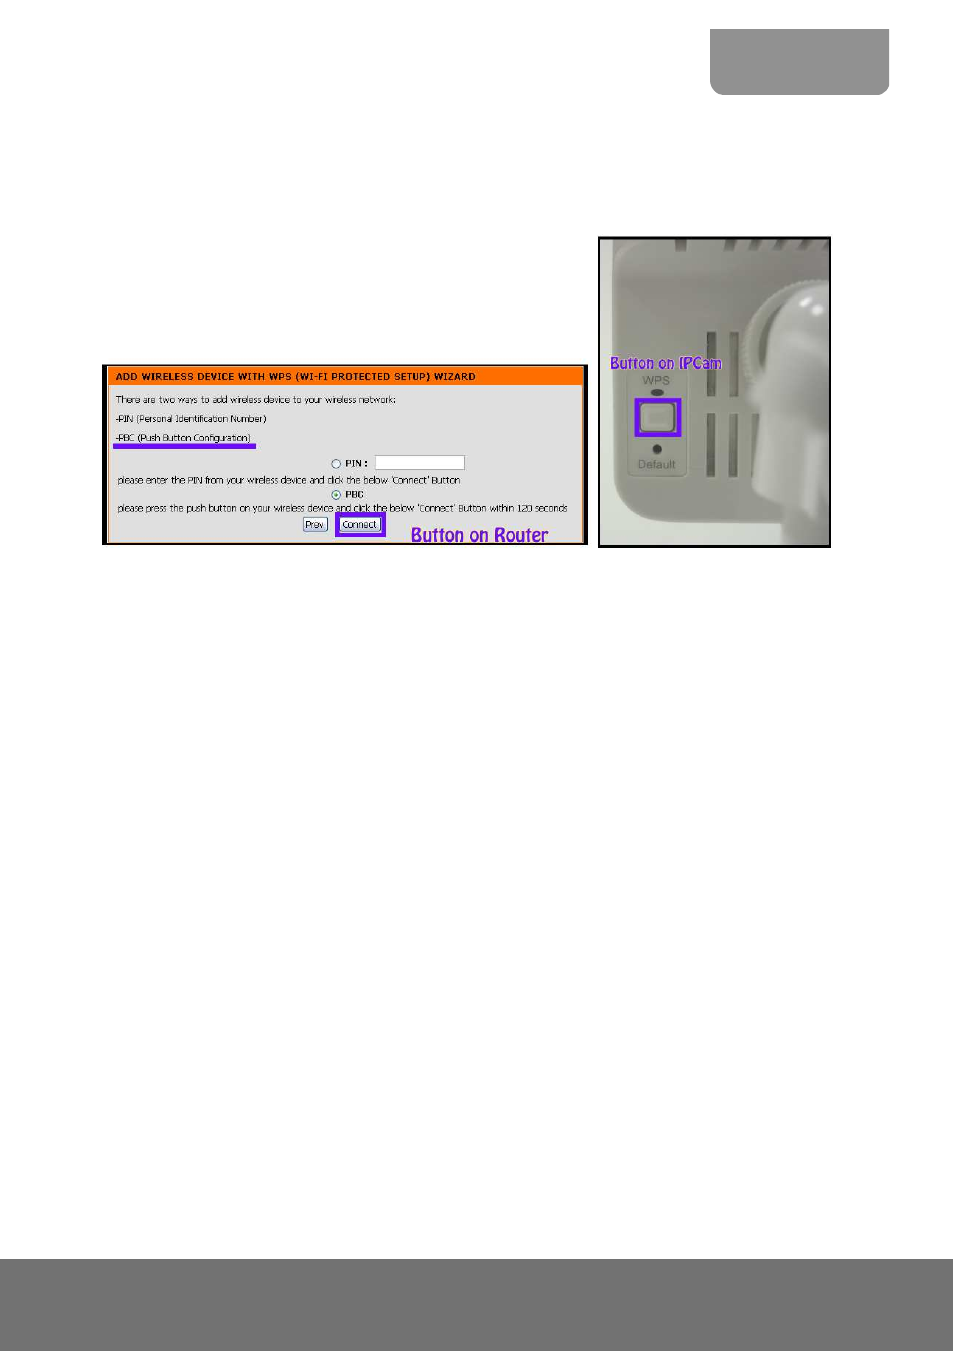
4. Access your router, and press "Connect” button of PBC (Push Button Configuration) setting
page on your router. Then press WPS button on the back of camera. The light above the WPS
button will start flashing.
5. When it finally stops flashing and lights constantly, it means WPS connection succeeds.
Refresh the wireless setting page on the camera, and you should find out the security setting is
already completed automatically. Meanwhile you may see a message on your router page to
inform connection OK. Now you can remove the Ethernet cable from IP camera.
6. If the light finally stops flashing but off, it means WPS connection failed. Try checking your
wireless router setting, and make sure the SSID of the wireless router is found by camera and
listed in "Status of Wireless Networks".