Infrared sensor, Led power button, Laser positioning guide adapter – AVer SPC300+ User Manual
Page 10: Microscope connection, Anti-glare
8
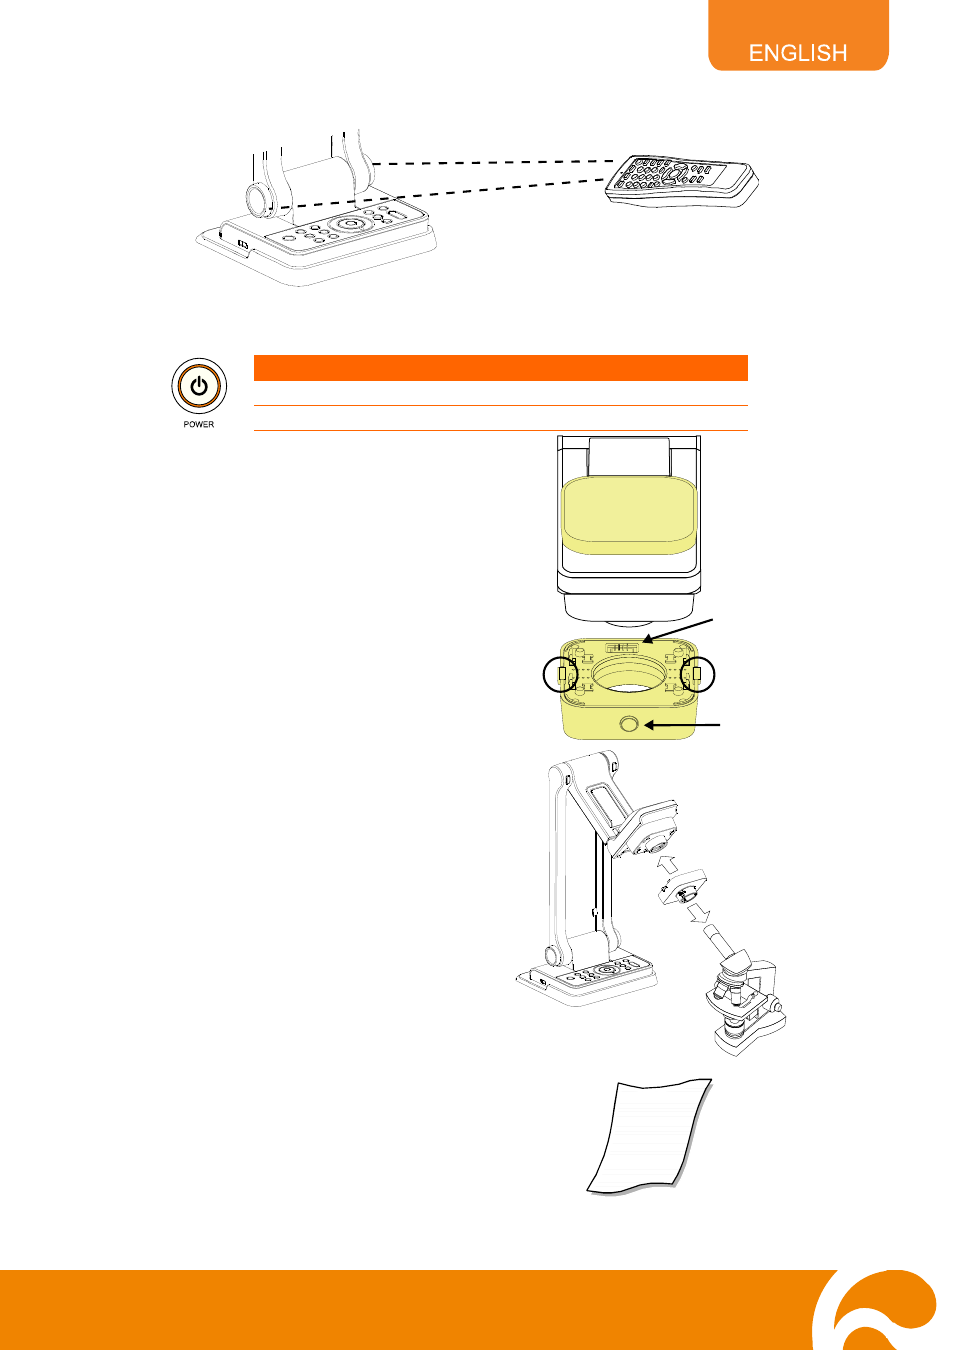
Infrared Sensor
Aim the remote control at the infrared sensor to operate the unit.
LED Power Button
The LED power button on the control panel of SPC300+ indicates the status of the unit.
Color
Description
Blue
: The unit is in standby mode.
Orange
: The unit is in operating mode.
Laser Positioning Guide
Adapter
The Laser Positioning Guide Adapter’s four
(4) positioning pointers define the viewing
area, enabling you to correctly position the
object at the center under the camera.
(1) To connect, make sure the connectors on
the camera head and Laser Positioning
Guide Adapter are on the same side.
(2) To detach the Laser Positioning Guide
Adapter, press the latch and pull.
(3) To turn on/off the Document Positioning
Pointer, press the button.
(1)
(2)
(3)
Microscope Connection
Connecting the SPC300+ to a microscope
enables you to examine microscopic objects
on a big screen without straining your eyes.
To display microscopic image clearly, press
MENU > select THEME > MICROSCOPE and
press ENTER.
Microscope
Adapter
Microscope
Anti-glare
Place the anti-glare sheet on top of shiny
documents to reduce light reflection. The anti-
glare sheet is a special coated film that helps
eliminate the light reflection when you are
displaying a very shiny object or glossy
surface such as magazines, etc.