Control panel – AVer PL50 user manual User Manual
Page 9
4
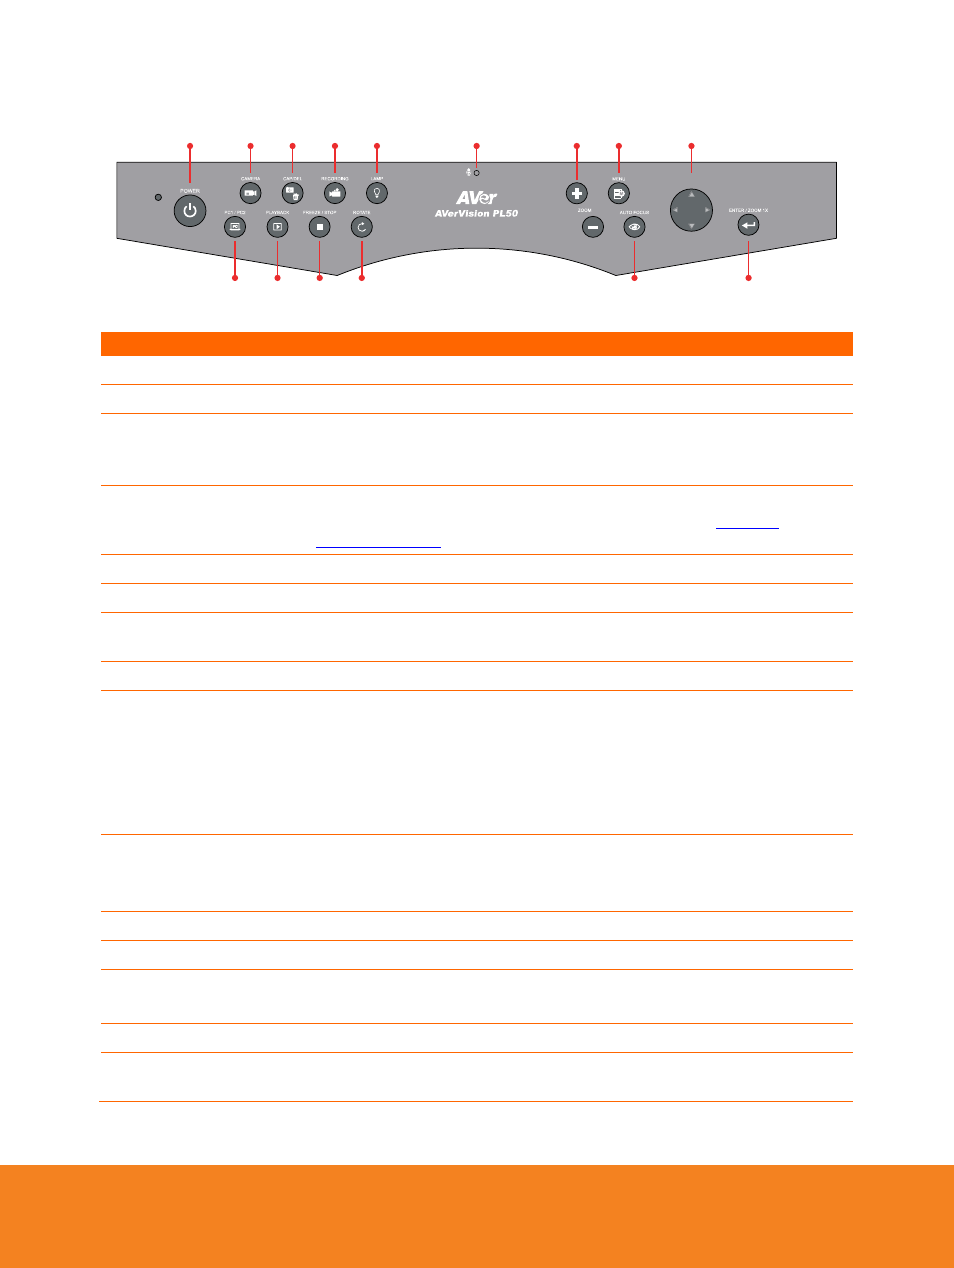
C o n t ro l P a n e l
(3)
(4)
(6)
(1)
(2)
(9)
(5)
(7)
(8)
(13 )
(10 )
(15 )
(14 )
(11)
(12 )
(fig. 1.3)
Name
Function
(1) POWER
Turn the unit on/standby.
(2) CAMERA
Camera mode displays the video signal from the built-in camera.
(3) CAP/DEL
- Capture picture in Camera mode. In continuous capture mode,
press this button again to stop.
- Delete the selected picture/video in Playback mode.
(4) RECORDING
Start/Stop audio & video recording. Audio and video recording can be
saved on an SD card or a USB Flash drive only. See HHU
(5) LAMP
Turns on the side lights, light box, or off.
(6) MIC
Record audio automatically when recording video clip.
(7) ZOOM +/-
- Increase/decrease the image magnification in camera and picture
playback mode.
(8) MENU
Open and exit the OSD menu.
(9)
▲,▼,◄, & ►
- Pan and zoom-in image (above digital zoom level) in both live and
playback mode.
- Select options in OSD menu.
- Use
▲&▼ to increase and decrease the video playback volume.
-
Use ◄&► to play the video backward and forward.
- Move the Spotlight frame and Visor screen cover.
(10) ENTER/ ZOOM
1X
- Make a selection in Playback mode and OSD menu.
- Start/Pause video playback.
- Reset zoom level to 100%.
(11) AUTO FOCUS
Adjust the focus automatically.
(12) ROTATE
Rotate the image by 90° in Camera mode and Playback mode.
(13) FREEZE / STOP
- Pause or resume image display in Camera mode.
- Stop audio & video playback in Playback mode.
(14) PLAYBACK
View & playback captured still images and audio video files.
(15) PC 1/ PC2
PC mode displays the video signal from the RGB 1/ 2 port of
AVerVision PL50