Get familiar with the avervision pl50 – AVer PL50 user manual User Manual
Page 7
2
G
G
e
e
t
t
F
F
a
a
m
m
i
i
l
l
i
i
a
a
r
r
w
w
i
i
t
t
h
h
t
t
h
h
e
e
A
A
V
V
e
e
r
r
V
V
i
i
s
s
i
i
o
o
n
n
P
P
L
L
5
5
0
0
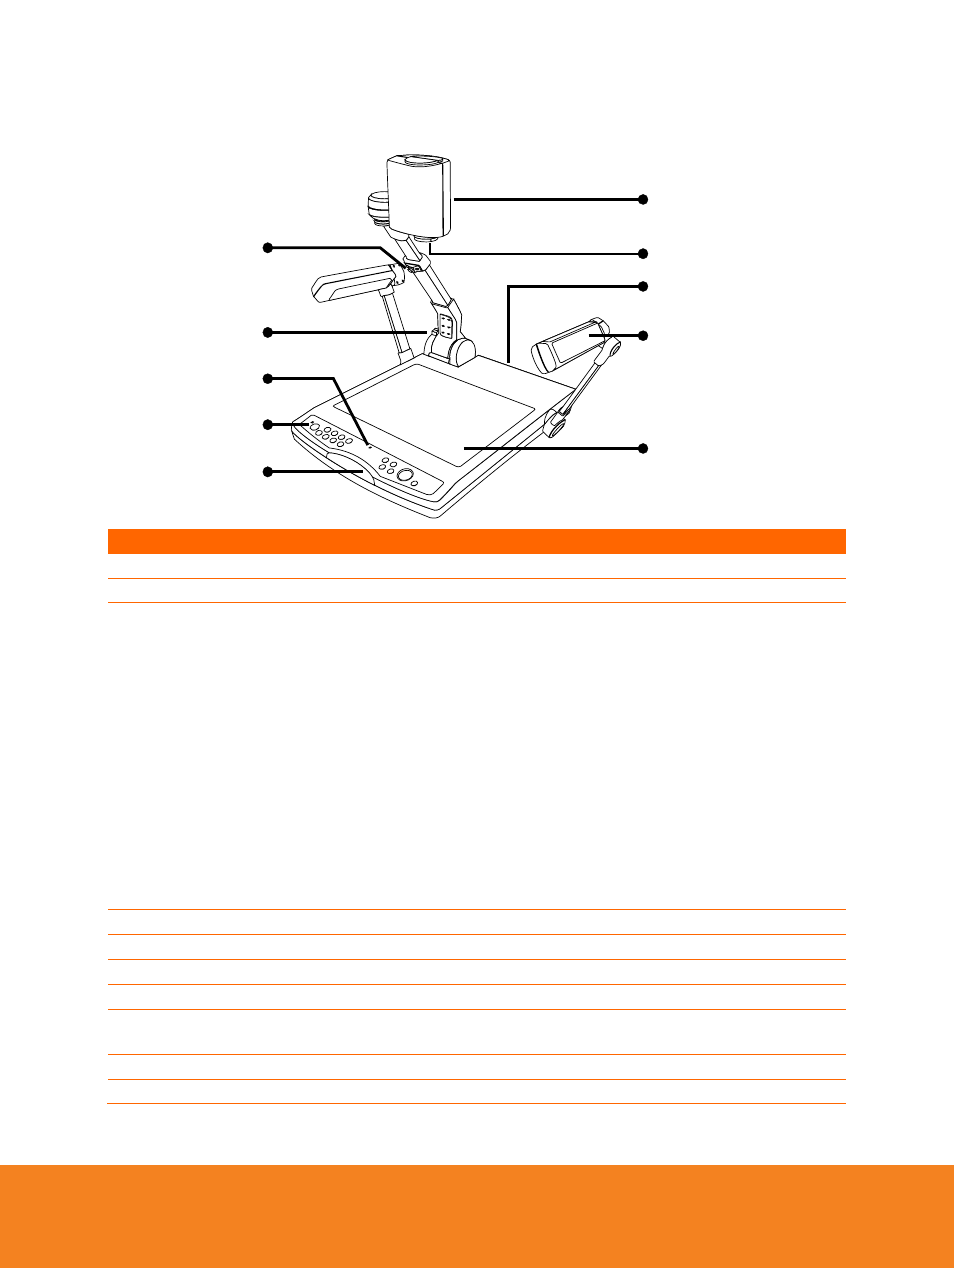
(4)
(1)
(3)
(2)
(7)
(8)
(9)
(10)
(5)
(6)
(fig. 1.1)
Name
Function
(1) Camera head
Contain the camera sensor.
(2) Camera lens
Focus the image in the camera.
(3) Rear panel
Connections and switches for the following :
Power
Computer for RGB input display
Display device for RGB, HDMI, or RCA video output
Microphone
Speaker
SD card for picture and video recording storage
RS-232 for serial communication between computer and
AVerVision PL50
USB standard for USB flash drive and AP20T/mouse connection
Mini USB for computer data transfer or USB camera connection
TV-RGB display output switch
USB Flash Drive - PC switch
(4) Side Lights
Provide light when presenting in dimmed lighting condition.
(5) Light box
Provide light for viewing x-ray, film or transparency.
(6) Arm latch
Extend and retract the arm.
(7) Base latch
Fold and unfold the arm.
(8) Built-in MIC
Record audio when recording video clip. The recorded sound will be
in monophonic.
(9) Control panel
Easy access to various functions.
(10) IR sensor
Receive remote control commands.