Alumax 733 User Manual
Page 6
EPH-N00-06016
6-4-97
Page 6 of 8
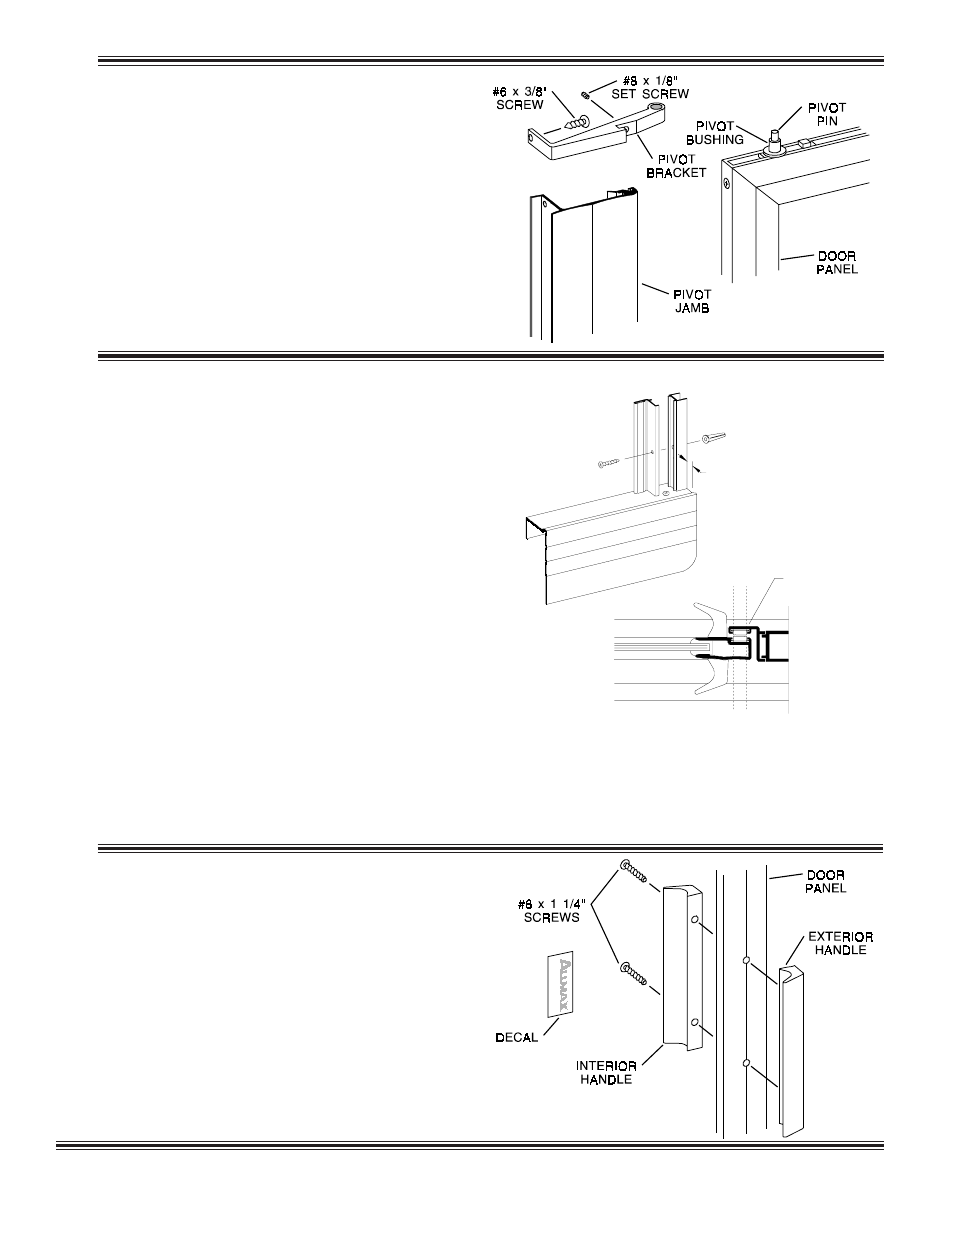
7
Insert a nylon pivot bushing [M] into the
bottom pivot bracket [D]. Slip the second pivot
bushing over the top pivot pin on the door panel.
Position the door by inserting the bottom pivot pin
into the bottom pivot bracket. Hold the door
vertical and slide the top pivot bracket into the
pivot jamb [C] and over the top pivot pin and pivot
bushing. Secure the top pivot bracket with a #6 x
3/8" truss head screw [E] and a #8-32 x 1/8" Allen
set screw [F].
Attach the interior door handle [R] and the
exterior door handle [S] to the door with two #6-32
x 1 1/4" round head screws [T].
Peel the backing from the A
LUMAX
decal [U] and
apply it to the inside handle.
9
Place the jamb fill [BB] on top of the curb [A]
and against the wall opposite the pivot jamb [C].
The jamb fill should be positioned 7/8" from the
outside edge of the curb. Mark the bottom hole
location and remove the jamb fill. As with the
pivot jamb, use a 1/8" or 7/32" drill bit, inserting a
plastic anchor if needed. Replace the jamb fill and
attach the strike jamb[N] (with the magnetic strip
facing toward the exterior) with one #8 x 1 1/2" flat
head screw [P] through the bottom hole. Do not
tighten the screw completely. Rotate the door into
the closed position so that the magnetic strips are
attached at both the top and bottom, and the jamb
fill and the strike jamb are plumb. Holding the
jamb fill in this position, open the door and mark
the last two hole locations. Drill the remaining
two holes and insert wall anchors where needed.
Fasten the stike jamb to the jamb fill and wall
using the remaining two #8 x 1 1/2" flat head
screws [P]. Close the door and check the clearance
with the strike jamb. If necessary, loosen the set
screws [K] and adjust the door to align the magnets.
8
A LIG N
M A G N E T S
7/8"