Alumax 733 User Manual
Page 5
EPH-N00-06016
6-4-97
Page 5 of 8
4
Position the curb [A] so that each end is
centered over a curb anchor [AA], and the long leg
is to the outside. Mark the hole locations on both
curb anchors and remove the curb. Using a 5/32"
drill bit, drill holes and countersink as marked on
the curb anchors. Replace the curb over the curb
anchors and attach using two #10 x 3/8" flat head
screws [Z].
6
5
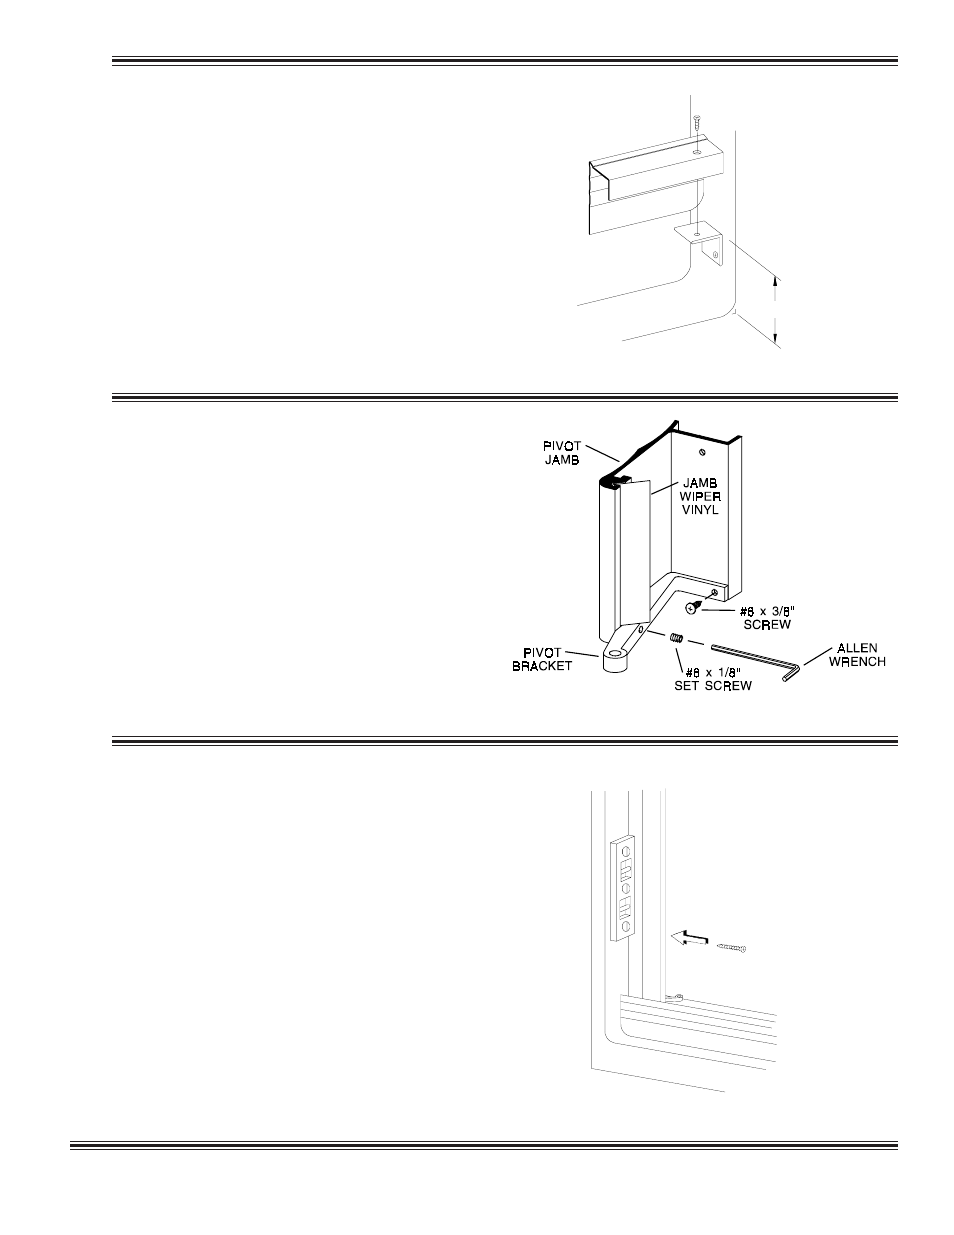
Slide the jamb wiper vinyl [B] into the pivot
jamb [C]. A small amount of soap or graphite
lubrication will help installation. Cut the jamb
wiper vinyl 7/8" shorter than the pivot jamb to
allow room for the pivot brackets [D]. Fit one of
the pivot brackets into the bottom of the pivot
jamb. Lock it in place with a #6 x 3/8" truss head
screw [E] and a #8-32 x 1/8" set screw [F] (a 5/64"
Allen wrench [G] is provided).
Place the pivot jamb [C] on the curb [A] with
the exterior face lined up with the raised edge of the
curb. Use a level to plumb the jamb then mark the
mounting hole locations. Remove the jamb and drill
the mounting holes.
For tile or marble walls, drill three 7/32" diameter
holes and insert the plastic wall anchors [H]. A
center punch helps locate the holes accurately.
Attachments to fiberglass or acrylic units can be
made in two ways. If a reinforcement is built into the
wall of the unit, drill three 1/8" diameter holes to
install mounting screws directly into the
reinforcement. If walls are not reinforced, drill 7/32"
holes and install plastic wall anchors or Molly bolts
(Molly bolts not supplied by A
LUMAX
).
Replace the pivot jamb and attach to the wall with
three #8 x 2" truss head screws [J].
3 9 /32 "