Alumax 338 User Manual
Page 7
EPH-N00-06007
10-21-04
Page 6 of 8
7
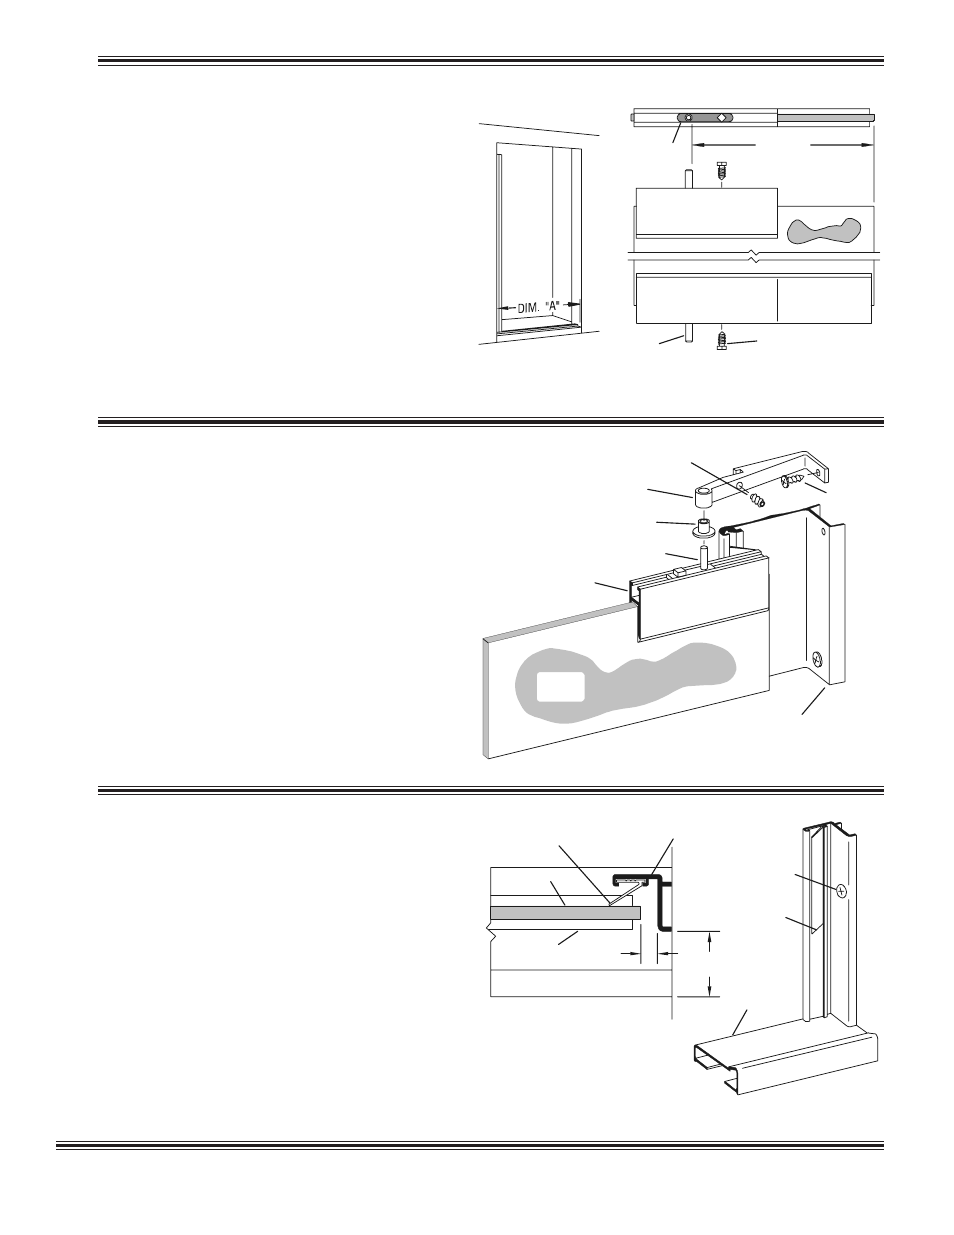
Thread the two #10-24 x 7/16" square head set
screws [N] into the tapped holes in the pivot blocks
[P]. Slide the pivot blocks into the top and bottom rails
of the glass door panel [L] with the stainless steel pins
toward the pivot side of the door (see detail).
Measure the distance from wall to wall directly above
the curb (Dim. “A”). Deduct 3 3/4" from this amount
and position the pivot pins this exact distance (Dim.
“B”) from the strike edge of the glass. Tighten the set
screws just enough to prevent the pivot blocks from
moving (finger tight plus a quarter turn). A 3/16"
wrench (not supplied by A
LUMAX
) will fit the set screw
heads.
Set the strike jamb [S] 15/16" back from the front
edge of the curb [A] and use the door edge as a guide to
align it vertically. Hold the jamb in position and mark the
hole locations.
Remove the jamb and drill the mounting holes as de-
scribed in Step #5. Replace the strike jamb and attach to
the wall with three #8 x 1 1/2" flat head screws [T].
Trim the flap on the clear vinyl strike jamb seal to clear
the bottom door rail.
9
Insert a nylon pivot bushing [R] into the bottom
pivot bracket [E]. Slip the second pivot bushing over the
top pivot pin on the door panel [L]. Position the door by
inserting the bottom pivot pin into the bottom pivot
bracket. Hold the door panel vertical and slide the top
pivot bracket into the pivot jamb [D] and over the top
pivot pin and pivot bushing. Secure the top pivot bracket
with a #6 x 3/8" truss head screw [F] and a #8-32 x 1/8"
allen set screw [G].
8
#8 x 1 1/2"
SCREW
TRIM
VINYL
FLAP
CURB
BOTTOM
RAIL
STRIKE
JAMB
JAMB
SEAL
GLASS
15/16"
1/4"
TOP
STUB RAIL
BOTTOM
RAIL
DIM. "B"
PIVOT
PIN
PIVOT
BLOCK
SQ. HEAD
SET SCREW
#6 x 3/8"
SCREW
SET
SCREW
PIVOT
JAMB
PIVOT
PIN
PIVOT
BUSHING
PIVOT
BRACKET
TOP
RAIL
DOOR
PANEL