Assembly step 4, Instan chain and cable – Craftsman 139.53403 User Manual
Page 8
Attention! The text in this document has been recognized automatically. To view the original document, you can use the "Original mode".
Assembly
STEP 4
Instan Chain and Cable
DO NOT REMOVE CHA IN A ND CABLE FROM CARTON
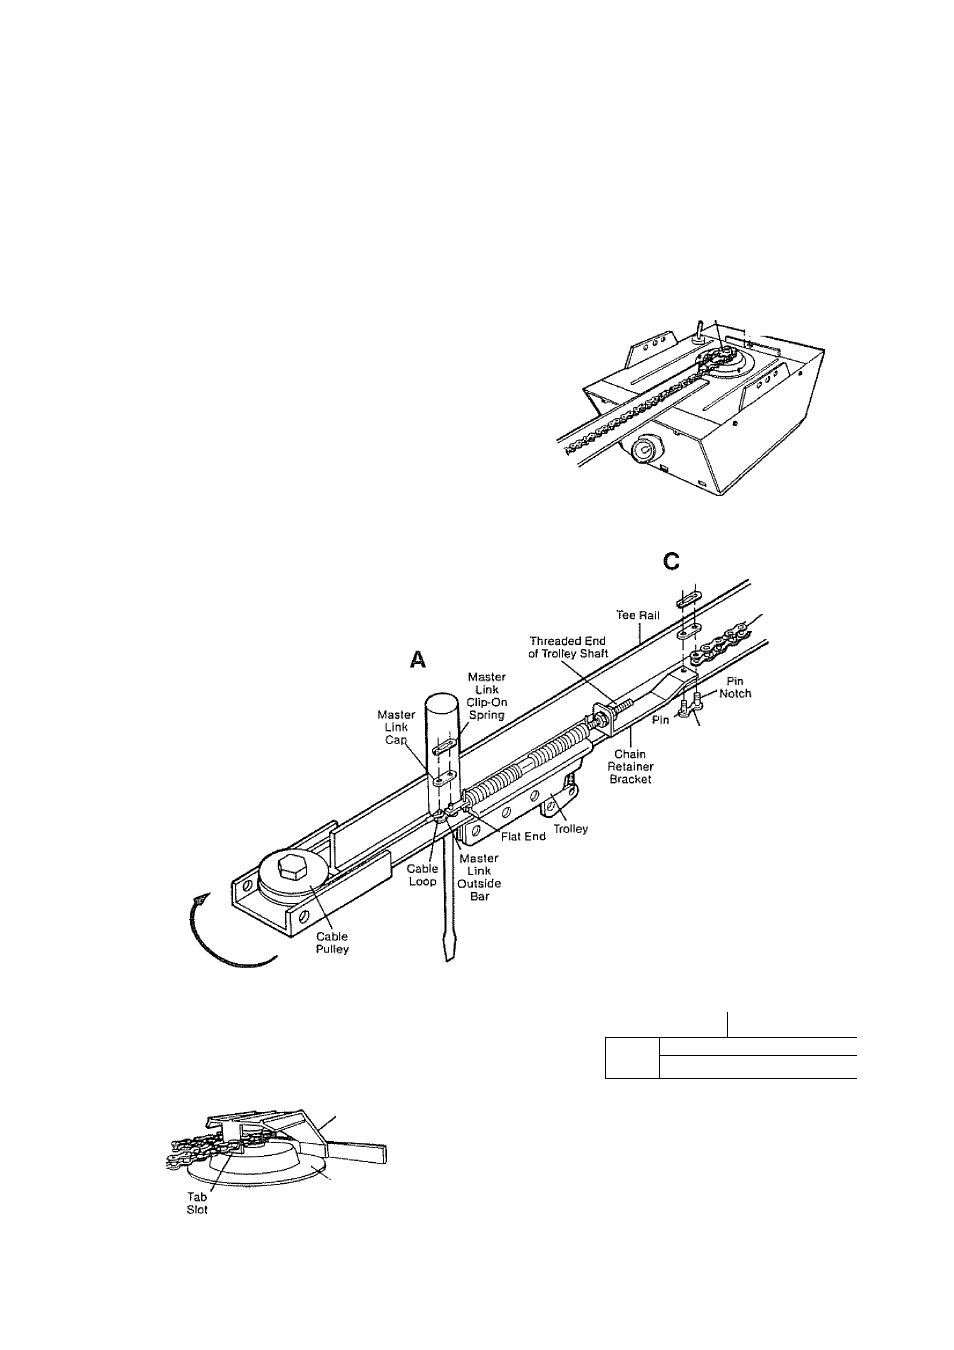
Detach cable from side of carton and fasten to trolley
with a master link from coin envelope.
MASTER LINK PROCEDURE: Push pins of master
link bar through loop of cable and hole in flat end of
trolley shaft (A) Push cap over pins and onto notches.
Slide dip-on spring over cap and onto pin notches
until both pins are locked in place.
Caution: Keep chain taut while installing to help
prevent kinking.
With trolley against the screwdriver, dispense cable
around pulley Proceed back around opener sprocket
fB) - be sure sprocket teeth engage chain-and fonward
to chain retainer bracket (C).
Use second master link to connect chain to retainer
bracket Check to make sure chain is not twisted.
o
install Chain and Cable
in This Direction
Opener Chassis /
Sprocket ^
Chain
Master
Link
Outside
Bar
Install Chain and Cable
in This Direction
Trolley
As a permanent trolley stop, insert 5/16" washered
screw and nut into remaining hole in Tee rail front.
Tighten securely REMOVE SCREWDRIVER.
^ Screw and Nut
o
y Ì
O
.........
q
J
Sprocket
Cover
Remove
Screwdriver
Mounting
Plate
Attach sprocket cover to chassis as shown. Insert
back tab in chassis slot Then bend cover forward and
insert front tab in slot provided on mounting plate