Installation step 4, Ste p s, Hang opener chassis – Craftsman 139.53403 User Manual
Page 12: Attach emergency release rope & handle
Attention! The text in this document has been recognized automatically. To view the original document, you can use the "Original mode".
Installation
STEP 4
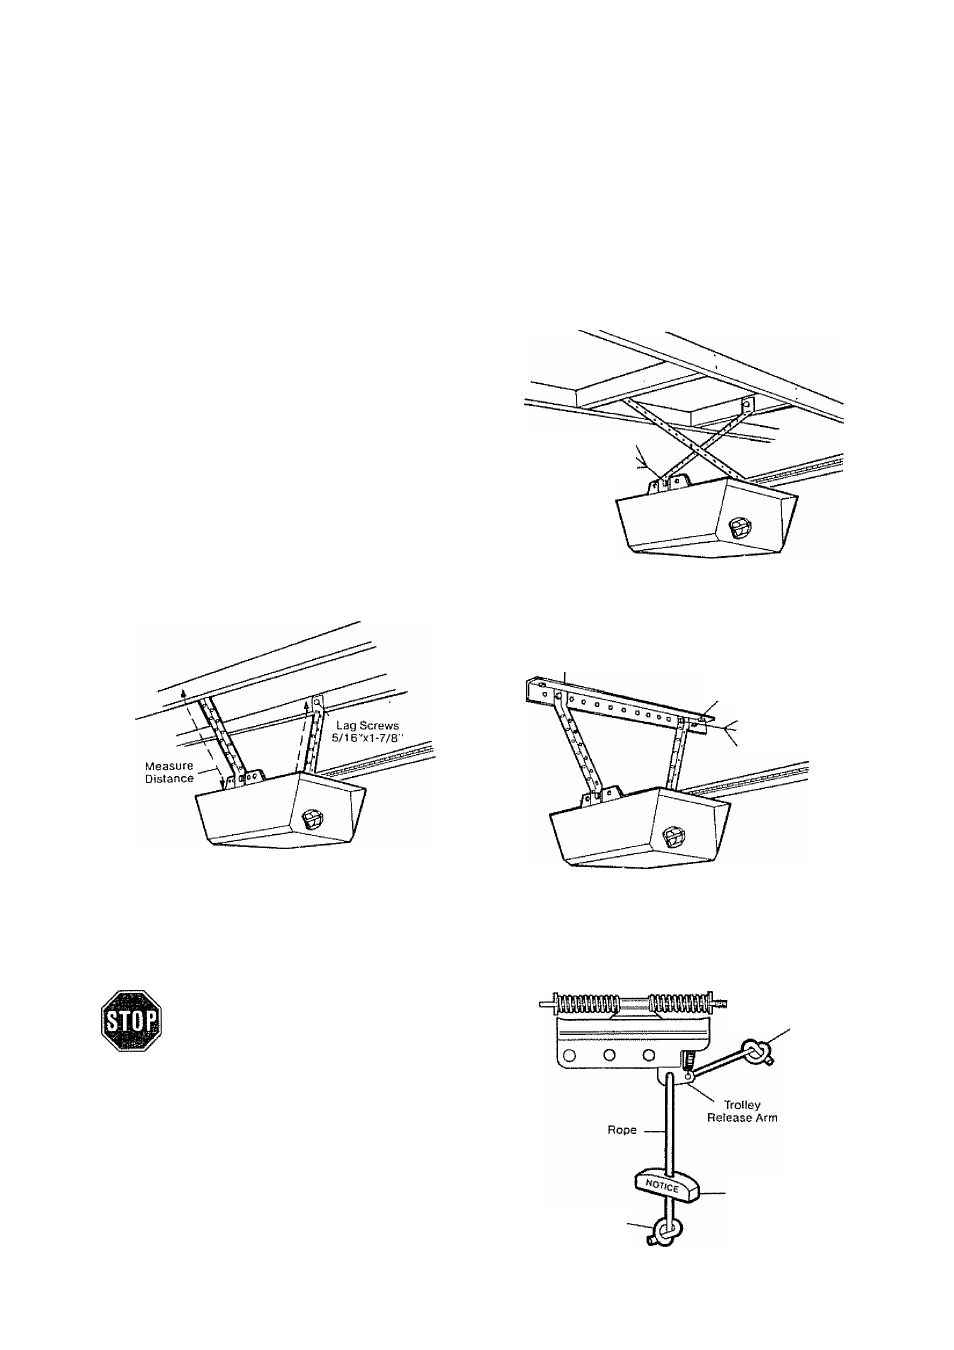
Hang Opener Chassis
THE OPENER CHASSIS MUST BE SECURELY FASTENED TO A ST/?yCTi/ffi4L SUPPORTOF GARAGE.
Three representative installations are shown„ Yours may be different. Hanging brackets should be angled
(Fig. 1) or crossed (Fig. 2) to provide rigid support. On finished ceilings (Fig. 3). attach a sturdy metal bracket
(not supplied) to ceiling joists before installing opener.
PROCEDURE: On EACH side of opener measure the
distance from chassis to structural support..
Cut both pieces of the hanging bracket to required
lengths. Flatten one end of each bracket and bend or
twist to fit fastening angles. Do not bend at bracket
holes. Drill 3/16" pilot holes in structural support
Attach flattened ends of brackets to the support with
5/16"x1-7/8" lag screws,,
Lift opener and fasten to hanging bracket as shown
Checkto make sure Tee rati is centered over door.
REMOVE 2x4. Operate door manually. If door hits
the rail, raise header bracket.
Grease top and underside of rail surface on which
trolley slides. A tube of grease is supplied.
FIGURE 1
FIGURE 2
5/16 "-18x7/6" Screw,
5/16" Lock Washer,
S/16"-18 Nut
Bracket
(Not Supplied)
FIGURE 3
FINISHED CEILING
Lag Screws
5/16"x1-7/8"
(Not Suppited)
5/16''-18x7/0" Screw
5/16" Lock Washer
5/16"-18 Nut
STE P S
Attach Emergency Release Rope & Handle
USE EMERGENCY RELEASE ONLY TO
DISENGAGE TROLLEY. DO NOT USE
ROPE AND HANDLE TO PULL DOOR
OPEN OR CLOSED.
PROCEDURE: Thread one end of rope through hole
in top of red handle so'NOTICE' reads right side up as
shown Secure with an overhand knot NOTE: Knot
should be at least 1 inch from end of rope to pre
vent slipping. Thread other end of rope through hole
in release arm of outer trolley Adjust rope length so
that handie is 6 feet above the floor. Secure with an
overhand knot as above.
NOTE: If it is necessary to cut rope, heat seal cut
end with a match or lighter to prevent fraying and/
or raveling.
Overhand
Knot
Overhand
Knot
Emergency
Release Handle
12