Maintenance – Craftsman 132.24607 User Manual
Page 16
Attention! The text in this document has been recognized automatically. To view the original document, you can use the "Original mode".
MAINTENANCE
CUSTOMER RESPONSIBILITIES
• Read and follow the maintenance schedule and the maintenance procedures listed in this
section.
MAINTENANCE SCHEDULE
Fill in dates as you complete
regular service
SetVice Dates
Checkfor loose fasteners
X
Clean Exterior
X
Empty Water Tank
X
Clean Basket Filter
X
Condition Water Tank
X
Replace Air/Water Filters
X
EMPTYING WATER TANK
•
Place container under drain valve, or
have tractor on surface where water can
be drained to.
•
Remove drain plug by turning counter-
ciockwise.
•
Loosen fill cap.
•
Allow tank to drain completely.
•
Replace drain plug and hand tighten
turning clockwise.
CLEANING BASKET FILTER
•
Remove fill cap and remove basket filter.
•
Rinse debris from filter with running
water.
•
Replace basket filter and fill cap.
CONDITIONING WATER TANK
Conditioning the water tank ensures that the
cooling system wili operate at optimal levels
throughout the life of the system. It is sug
gested that the tank be conditioned at an inter
val of every 4th filling or once a month; which
ever comes first.
•
Completely drain water tank. (See Emp
tying Water Tank)
•
Fill tank with DRINKING WATER. Be
sure to always fill tank with basket filter in
place.
•
Add 5 drops of household bleach to wa
ter tank.
•
Replace cap and hand tighten.
•
Run system for 5 minutes with increased
water flow.
•
The system is conditioned and ready for
operation.
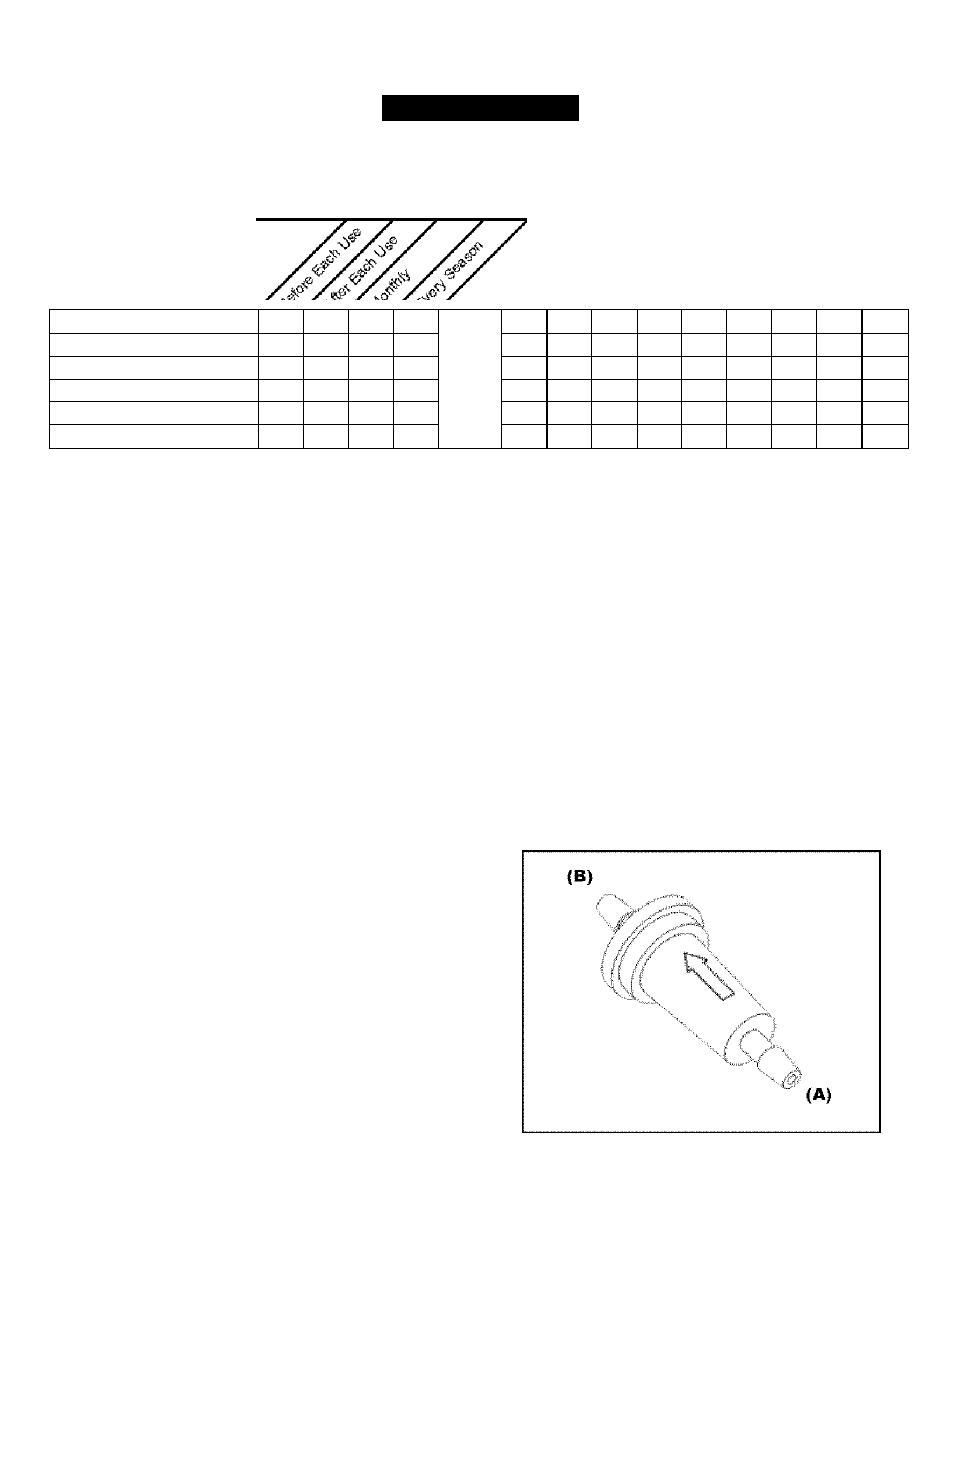
REPLACING FILTERS
The filters have been designed to provide
optimal system performance by catching any
debris that may enter the supply lines through
out use. Annual replacement of both the air
and water inline filters ensures the life of your
system.
•
Open tractor hood and locate the inline
filters on the water (blue) supply line.
•
Cut water (blue) supply line at each end
of filter body.
•
Dispose of filter.
•
Remove filter from package and orient
directional arrow so that the flow direction
is towards the misting assembly.
Push supply line from power unit over
filter barb near base of arrow (A) until
seated against filter body.
Push supply line from misting nozzle over
filter barb at arrowhead (B) until seated
against filter body.
Repeat steps for air (black) supply lines.
16