Brush replacement, Accessories, Maintenance – Craftsman 315.279840 User Manual
Page 13
Attention! The text in this document has been recognized automatically. To view the original document, you can use the "Original mode".
MAINTENANCE
BRUSH REPLACEMENT
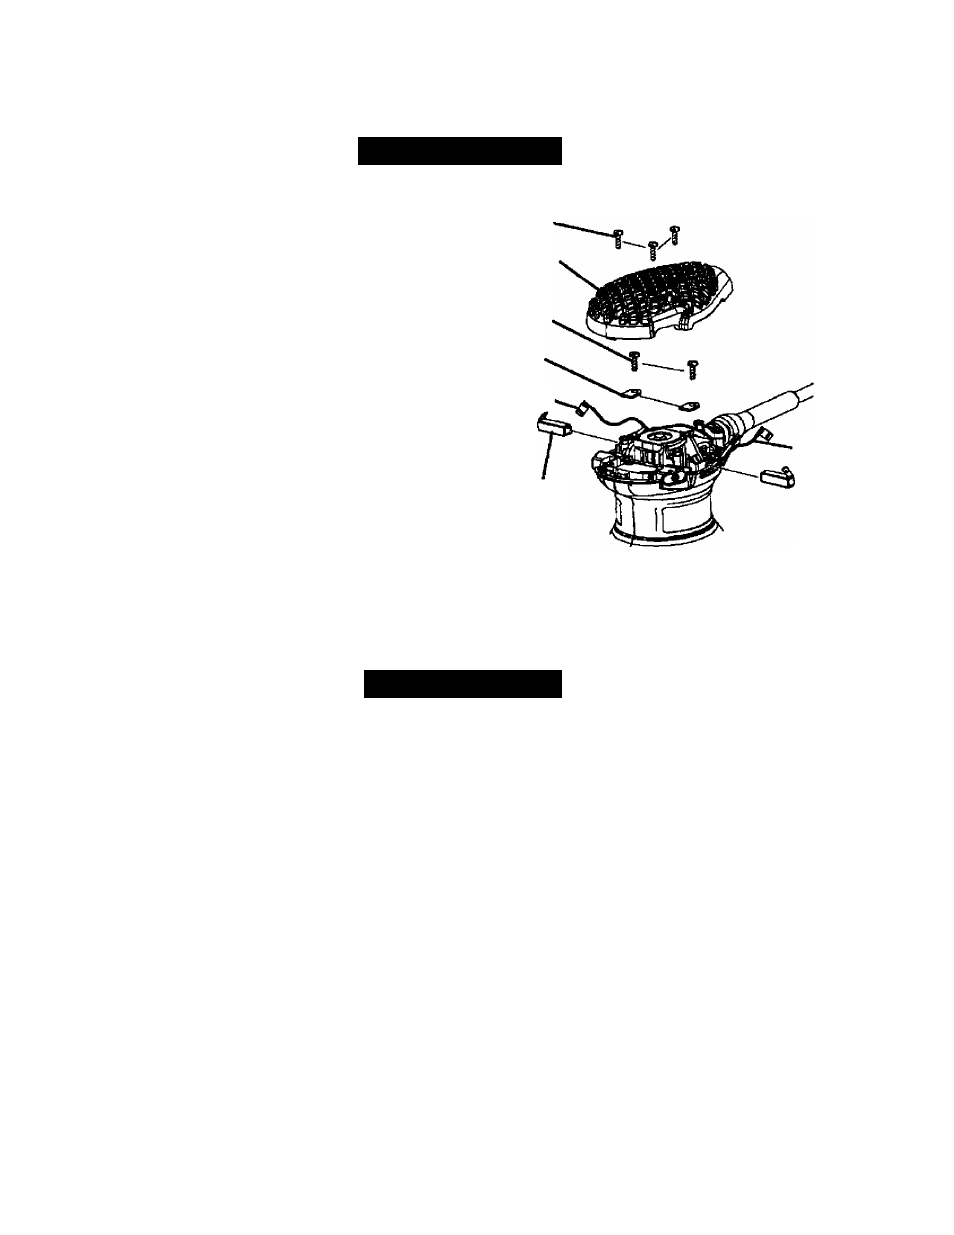
See Figure 10.
■ Unplug the sender.
■ Remove screws (3) from top cover of sender.
■ Remove top cover.
■ Remove clamp screws (2}.
■ Remove brush tube clamps (2).
■ Disconnect red and black lead terminals from brush
tubes.
■ Remove brush assemblies (2).
■ Check for wear. Replace both brush assemblies when
either has less than 1M in. length of carbon remaining.
Do not replace one side without replacing the other.
■ Install new brush assemblies. Make sure curvature
of brush matches curvature of motor and that brush
moves freely in brush tube.
■ Reassemble by reversing the steps listed above.
■ Tighten ail screws securely. Do not overtighten.
SCREWS
TOP
COVER
CLAMP
SCREWS
BRUSH
TUBE
CLAMPS
№D LEAD
BRUSH
ASSEMBLY
BLACK
LEAD
Fig. Ì0
ACCESSORIES
The following recommended accessories are currently available at Sears retail stores;
■ Aluminum Oxide Sheets With Paper Backing (1/4 Sheet)
X-Fine, Fine, Medium, Coarse
■ Pressure-sensitive Adhesive, Paper Backed Sheets (1/4 Sheet)
X-Fine, Fine, Medium, Coarse
■ The Following Standard 4-1/2 in. X11 in. Sanding Sheets Can Be Cut To Fit The Sander
X-Fine, Fine, Medium, Coarse
▲
WARNING:
Current attachments and accessories available for use with this toot are listed above. Do not use any
attachments or accessories not recommended by the manufacturer of this tool. The use of attachments or acces
sories not recommended can result In serious personal injury.
13