Assembly step 2, Assembly step 3, Instai! the trolley on the t-rau – Craftsman 139.53664SRT2 User Manual
Page 9: Fasten the t-rau to the opener
Attention! The text in this document has been recognized automatically. To view the original document, you can use the "Original mode".
Assembly Step 2
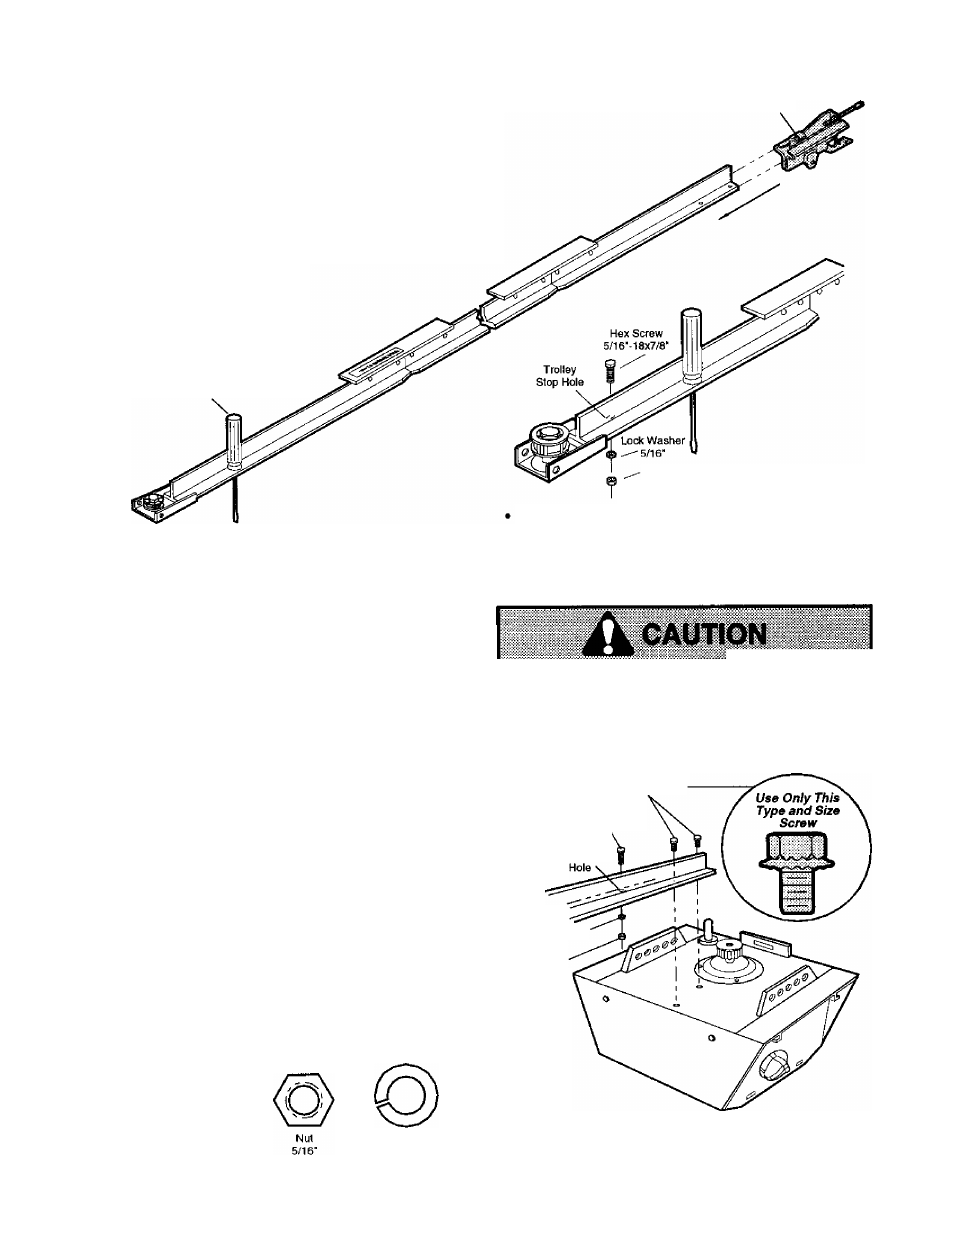
Instai! the Trolley on the T-raU
Trolley
• As a temporary stop, insert a screwdriver into the
hole in the front end of the T-rail.
• Slide the trolley assembly along the rail to the
screwdriver stop.
If trolley hits against any nuts on the T-raU, the
bolts and nuts were attached from the wrong
side and must be repositioned. Review Step 1.
Temporary Stop
Screwdriver
Nut
5/16"-18
Insert a 5/16"-18x7/8" hex screw into the trolley
stop hole in the T-rail as shown. Tighten securely
with a 5/16" lock washer and nut. This screw limits
trolley travel in the DOWN direction.
Assembly Step 3
Fasten the T-raU to the Opener
• Place the opener on packing material to protect
the cover. For convenience, put a support under
the belt pulley bracket.
• Remove the (2) 5/16“-18x1/2" washered screws
mounted in the top of the opener.
• Align the holes in the back section of the T-rail with
the holes in the opener.
• Fasten the rail with the (2) washered screws
previously removed. Tighten securely.
Remember to use only these screws! tKxvi
other
screws will cause serious damage to the opener.
• Insert a 5/16"-18x7/8" hex screw into the cover
protection bolt hole in the T-rail as shown. Tighten
securely with a 5/16" lock washer and nut.
NOTE: This screw prevents trolley over-travel.
Keep a 2” minimum between the troiiey and this
screw when adjusting travei limits (see page 28).
Hardware Shown Actual Size
To fasten rail, use only those screws mounted
in the top of the opener. Any other screws wiii
cause serious damage to the opener.
Washered Screw
S/16"-18x1/2'
Hex Screw
5/16'-18x7/8'
Cover
Protection
Bolt
T-rail
{Back Section)
Lock Washer
5/16"
Nut
S/16’-18
Hex Screw
5/16'-18x7/8"
Lock Washer
5/16"