Assembly, Tools required for assembly, Removal of parts from cartons – Craftsman 486.24504 User Manual
Page 9: Assembling the vac system
Attention! The text in this document has been recognized automatically. To view the original document, you can use the "Original mode".
ASSEMBLY
This unit is shipped WITHOUT GASOLINE or OIL. After
assembly, see separate engine manual for proper fuel
and engine oil recommendations.
TOOLS REQUIRED FOR ASSEMBLY
(1} Screwdriver
(1) Pliers
(1} 3/8" Wrench
(2) 7/16" Wrenches
(2) 1/2" Wrenches
(2) 9/16" Wrenches
(1} 3/4" Wrench - (2) if hitch plate in fig. 21 is used
REMOVAL OF PARTS FROM CARTONS
• Remove the hardware packs and ail loose parts from
the cartons.
• Lay out and identify parts shown in carton contents.
• Lay out and identify parts in the hardware packs.
Keep contents of each hardware package separate
for easier assembly.
ASSEMBLING THE VAC SYSTEM
• Place cart body halves upright on a smooth level
surface such as a garage floor or a paved driveway.
See figure 1.
A
CAUTION: Do not
leave the cart unattended in
upright position during assembly. A failing cart
can cause personal injury! Pay close attention
to the stability of the cart while it remains in an
upright position. For best stability, assemble on
a smooth level surface.
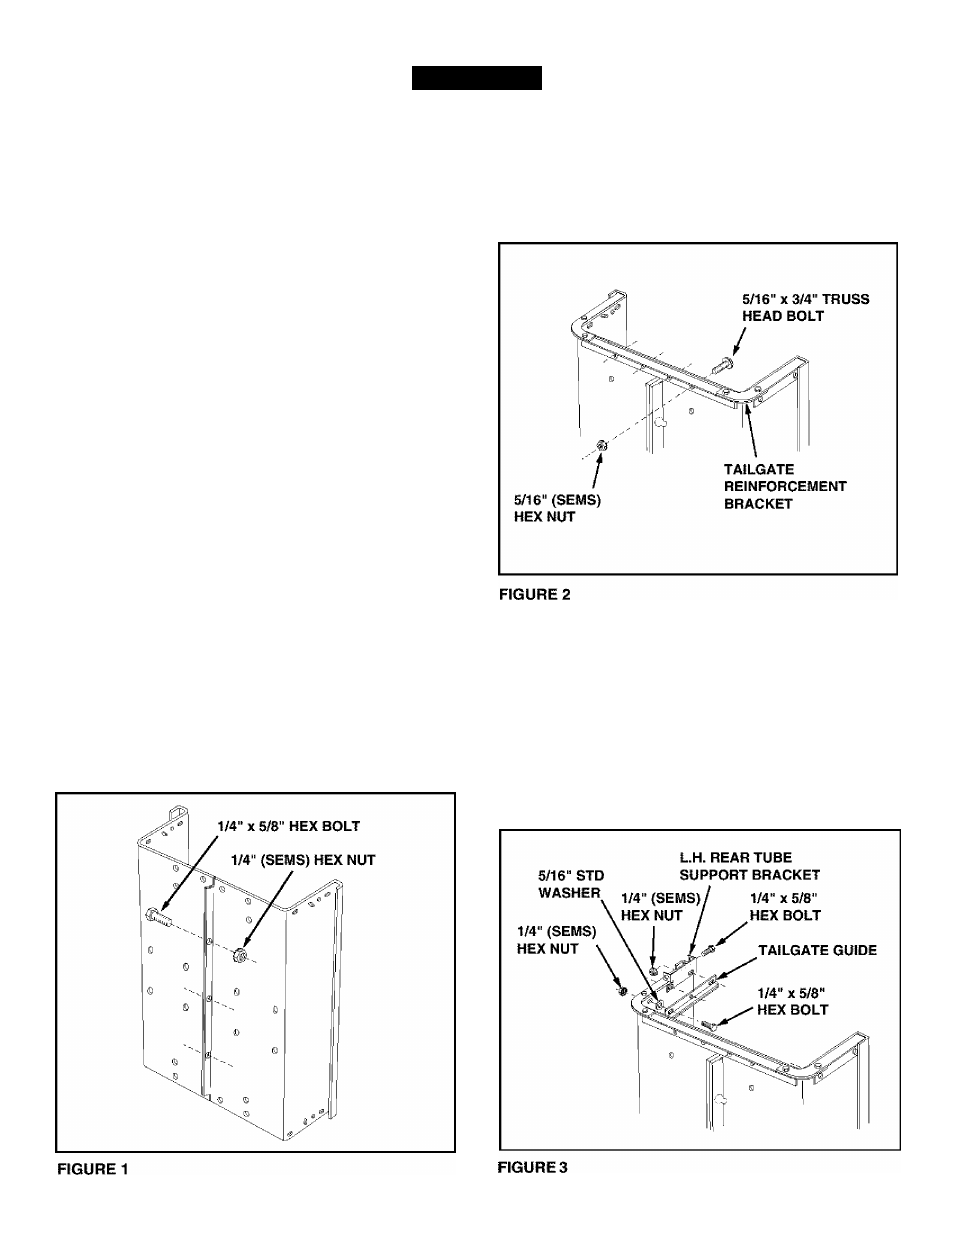
• Assemble cart body halves together using three 1/4"
X
5/8" hex bolts and 1/4" (SEMS) hex nuts as shown
in figure
1. Do not tighten yet.
Fit the tailgate reinforcement bracket around the end
of the cart body.
Fasten the tailgate reinforcement bracket to the
bottom of the cart body using four 5/16" x 3/4" truss
head bolts and 5/16" (SEMS) hex nuts as shown in
figure 2.
Do not tighten yet.
Assemble the L.H. Rear Tube Support Bracket to the
top flange of the cart using a 1/4" x 5/8" hex bolt and
1/4" SEMS hex nut.
Do not tighten yet.
See figure 3.
Fasten a Tailgate Guide to the Tube Support Bracket
and the side of the cart using three 1/4" x 5/8" hex
bolts, a 5/16" washer and three 1/4" SEMS hex nuts.
Place the washer on the bottom hole between the
Tailgate Guide and the side of the cart.
Do not
tighten yet.
See figure 3.
Repeat for other side of cart.