Craftsman 486.24504 User Manual
Page 11
Attention! The text in this document has been recognized automatically. To view the original document, you can use the "Original mode".
Assemble a spacer tube onto each end of the axle as
shown in figure 7.
Assemble a 1" flat washer, a wheel (valve stem
facing out), and another 1'' fiat washer onto the axle
as shown in figure 7. Secure the wheel with a 1/8" x
1-1/2" cotter pin, spreading the ends so that a hub
cap will fit over the pin. Assemble the hub cap by
pressing it onto the flat washer. Repeat on other end
of axle.
SPACER TUBE
WHEEL
1" FLAT
WASHER
HUB CAP
1/8"
X
1-1/2"
COTTER PIN
FIGURE 7
• Flip the cart over so that it rests on its wheels.
• Assemble the front tongue on top of the rear tongue
using three 3/8" x 3" hex bolts, 3/8" lock washers and
3/8" hex lock nuts. See figure 8.
HINT:
For easier assembly, support the rear tongue with
a block of wood.
• Assemble the hitch pin to the hitch bracket and
tongue, securing it with the 1/8" hair cotter pin. See
figure 8.
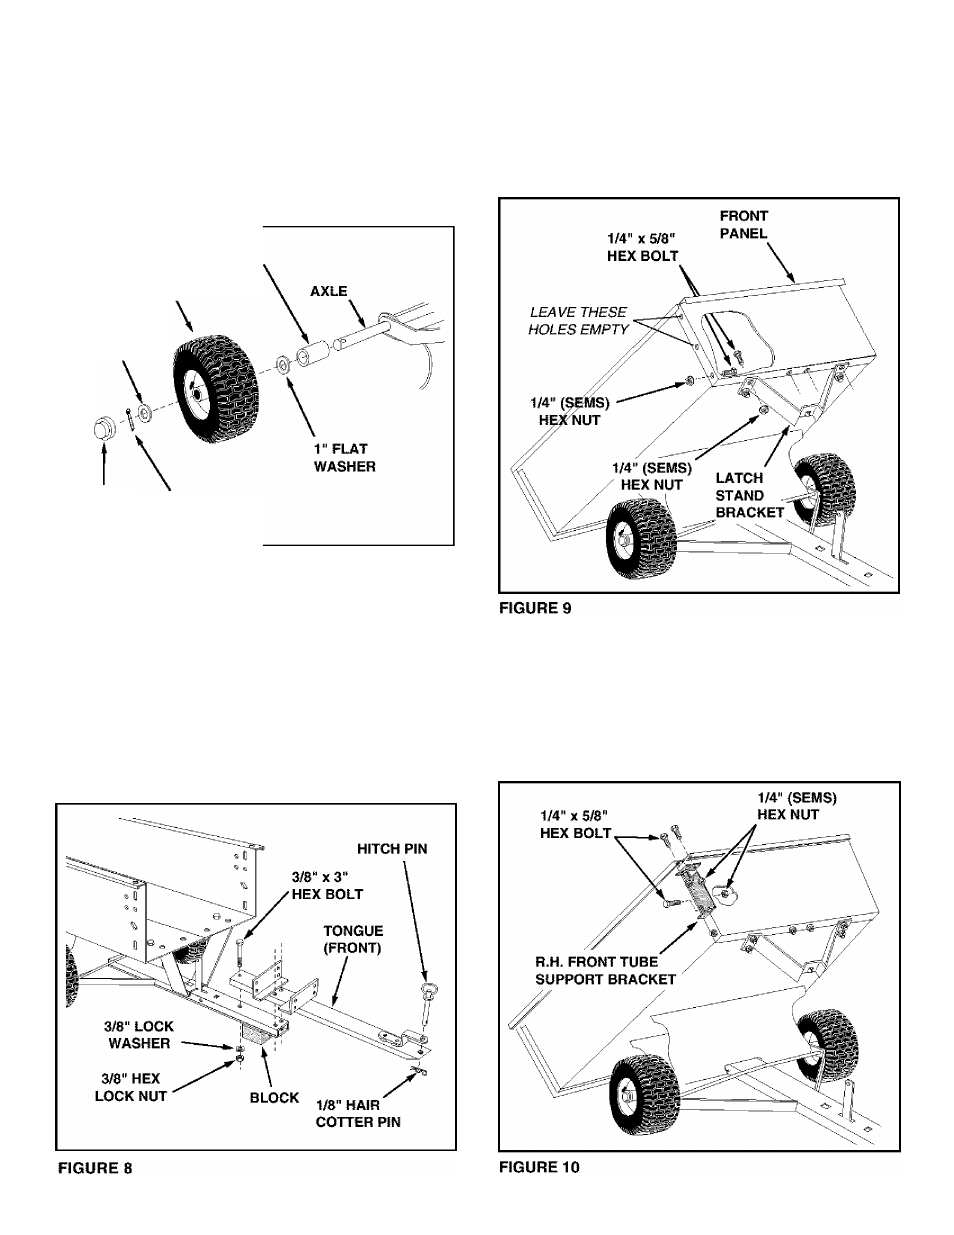
Release the latch lock lever and tilt the cart bed
back. See figure 9.
Assemble the front panel to the cart, sliding the
bottom lip of the panel between the cart and the latch
stand bracket. Secure with six 1 /4" x 5/8" hex bolts
and 1/4" SEMS hex nuts. Leave the upper holes on
the sides empty.
Do not tighten yet.
See figure 9.
Place the R.H. Front Tube Support Bracket under the
top flanges of the cart, as shown in figure 10. Fasten
the bracket to the cart using three 1/4" x 5/8" hex
bolts and 1/4" SEMS hex nuts.
Do not tighten yet.
Repeat for the L.H. Front Tube Support Bracket.
Tighten
ail loose bolts and nuts.
11