Uniformity adjustment, Using on-screen menus, Color temperature fine adjustment – Sony GDM-2000TC User Manual
Page 10
Attention! The text in this document has been recognized automatically. To view the original document, you can use the "Original mode".
Using on-screen menus
COLOR TEMPERATURE FINE Adjustment
This feature allows you to finely adjust the white on the
screen.
Press MENU while pressing ENTER in the COLOR
TEMPERATURE menu. The message below appears:
RL: 0
GL: 0
BL: 0
RH; 0
GH:0
BH: 0
RL, GL and BL adjust the dark white (gray) part of the
screen; RH, GH, and BH adjust the bright white part in the
screen. Set the values of the items from a min. of -128 to a
max. of +127 by pressing the ADJUST +/- buttons. Press +
repeatedly to increase the value, and press - to decrease the
value.
Items with any value other than 0 show that the white point
is out of the standard color temperature curve by the given
value. The (STD) indicator by the color temperature
indicators disappears.
If the limit value is reached when setting, the operation
stops. Further adjustments to the color configuration may
not be possible even if the values change. The limit value
varies, depending on the color temperature item.
When actually adjusting. Because adjustment of the gray
part and the white part effect each other a little, you may
need to readjust the RL, GL, BL, RH, GH and BH items,
until you get the desired color configuration for both the
gray and white parts.
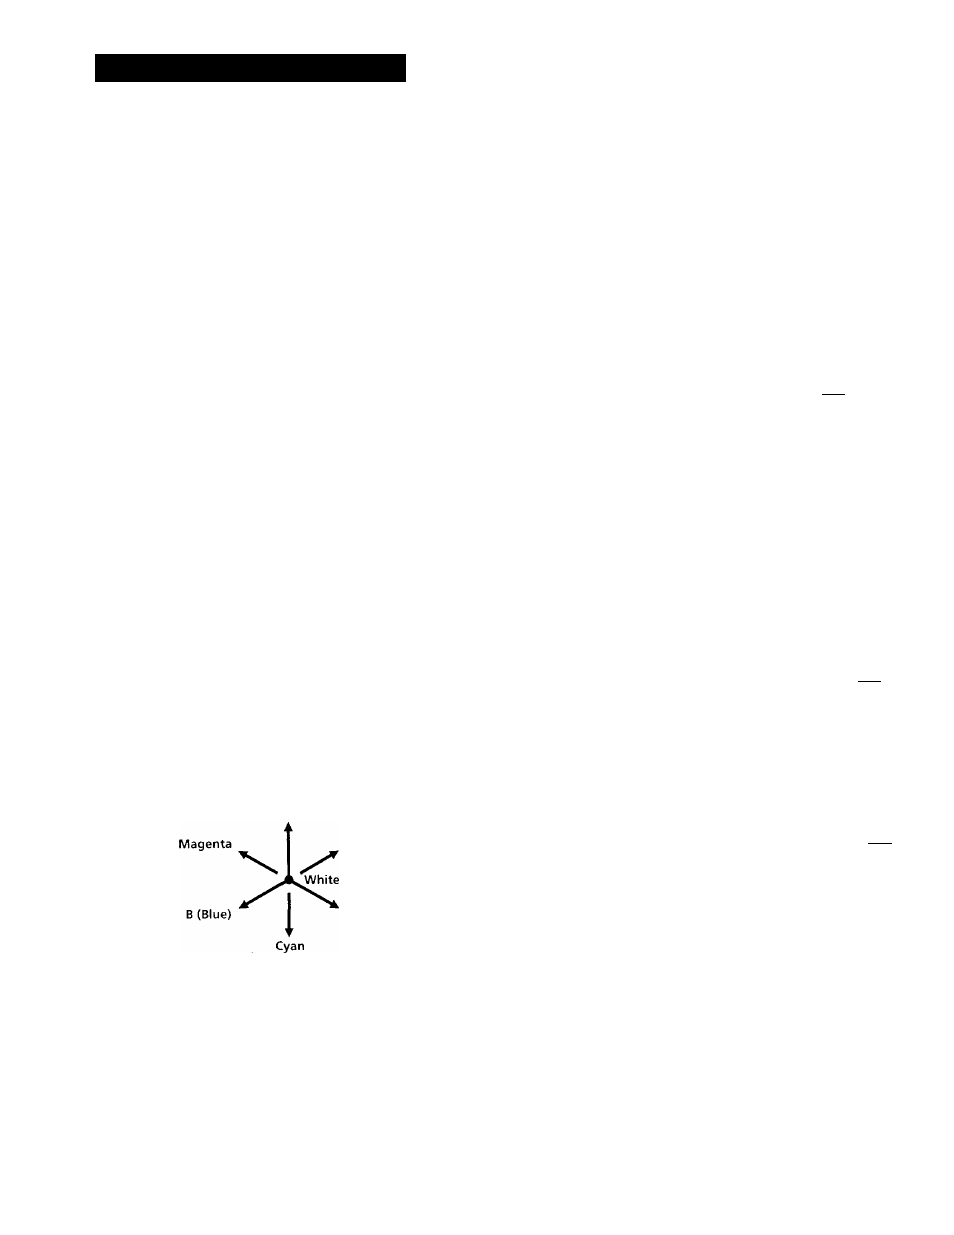
The chart below presents the RGB configuration.
R(Red)
Yellow
G (Green)
You can easily change a color function by increasing or
decreasing the color function values.
For example:
You can increase the R (Red) function by increasing R.
You can increase the yellow function by increasing R or G,
or by decreasing the B. Decreasing B makes the yellow
darker than the increasing R or G. Similar results occur for
magenta and cyan by adjusting the corresponding color
functions.
Uniformity adjustment
You can correct the non-uniformity of the color or the
luminance by using this feature.
Before proceeding, connect the RGB sensor to the PROBE
connector on the right side of the stand, and demagnetize
the screen with the DEGAUSS feature explained on page 9.
1 Select UNIFORMITY ADJUSTMENT in the main
menu.
The search miessage appears.
1. Place Sensor in
UPPER LEFT CORNER.
2. Click an(j hold
fxit
T
menu
I
Put
the
RGB
sensor
on
the
upper
left
corner
of
the screen and click it.
The search message appears.
1. Place Sensor tn
LOWER RIGHT CORNER
2. Click and hold
fxit
T
menu
I
Put
the
sensor
on
the
lower
right
corner
of
the
screen and click it.
The message below appears.
SENSOR CALIBRATION
1. Place Sensor over
Black Sguare
2. Click and hold
FXITIMENUI
CD
10