Replacing lights, Replacing the front led board – Dell XPS 625 (Early 2009) User Manual
Page 29
Back to Contents Page
Replacing Lights
Dell™ XPS™ 625 Service Manual
Replacing the Front LED Board
1.
Follow the procedures in
Before You Begin
.
2.
Remove the computer cover (see
Replacing the Computer Cover
).
3.
Remove the drive panel (see
Replacing the Drive Panel
).
4.
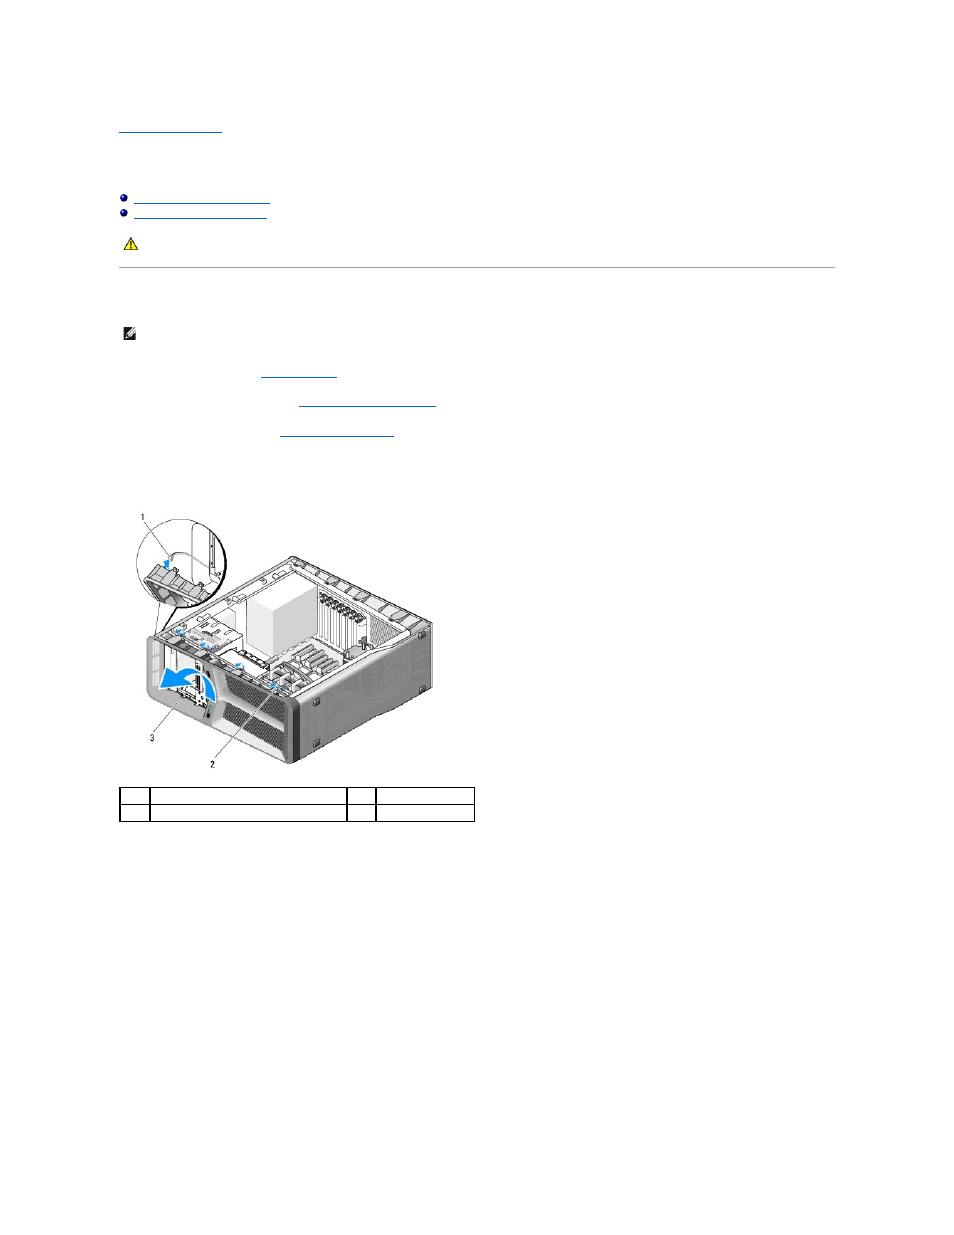
Release the four tabs that secure the front panel to the chassis.
5.
Carefully, pivot the front panel away from the computer to release it from the chassis.
6.
Disconnect the FRONT_LED cable from the front panel to remove the front panel along with the front panel light board.
7.
To replace the front LED board, align the securing tabs on the front panel with the corresponding slots on the chassis; connect the FRONT_LED cable to
the front panel.
WARNING:
Before working inside your computer, read the safety information that shipped with your computer. For additional safety best
practices information, see the Regulatory Compliance Homepage at www.dell.com/regulatory_compliance.
NOTE:
The front LED board is embedded on the front panel. To replace the front LED board, you must replace the front panel.
1
FRONT_LED cable
2
tabs (4)
3
front panel