Replacing the flexdock – Dell Studio XPS 435 MT (Late 2008) User Manual
Page 15
13.
Replace the computer cover (see
Replacing the Computer Cover
).
14.
Connect your computer and devices to their electrical outlets, and turn them on.
Replacing the FlexDock
1.
Follow the procedures in
Before You Begin
.
2.
Remove the computer cover (see
Replacing the Computer Cover
).
3.
Remove the front panel (see
Replacing the Front Panel
).
4.
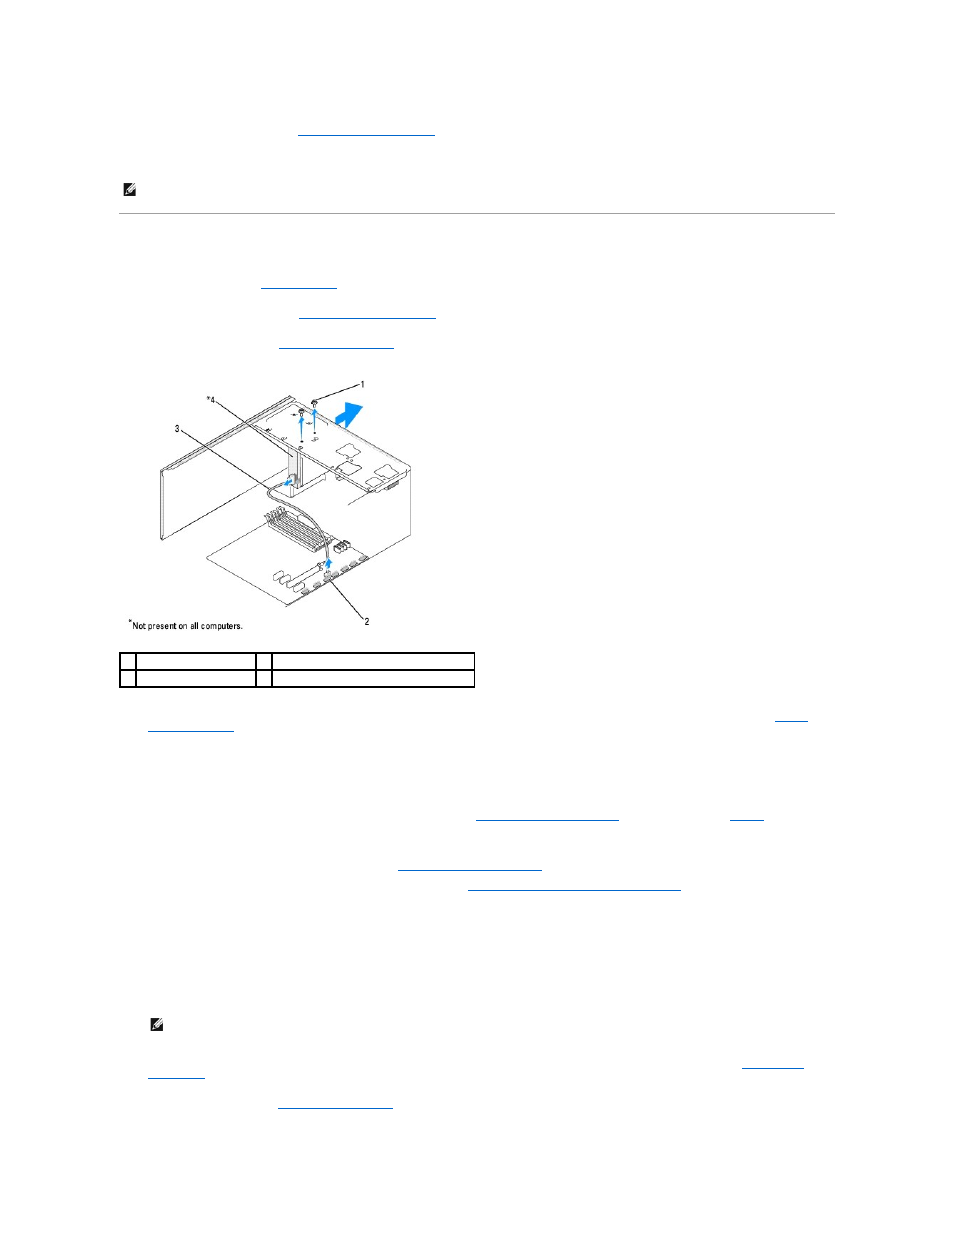
Disconnect the FlexDock USB cable from the back of the FlexDock and from the FlexDock USB connector (F_USB4) on the system board (see
System
Board Components
).
5.
Remove the two screws securing the FlexDock.
6.
Slide the FlexDock out through the front of the computer.
7.
If you are not replacing the FlexDock, replace the drive panel insert (see
Replacing the Drive Panel Insert
) and proceed with step
.
8.
If you are installing a new FlexDock:
a.
Remove the drive panel insert, if applicable (see
Replacing the Drive Panel Insert
b.
Remove the FlexDock break-away metal plate, if applicable (see
Removing the FlexDock Break-Away Metal Plate
c.
Remove the FlexDock from its packaging.
9.
Gently slide the FlexDock into place in the FlexDock slot.
10.
Align the screw holes on the FlexDock with the screw holes on the FlexDock slot.
11.
Replace the two screws that secure the FlexDock.
12.
Connect the FlexDock USB cable to the back of the FlexDock and to the FlexDock USB connector (F_USB4) on the system board (see
System Board
Components
).
13.
Replace the front panel (see
Replacing the Front Panel
).
NOTE:
If you installed a new drive, see the documentation that came with the drive for instructions on installing any software required for drive
operation.
1 custom screws (2)
2 FlexDock USB connector (F_USB4)
3 FlexDock USB cable
4 FlexDock
NOTE:
Ensure that the FlexDock is installed before the FlexDock cable is connected.