Scsi backplane, Removing the scsi backplane, Installing the scsi backplane – Dell PowerEdge 1800 User Manual
Page 6
SCSI Backplane
Removing the SCSI Backplane
1.
Turn off the system, including any attached peripherals, and disconnect the system from the electrical outlet.
2.
Remove the bezel.
3.
Open the system:
a.
Loosen the three thumbscrews on the left-side cover.
b.
Grasp the cover at both ends and slide it toward the front of the system.
c.
Lift the cover away from the system.
4.
If your system is configured as a tower, lay the system on its right side.
5.
Remove the baffle/back fan assembly.
6.
Remove the SCSI hard drives from the drive bays.
7.
Remove the power and interface cables from the SCSI backplane connectors.
8.
Remove the four drive-cage retention screws on the front panel and remove the drive cage.
9.
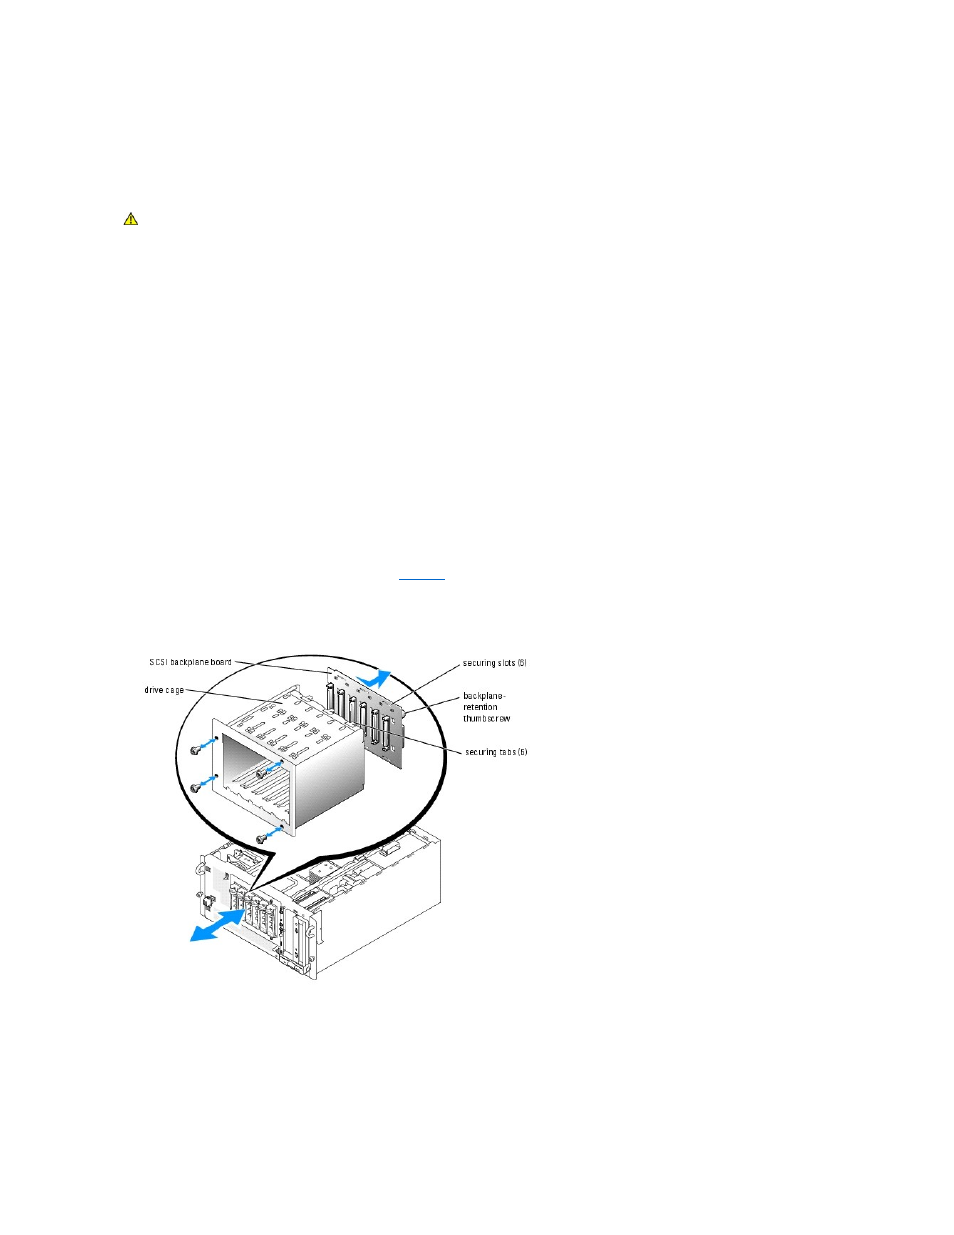
Loosen the SCSI backplane-retention thumbscrew. See
10.
Slide the SCSI backplane to the right and then lift the backplane away from the drive cage.
Figure 1-4. Removing and Installing the SCSI Backplane
Installing the SCSI Backplane
1.
Insert the six securing tabs on the drive cage into the six securing tabs on the SCSI backplane.
2.
Slide the SCSI backplane to the left until it stops.
CAUTION:
Only trained service technicians are authorized to remove the system cover and access any of the components inside the system. See
your Product Information Guide for complete information about safety precautions, working inside the computer, and protecting against
electrostatic discharge.