Control panel, Installing the power distribution board – Dell PowerEdge 1800 User Manual
Page 4
2.
Remove the bezel.
3.
Open the system:
a.
Loosen the three thumbscrews on the left-side cover.
b.
Grasp the cover at both ends and slide it toward the front of the system.
c.
Lift the cover away from the system.
4.
If your system is configured as a tower, lay the system on its right side.
5.
Remove the baffle/back fan assembly.
6.
Remove all power cables from the system board power connectors and from their retainer clips, and the power cables from the SATA hard drives or SCSI
backplane, diskette drive, CD drive, and any other installed drive.
7.
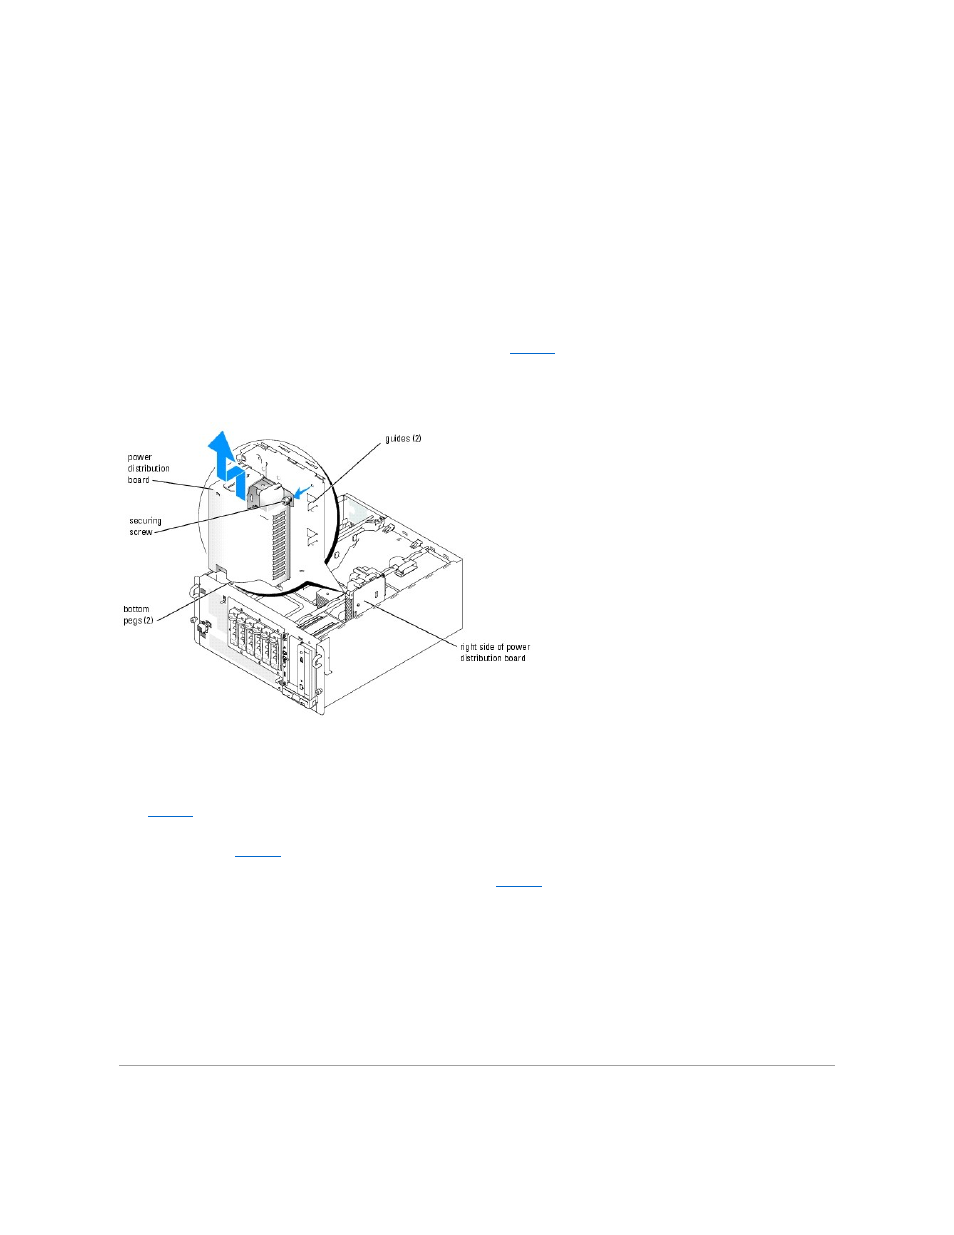
Loosen the screw that secures the power distribution board to the chassis. See
.
8.
Slightly lift up the power distribution board, move it away from the retainers on the chassis wall, and then lift the unit out of the chassis.
Figure 1-2. Removing and Installing the Power Distribution Board
Installing the Power Distribution Board
1.
Align the power distribution board with the two chassis guides so that the right side of the power distribution board is flat against the chassis wall. See
.
2.
Slide the power distribution board slightly down so the two bottom pegs on the power distribution board insert into their securing holes on the bottom
of the chassis. See
.
3.
Tighten the screw to secure the power distribution board to the chassis. See
4.
Reconnect all power cables to the system board power connectors and to their retainer clips, and the power cables from the SATA hard drives or SCSI
backplane, diskette drive, CD drive, and any other installed drive.
5.
Reinstall the baffle/back fan assembly.
6.
If the system is a tower, stand the system upright.
7.
Close the system.
8.
Reinstall the bezel.
Control Panel