Power distribution board, Installing a nonredundant power supply, Removing the power distribution board – Dell PowerEdge 1800 User Manual
Page 3
9.
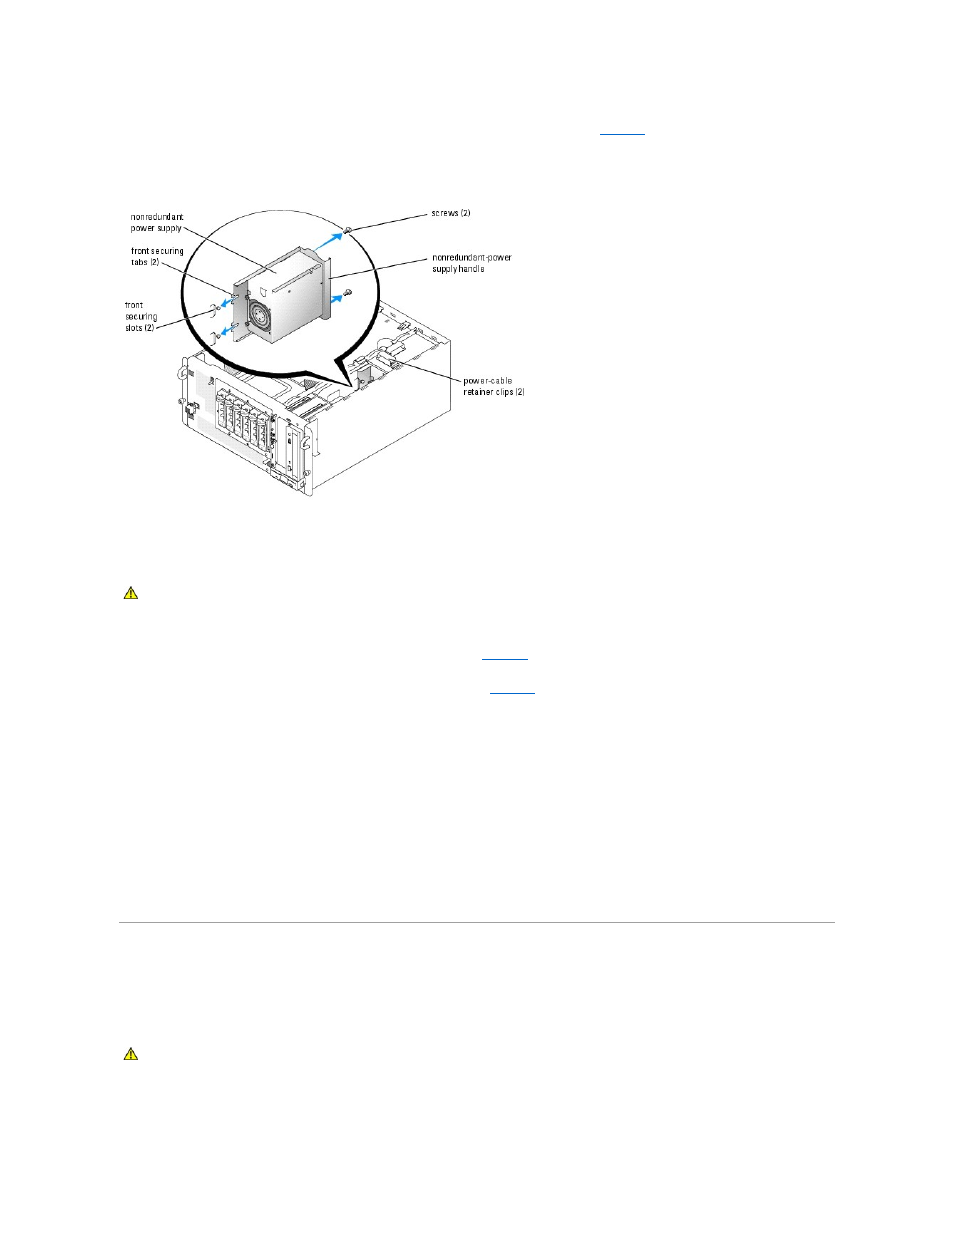
At the back of the system, remove the two screws that secure the power supply to the system. See
.
10.
Use the power supply handle to carefully slide the power supply out of the system.
Figure 1-1. Removing and Installing a Nonredundant Power Supply
Installing a Nonredundant Power Supply
1.
Slide the power supply into the system.
Ensure that the front securing tabs fully insert into the securing slots. See
2.
Install the two screws that secure the power supply to the back panel. See
.
3.
Connect the system-board power cables to the system-board power connectors.
4.
Place the power cables into the power-cable retainer clips and close the clips.
5.
Connect the power cables to the SATA hard drives or SCSI backplane, diskette drive, CD drive, and any other installed drive.
6.
Reinstall the baffle/back fan assembly.
7.
If the system is a tower, stand the system upright.
8.
Close the system.
9.
Reinstall the bezel.
Power Distribution Board
Removing the Power Distribution Board
1.
Turn off the system, including any attached peripherals, and disconnect the system from the electrical outlet.
CAUTION:
When sliding the power supply into the system, ensure that the cables are not between the front securing tabs and the securing slots.
CAUTION:
Only trained service technicians are authorized to remove the system cover and access any of the components inside the system. See
your Product Information Guide for complete information about safety precautions, working inside the computer, and protecting against
electrostatic discharge.