Installation of satellite i/o box (multiple units) – Casio PA-2500 User Manual
Page 8
8
2.5 Installation of Satellite I/O Box (multiple units)
Note that the DIP switch settings should be made according to whether the I/O Box is connected
directly to the PC or daisy-chained to other I/O Boxes.
The following environment setup example assumes a baud rate of 115.2 Kbps has been set.
Environment setup
1) Make sure that the POWER switch is set to OFF.
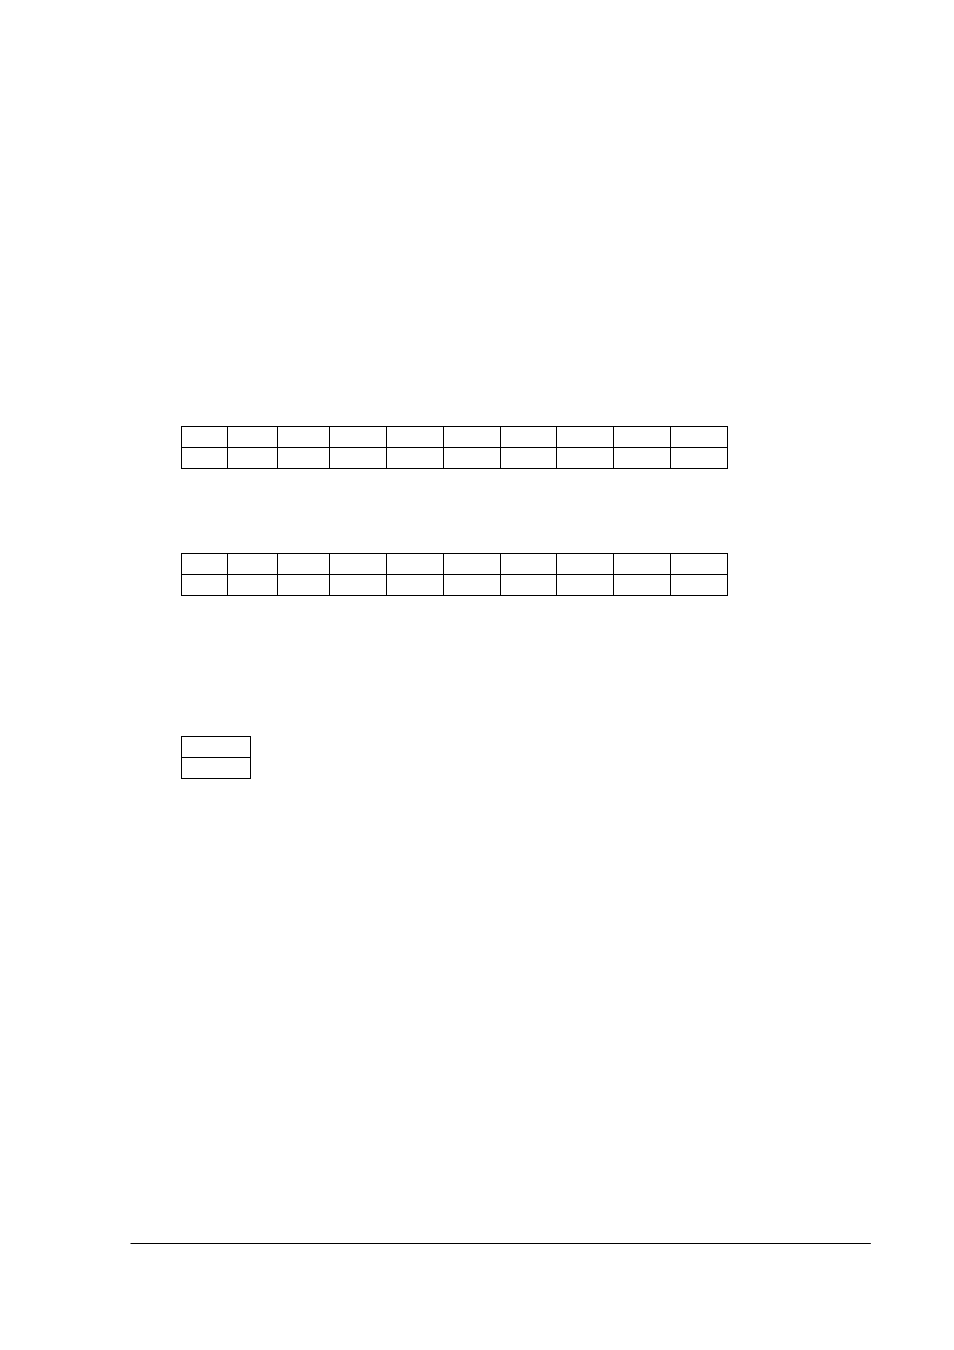
2) Set the DIP switches of the I/O Box to be connected with the PC as follows.
Table 2.3
1
2
3
4
5
6
7
8
9
10
ON
OFF
OFF
OFF
OFF
OFF
ON
ON
ON
ON
3) Set the DIP switches of other I/O Boxes as follows.
Table 2.4
1
2
3
4
5
6
7
8
9
10
ON
OFF
ON
OFF
OFF
OFF
ON
ON
ON
ON
Note:
Set No.5 of the DIP switch to ON if the C-OUT terminal is not chained to other I/O Boxes.
A terminator should be connected to it.
Table 2.5
5
ON
Connection
1) Connect an AC adaptor to each I/O Box.
2) Connect the I/O Box to the PC with the RS-232C cross-type cable.
3) Connect the C-OUT terminal of the I/O Box, which is connected to the PC, and the C-IN
terminal of the other I/O Box with the RS-422 cable.
4) Chain together the remaining I/O Boxes. The I/O Box attached to the terminator must be at the
end of the chain.
Start-up
1) Set the POWER switches of all the I/O Boxes to ON.