Removing and installing a power supply, Installing the cooling shroud – Dell PowerEdge 2500 User Manual
Page 54
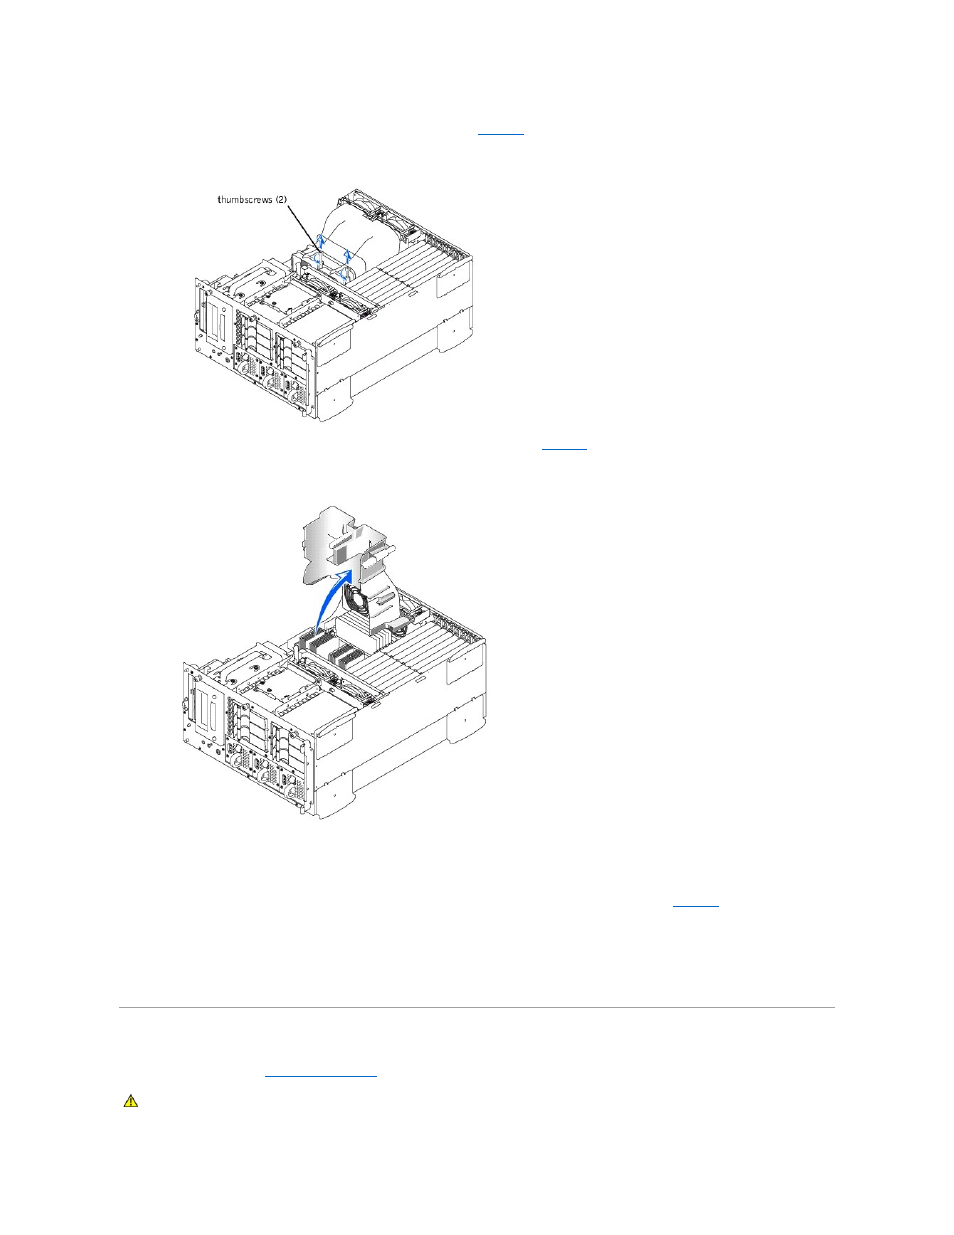
3. Loosen the two thumbscrews securing the cooling shroud to the system (see
).
Figure 6-6. Removing and Installing the Cooling Shroud
4. Rotate the cooling shroud up and lift to clear the rear cooling fan assembly and chassis (see
).
Figure 6-7. Rotating the Cooling Shroud
Installing the Cooling Shroud
1. Lower the cooling shroud into the chassis ensuring that the cooling shroud is aligned with the rear cooling fan assembly guides.
2. Rotate the cooling shroud down ensuring the thumbscrews are aligned with the connecting posts on the system board (see
3. Tighten the two thumbscrews securing the cooling shroud to the system board.
4. Replace the system cover.
5. Close the front bezel.
Removing and Installing a Power Supply
1. Open the front bezel (see "
Removing the Front Bezel
" in "Troubleshooting Your System").
CAUTION:
The power supplies are hot-pluggable. The system requires two power supplies to be installed for the system to operate normally.
The system is in the redundant mode when all three power supplies are installed. Remove and replace only one power supply at a time.