Dell OptiPlex GX1 User Manual
Page 10
Removing and Replacing Parts: Dell OptiPlex GX1 Systems Service Manual
file:///C|/infodev/2013/eDoc/OpGX1/SM/remsff.htm[2/21/2013 11:45:32 AM]
Figure 9).
Hard-Disk Drive
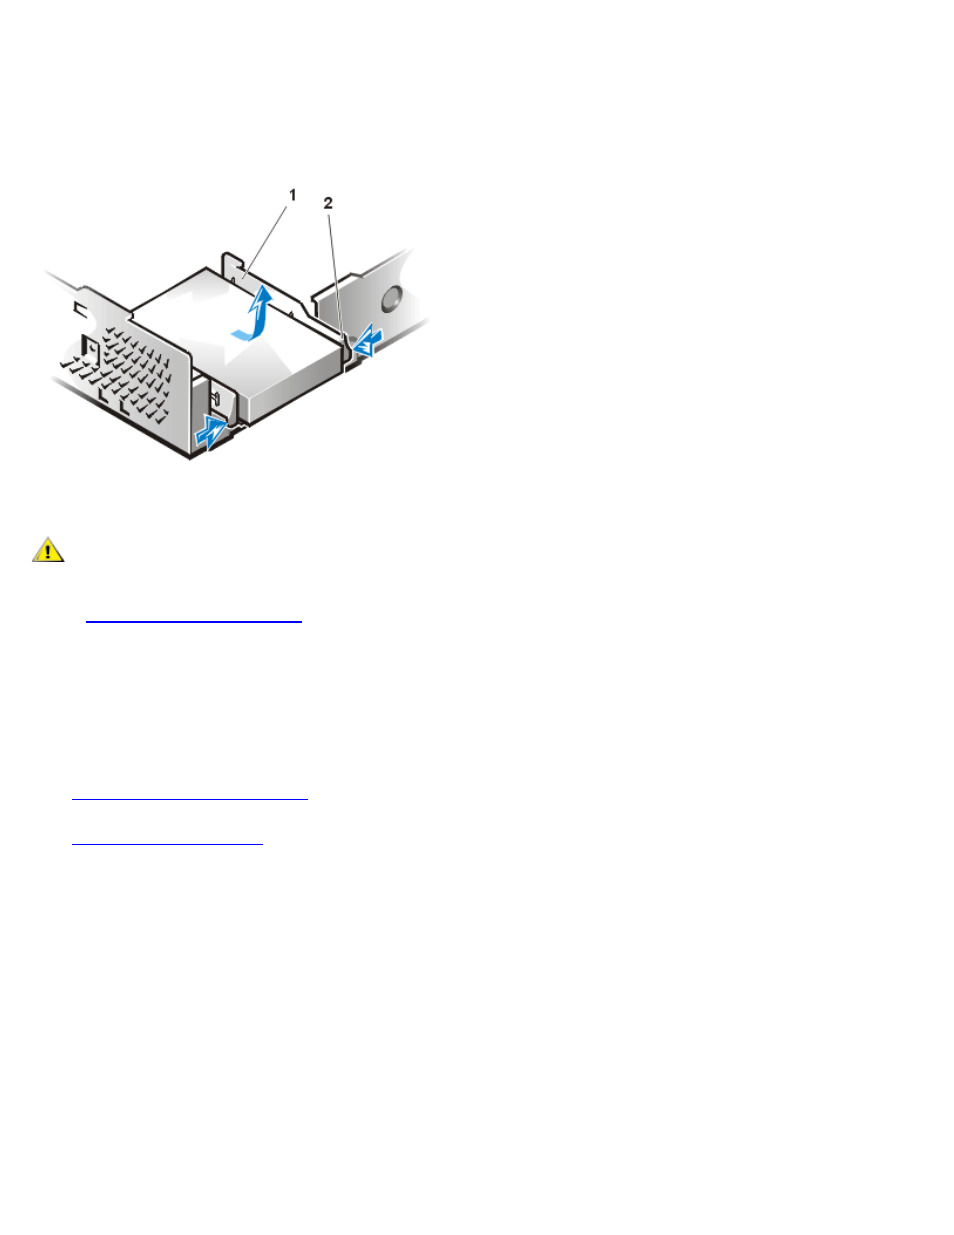
Figure 10. Hard-Disk Drive/Bracket Removal
1 Drive bracket
2 Release tabs (2)
CAUTION: To avoid the possibility of electric shock, turn off the computer and any peripherals,
disconnect them from electrical outlets, and then wait at least 5 seconds before you remove
the computer cover. Also, before you remove a drive, see the other precautions in
"
."
To remove the hard-disk drive and its bracket from the chassis, perform the following steps:
1. If you are replacing a hard-disk drive that contains data you want to keep, make a backup copy of your
files before you continue this procedure.
2.
if not already removed.
3.
.
4. Squeeze the tabs on each side of the hard-disk drive/bracket, and pull the hard-disk drive/bracket
forward about one inch (see Figure 10).
5. Disconnect the power and interface cables from the back of the drive.
6. Lift the hard-disk drive/bracket away from the chassis.
7. Lay the hard-disk drive/bracket on an antistatic surface with its bracket facing up.
8. Remove the four screws securing the hard-disk drive to the bottom of the bracket (see Figure 11).
Figure 11. Drive Bracket Removal