Installing the i/o panel, Removing the processor – Dell Vostro 270s (Late 2012) User Manual
Page 19
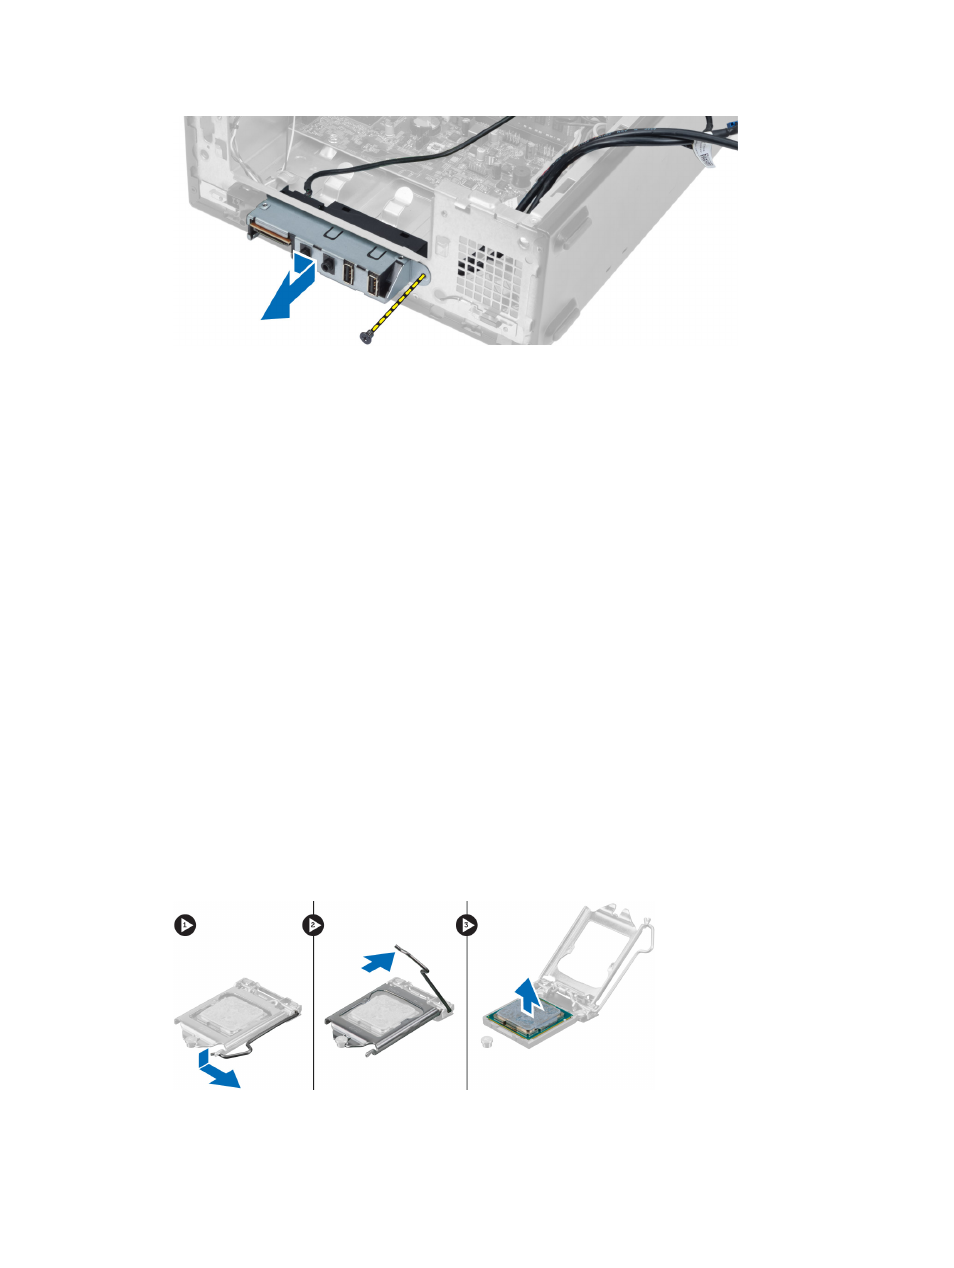
Installing the I/O Panel
1.
Insert the I/O panel into the slot on the front panel.
2.
Slide the I/O panel to align it with the screw holes on the front panel.
3.
Tighten the screw to secure the I/O panel to the front panel.
4.
Route the I/O panel cables through the routing channels on the chassis.
5.
Connect the I/O panel cables to the system board.
6.
Install:
a) expansion card
b) drive cage
c) front bezel
d) fan shroud
e) cover
7.
Follow the procedures in
After Working Inside Your Computer
.
Removing the Processor
1.
Follow the procedures in
Before Working Inside Your Computer
.
2.
Remove:
a) cover
b) fan shroud
c) heat-sink assembly
3.
Press the release lever down and then move it outward to release it from the retention hook. Lift the processor
cover and remove the processor from the socket, and place it in antistatic bag.
19
- Inspiron 530 (2 pages)
- OptiPlex 755 (622 pages)
- OptiPlex 755 (528 pages)
- OptiPlex 755 (82 pages)
- OptiPlex 755 (45 pages)
- OptiPlex 755 (248 pages)
- OptiPlex 760 (76 pages)
- OptiPlex 760 (203 pages)
- OptiPlex 745 (212 pages)
- OptiPlex 745 (360 pages)
- OptiPlex 745 (428 pages)
- OptiPlex 780 (73 pages)
- OptiPlex 780 (40 pages)
- OptiPlex 780 (14 pages)
- OptiPlex 780 (89 pages)
- OptiPlex 780 (10 pages)
- OptiPlex 780 (74 pages)
- OptiPlex 780 (80 pages)
- OptiPlex GX620 (294 pages)
- OptiPlex GX620 (338 pages)
- OptiPlex GX620 (221 pages)
- Inspiron 530 (226 pages)
- OptiPlex 960 (Late 2008) (16 pages)
- OptiPlex GX260 (100 pages)
- OptiPlex GX260 (235 pages)
- OptiPlex FX160 (Late 2008) (20 pages)
- OptiPlex FX160 (Late 2008) (132 pages)
- OptiPlex FX160 (20 pages)
- OptiPlex 210L (128 pages)
- OptiPlex 210L (300 pages)
- OptiPlex 210L (258 pages)
- OptiPlex 210L (150 pages)
- OptiPlex 210L (130 pages)
- OptiPlex 320 (266 pages)
- OptiPlex 320 (356 pages)
- OptiPlex 320 (44 pages)
- OptiPlex 320 (140 pages)
- OptiPlex 320 (132 pages)
- OptiPlex 320 (312 pages)
- OptiPlex GX240 (144 pages)
- OptiPlex GX240 (121 pages)
- OptiPlex GX240 (86 pages)
- OptiPlex GX240 (283 pages)
- OptiPlex GX240 (298 pages)
- OptiPlex GX240 (182 pages)