Front-panel inserts – Dell Precision 620 User Manual
Page 6
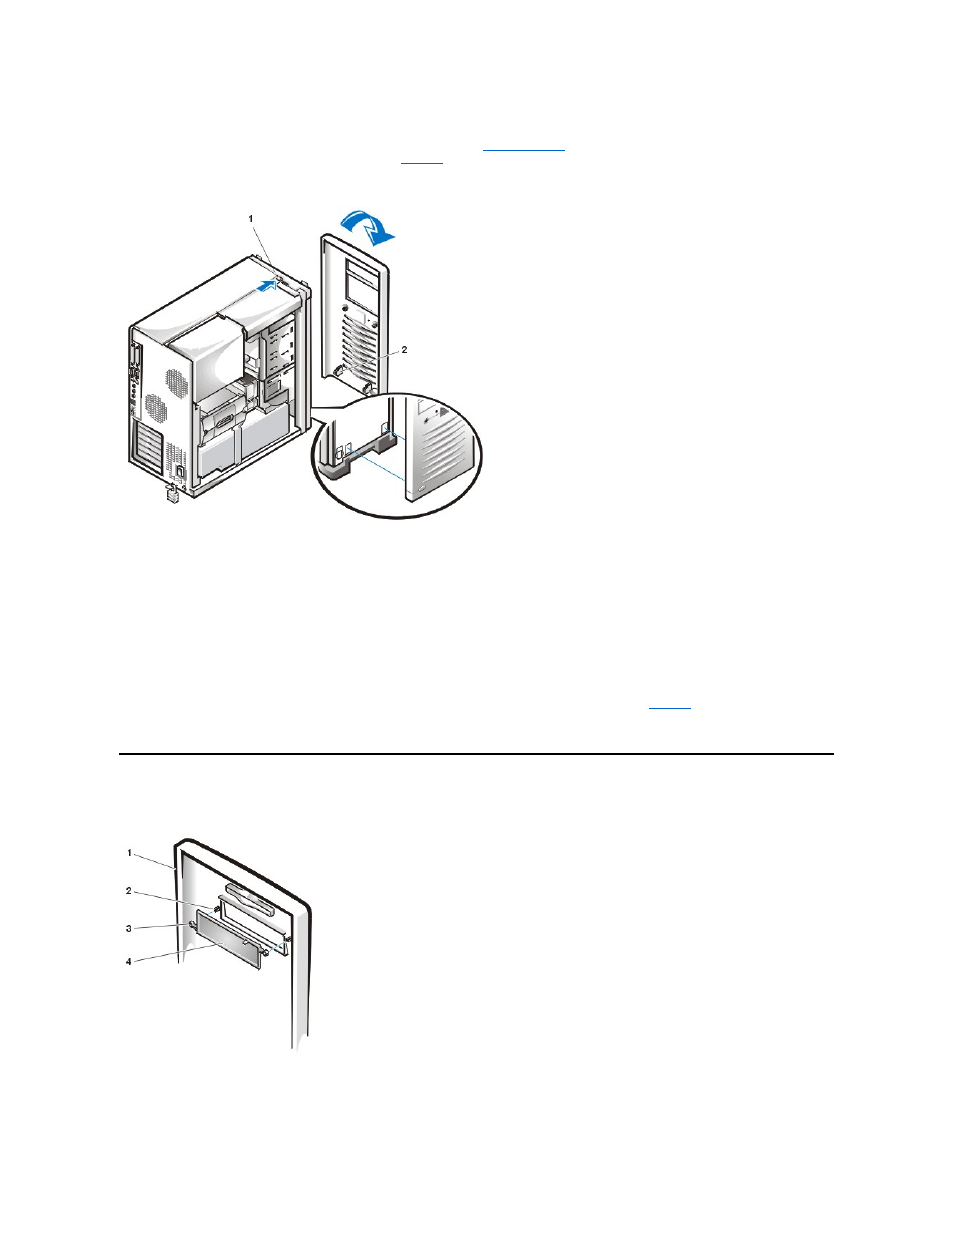
To access some drive bays in the chassis, you must first remove the front panel.
To remove the front panel, you first must remove the computer cover (see "
"). With the cover removed, release the panel by
pressing the green tab release marked with the icon (see
Figure 6. Front Panel Removal
To remove the front panel, perform the following steps:
1. While pressing the tab release marked with the icon, tilt the panel away from the chassis.
2. Disengage the two retaining hooks at the bottom of the panel.
3. Carefully pull the panel away from the chassis.
To replace the front panel, perform the following steps:
2. Rotate the top of the panel toward the chassis until the tabs on the top of the chassis snap into their corresponding slots on the panel.
Front-Panel Inserts
Figure 7. Front-Panel Insert Removal
To remove a 5.25-inch front-panel insert, perform the following steps:
1 Tab release
2 Retaining hooks (2)
1 Front panel
2 Posts (2)
3 Ring tabs (2)
4 Front-panel insert