Complete the installation, All installation types) – EcoPure EPASF1 User Manual
Page 10
10
INSTALL THE DRAIN HOSE
Do the following before turning the water supply back
on:
1. Measure, cut to needed length and connect the 3/8”
drain line (provided) to the Automatic Sediment
Filter’s valve drain fitting (See Figure 8 on Page 6).
Use a hose clamp to hold hose in place.
2. Run the drain hose or copper tubing to the floor
drain. Secure drain hose. This will prevent the
drain line from “whipping'' during sediment flush
cycles. See “Air Gap Requirements" section.
CHECK FOR LEAKS
1. With the installation steps completed, fully open the
home’s main water supply valve.
2. Check for leaks at all the plumbing connections you
made.
3. Make sure the electronics are completely dry before
powering the unit up (as described in the next sec-
tion).
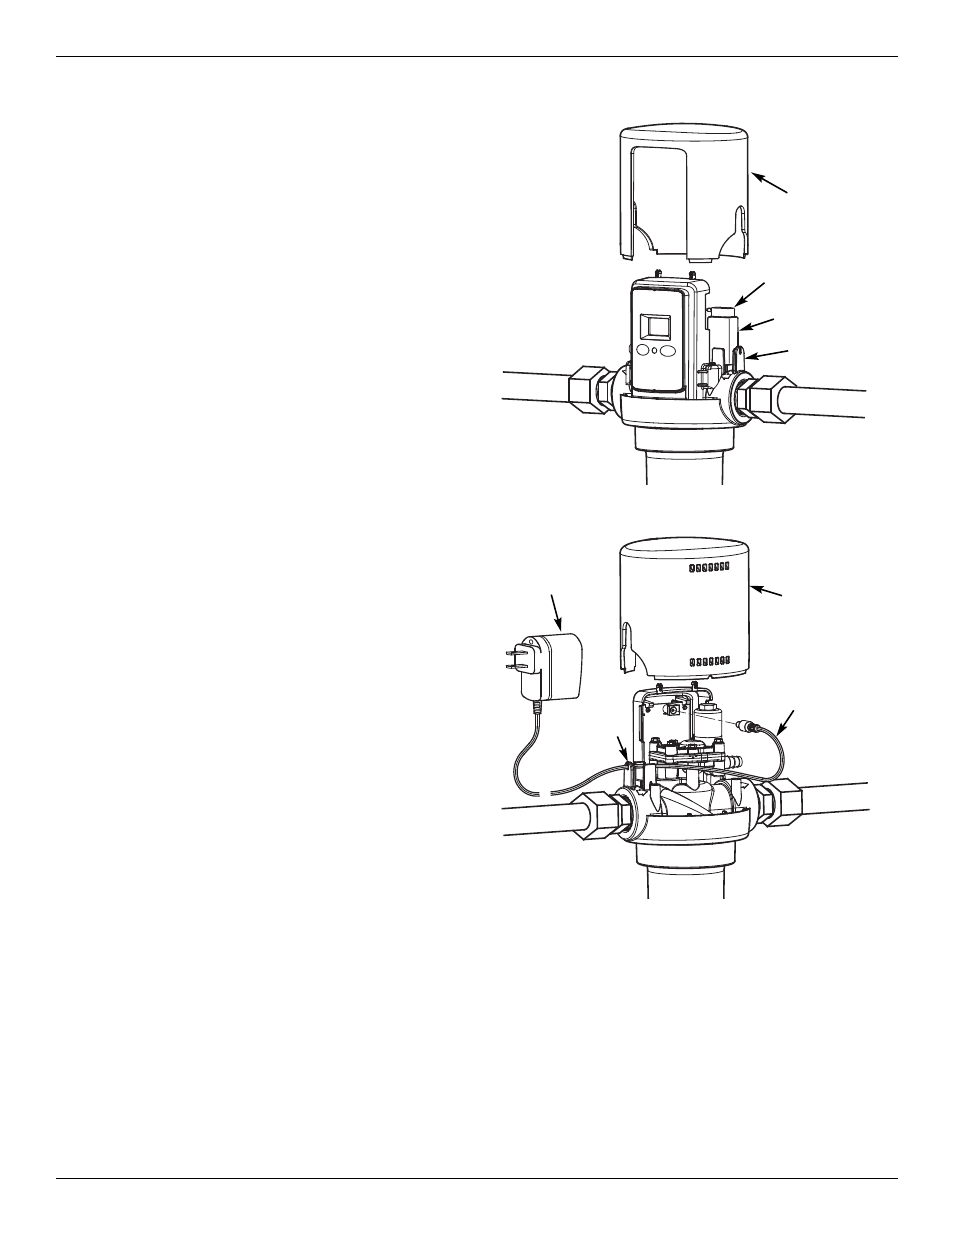
INSTALL BATTERY
1. Take the included 9V battery out of its plastic wrap.
2. Remove the top cover from the ASF by sliding it
upward (See Figure 18).
3. Snap the battery connector onto both terminals of
the 9V battery.
4. Place the connected battery into the clip provided
for it directly above the IN port (See Figure 18).
5. Slide the top cover back onto the ASF and push it
down to snap into place.
OPTIONAL AC ADAPTOR (not included)
An optional AC adaptor (P/N 7302835) is available to
supply 9V DC power to the electronic control instead
of using a 9V battery. This adaptor has 5 feet of wire.
One end plugs into a household 120V AC, 60 Hz. out-
let and the other end plugs into the back of the elec-
tronic control board, as shown in Figure 19. See the
Repair Parts List page for ordering information.
IMPORTANT: Do not use any AC adaptor other than
the EcoPure P/N 7302835 with this
Automatic Sediment Filter.
To install the optional AC adaptor:
1. Remove the top cover from the ASF by sliding it
upward (See Figure 19).
2. Remove any previously installed 9V battery from the
ASF (disconnect it from the battery connector and
lift it out of the clip above the IN port).
Complete the Installation
(all Installation types)
FIG. 18
Clip
9V Battery
Top Cover
Battery Connector
3. Locate the small round plug on one end of the AC
adaptor cable and insert this into the connector on
back of the electronic control board (See Figure 19).
4. Plug the other end of the AC adaptor into a 120V,
60 Hz household electric socket.
5. Before replacing the cover on the ASF, feed the wire
through the small slot above the IN port of the ASF
(See Figure 19).
6. Slide the top cover back onto the ASF, making sure
not to pinch any wires, and push it down to snap
into place.
FIG. 19
Optional
AC Adaptor
Top Cover
Feed
Wire
through
Slot
Plug into
Connector on
Electronic
Control Board