Dogtra EDGE User Manual
Page 12
20
21
11. Code Setting
To set the coding for the Dogtra EDGE transmitter to an existing
receiver/collar, or an Additional receiver/collar, follow the steps below.
*Attention:7XUQWKHPRGHVHOHFWLRQGLDOWR3RU/WRFKHFNWKDW
unit has been coded properly.
6WDUWE\WXUQLQJRQWKHWUDQVPLWWHU
by holding down the on/off button
RQWKHEDFNRIWKHWUDQVPLWWHU
6HWWKHWUDQVPLWWHU¶VLQWHQVLW\GLDO
WR³´DQGWKHPRGHVHOHFWLRQGLDO
WR³&´
,QWKHRIISRVLWLRQKROGGRZQWKH
receiver/collar on/off button until
the green LED indicator light
EHJLQVWREOLQNUDSLGO\
,PPHGLDWHO\SUHVVWKHEXWWRQRQ
the transmitter of the color you
ZRXOGOLNHWKHUHFHLYHUFROODUWREH
coded to.
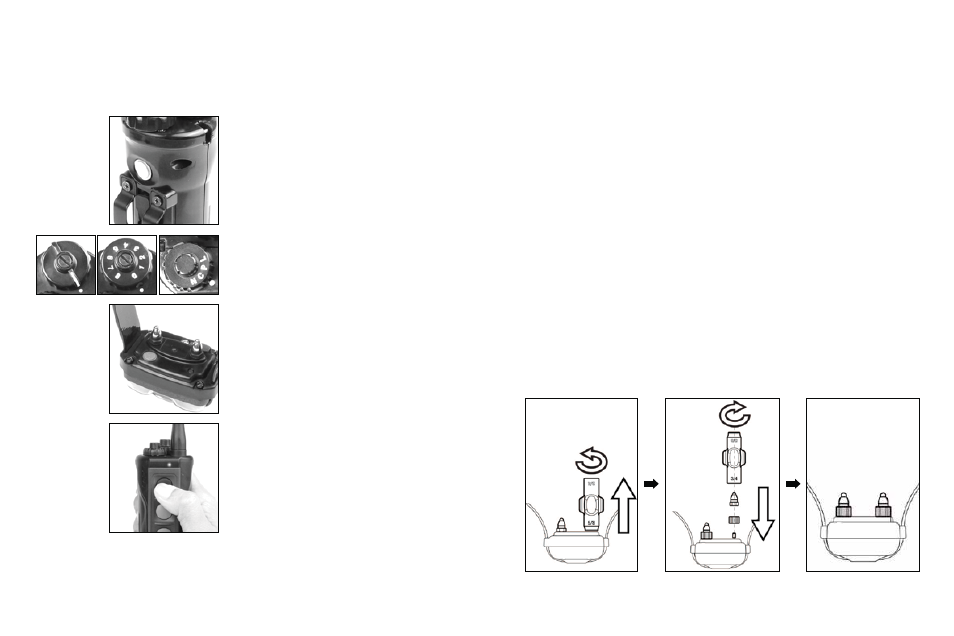
12. How to change the length of the contact points
The Dogtra EDGE comes equipped with standard 5/8” contact points
that can be extended to 3/4” contact points, for use with dogs with
longer coats.
To increase the contact point length from 5/8” to 3/4”, follow the steps
below.
8VLQJWKHLQFOXGHGDGMXVWPHQWWRROZLWKWKHVLGHPDUNHG´
XQVFUHZWKHFRQWDFWSRLQWVFRXQWHUFORFNZLVH
3ODFHWKHFRQWDFWSRLQWH[WHQVLRQRYHUWKHH[SRVHGWKUHDGVÀDWVLGH
down.
3. Place the contact points over the extensions and tighten the contact
SRLQWVDQGH[WHQVLRQVFORFNZLVHXVLQJWKHDGMXVWPHQWWRROZLWKWKH
VLGHPDUNHG´
&DXWLRQ7LJKWHQXQWLO¿UPO\LQSODFH%HFDUHIXOQRWWRRYHUWLJKWHQ
7RVKRUWHQWKHFRQWDFWSRLQWVEDFNWRWKHVWDQGDUG´VWDUWZLWKWKH
DGMXVWPHQWWRROZLWKWKHVLGHPDUNHG´UHPRYHWKHFRQWDFWSRLQW
extensions, and tighten the contact points with the adjustment tool with
WKHVLGHPDUNHG´